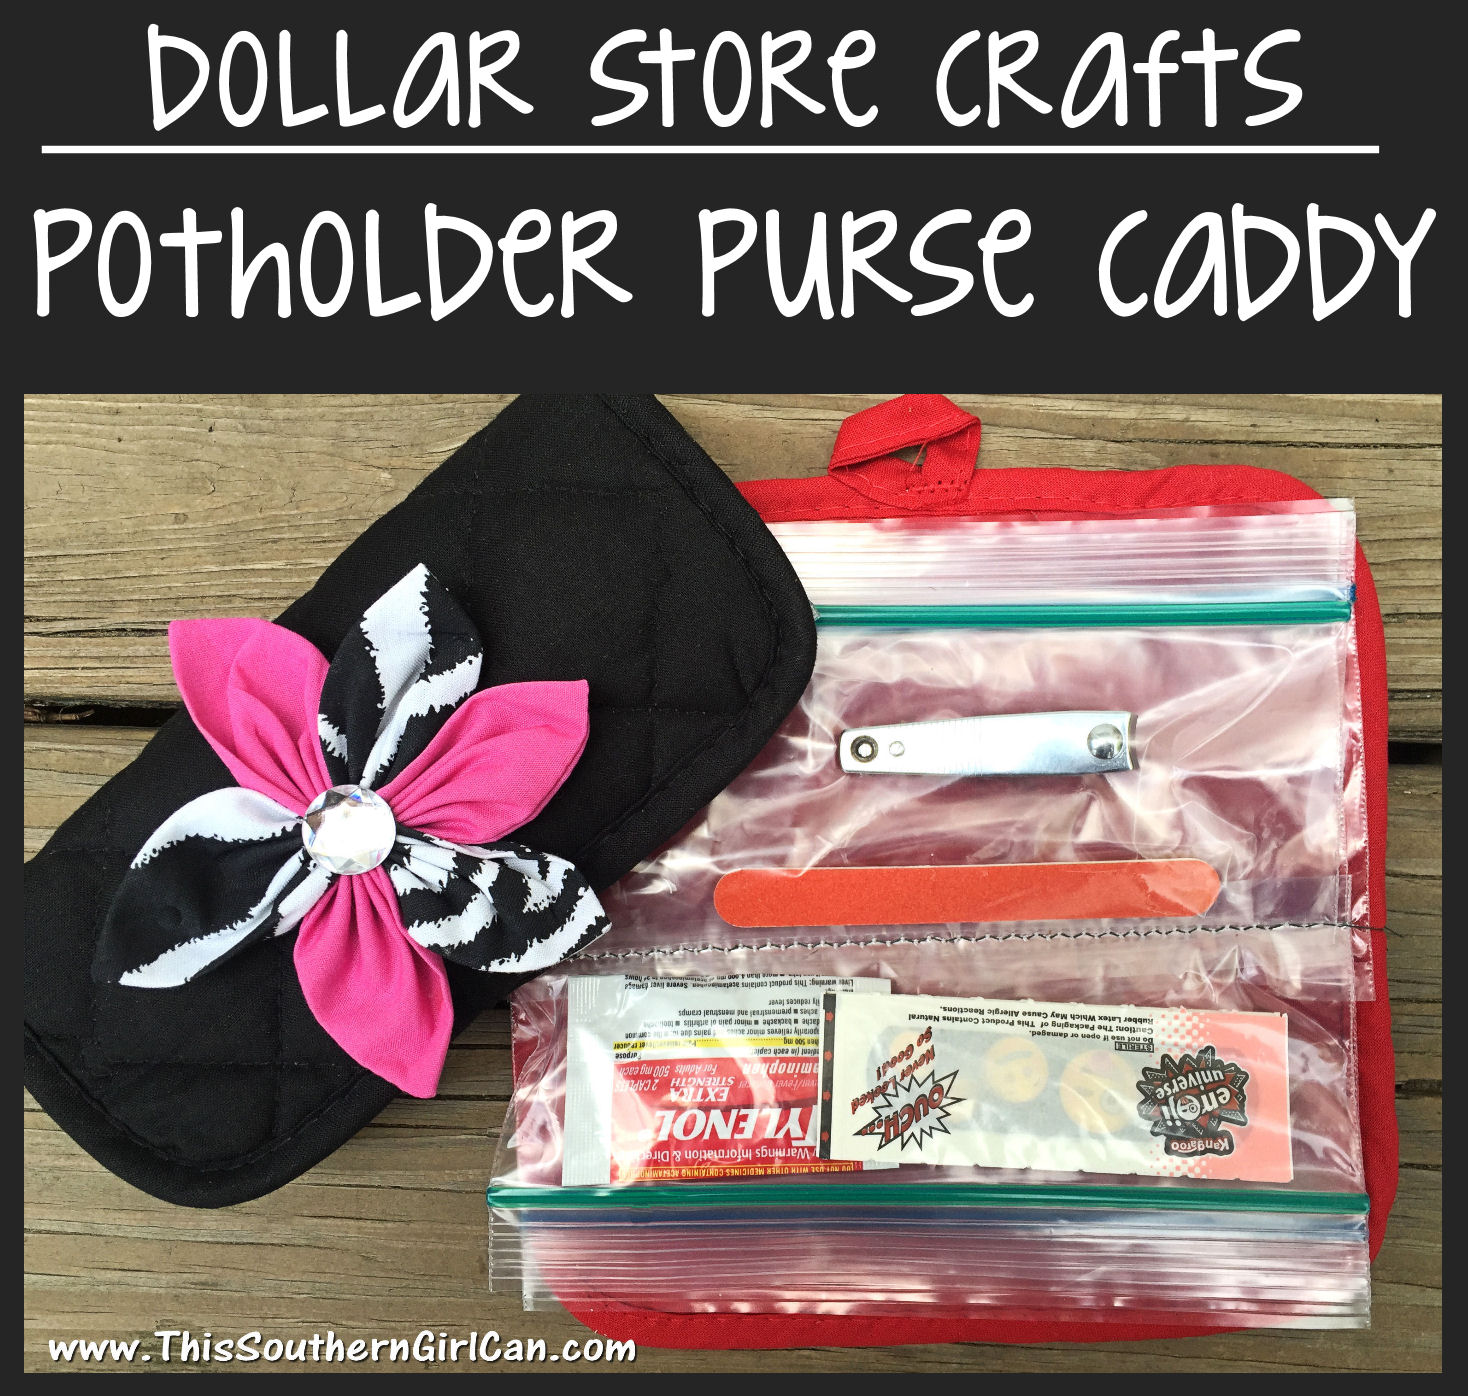
Don't you just hate having to dig around in the bottom of your purse for a band-aid, nail file or other small object? I know I do! Keep everything organized and within easy reach with this potholder purse caddy!
This is such a great project because not only is it fast and inexpensive to make, it can be customized with any embellishment you like to match any purse you may have. I never really knew how many cute potholders there were out there until I went shopping for one to use in this tutorial. The color and embellishment combos are simply endless! To take easier photos, I chose a solid color. What you need: a potholder that has a loop on one side (not on a corner) 6 ziplock bags a button any embellishments you like a sewing machine tape needle and thread scissors 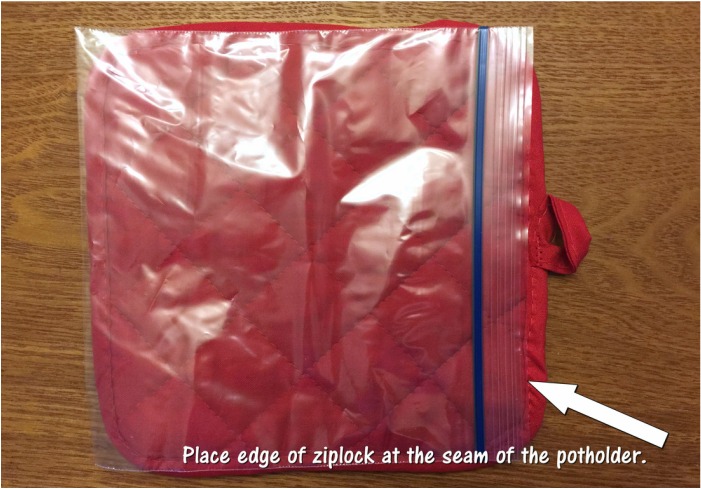
How to make it:
1. Lay your potholder on a table, and then lay one ziplock bag on top of it. You want the edge of the bag opening to be just touching the seam of the potholder. 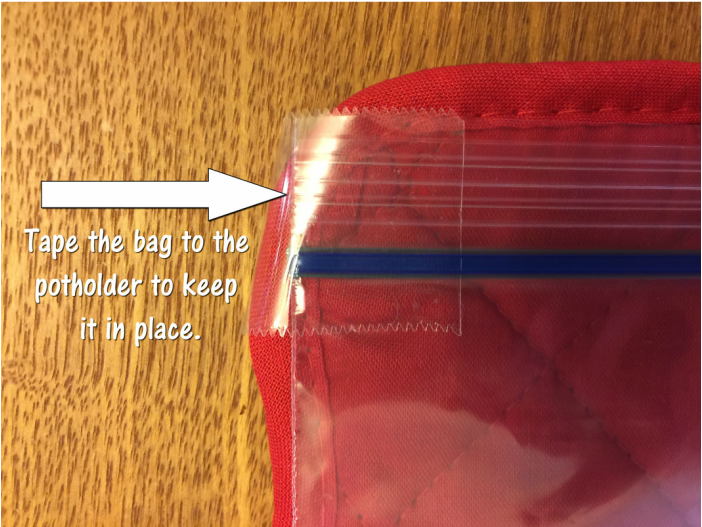
2. Use a small piece to tape to secure the corners of the ziplock bag to the potholder. This will help hold it in place while you sew.
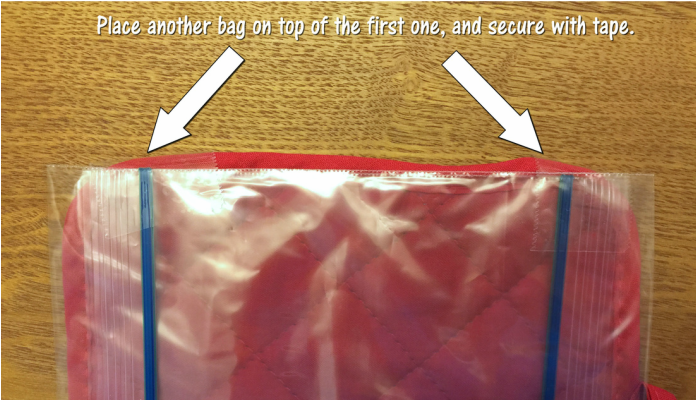
3. Place another bag on top of the first one. This time, the opening of the bag should be facing the opposite direction. Secure it with a bit of tape. Make sure the edge of the bag opening is just touching the seam of the potholder edging. Do not worry about the closed end of the bag hanging over the edge. We'll fix that later.
Keep layering the rest of your bags on top of each other, alternating directions and securing them with tape until you have used them all. Now, let's sew them together. 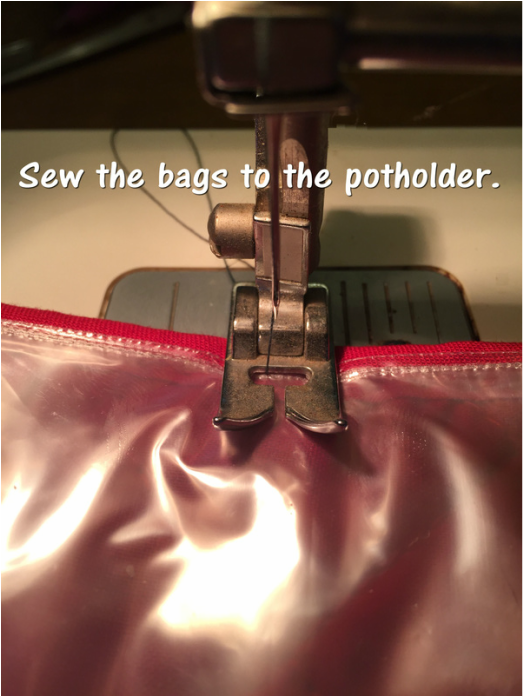
4. Let's sew the bags to the potholder. Make sure to run your seam directly down the middle of the potholder. It will help to keep the bags in place if you lower the pressure foot onto the bags, then crank the needle down into them manually before you start sewing.
Sew slowly to keep the bags from slipping. Tie off the loose ends of your thread and trim them. 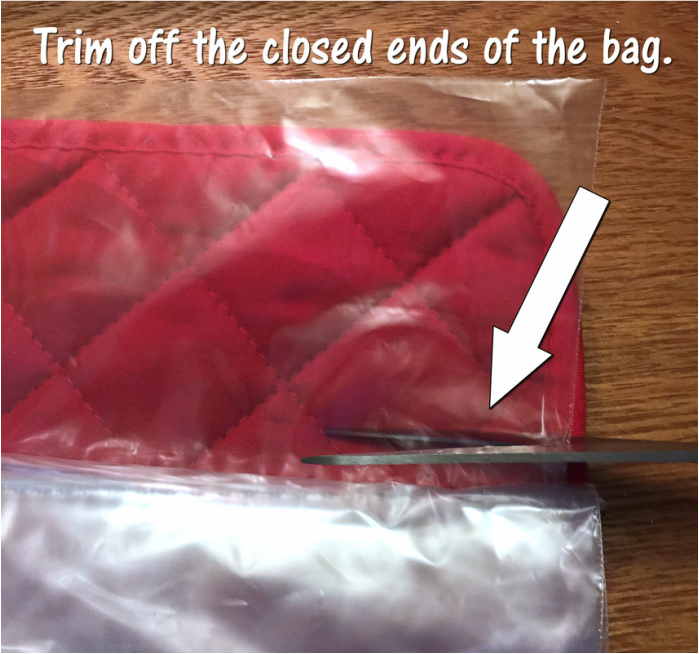
5. Remove the tape, and trim off the closed ends of the bags. Make sure to not cut too close to the seam to prevent the bags from coming loose. Leaving about 1/4 of an inch is just fine.
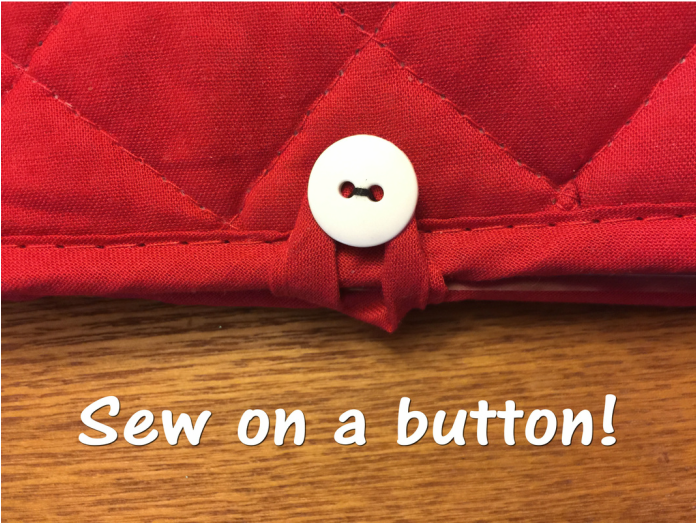
6. Close your caddy, and fold the loop up to help you determine where to sew the button. Sew the button on and you're finished! Add on any embellishments you like to jazz it up a bit.
If the corners of the ziplock bags are poking out, carefully trim them with scissors. In the photo at the top of this post, I attached a flower that I made to the front of mine, but you could add anything you like.
0 Comments
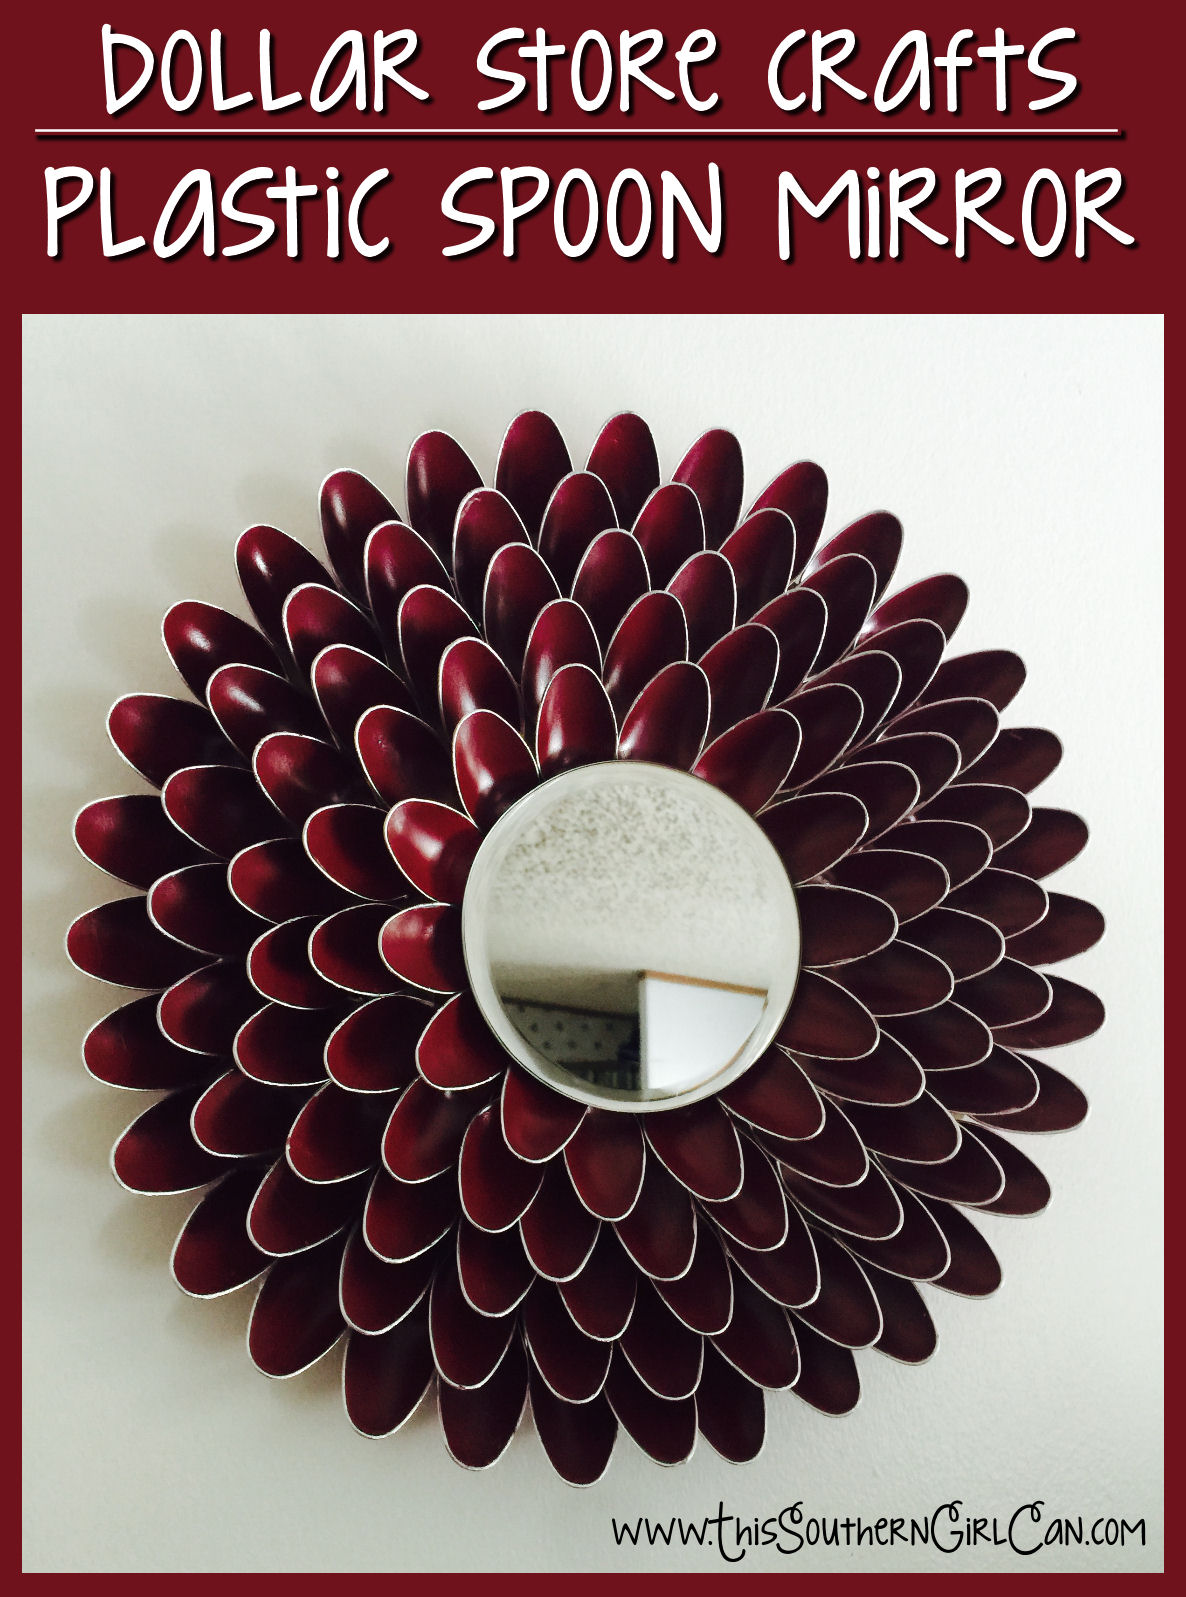
This has been one of my most popular photos on Facebook, and now I have finally decided to get around to posting the tutorial for this pretty plastic spoon mirror. This is so inexpensive to make, and the color combinations are virtually endless.
For the sake of this tutorial, the spoons will be left their original color. SCROLL DOWN TO THE BOTTOM OF THIS POST TO SEE THE PHOTO I USED FOR INSPIRATION. What you need: 2 or 3 boxes of plastic spoons a large piece of cardboard a small mirror (I got mine in the candle section of the Dollar Tree) hot glue & hot glue gun heavy duty scissors or tin snips Optional: spray paint. For the mirror in the photo, I used Krylon spray paint and a metallic silver paint pen. How to make it: 1. Cut a large piece of cardboard into a circle. The spoons will extend about an inch past the edge of the cardboard, so keep this in mind when deciding how big you want your mirror. 2. If you are going to paint your spoons, do it NOW, before you glue them down. Leave the handles on them while you paint them. Lay all of your spoons down onto a large sheet of newspaper, and spray paint them. Once they are dry, hold them by the handle and paint around the edges with a metallic paint pen. 3. Once all of the spoons are dry, use the scissors or tin snips to cut the handles off. 4. Heat up your glue gun, and start gluing the spoon heads around the edge. 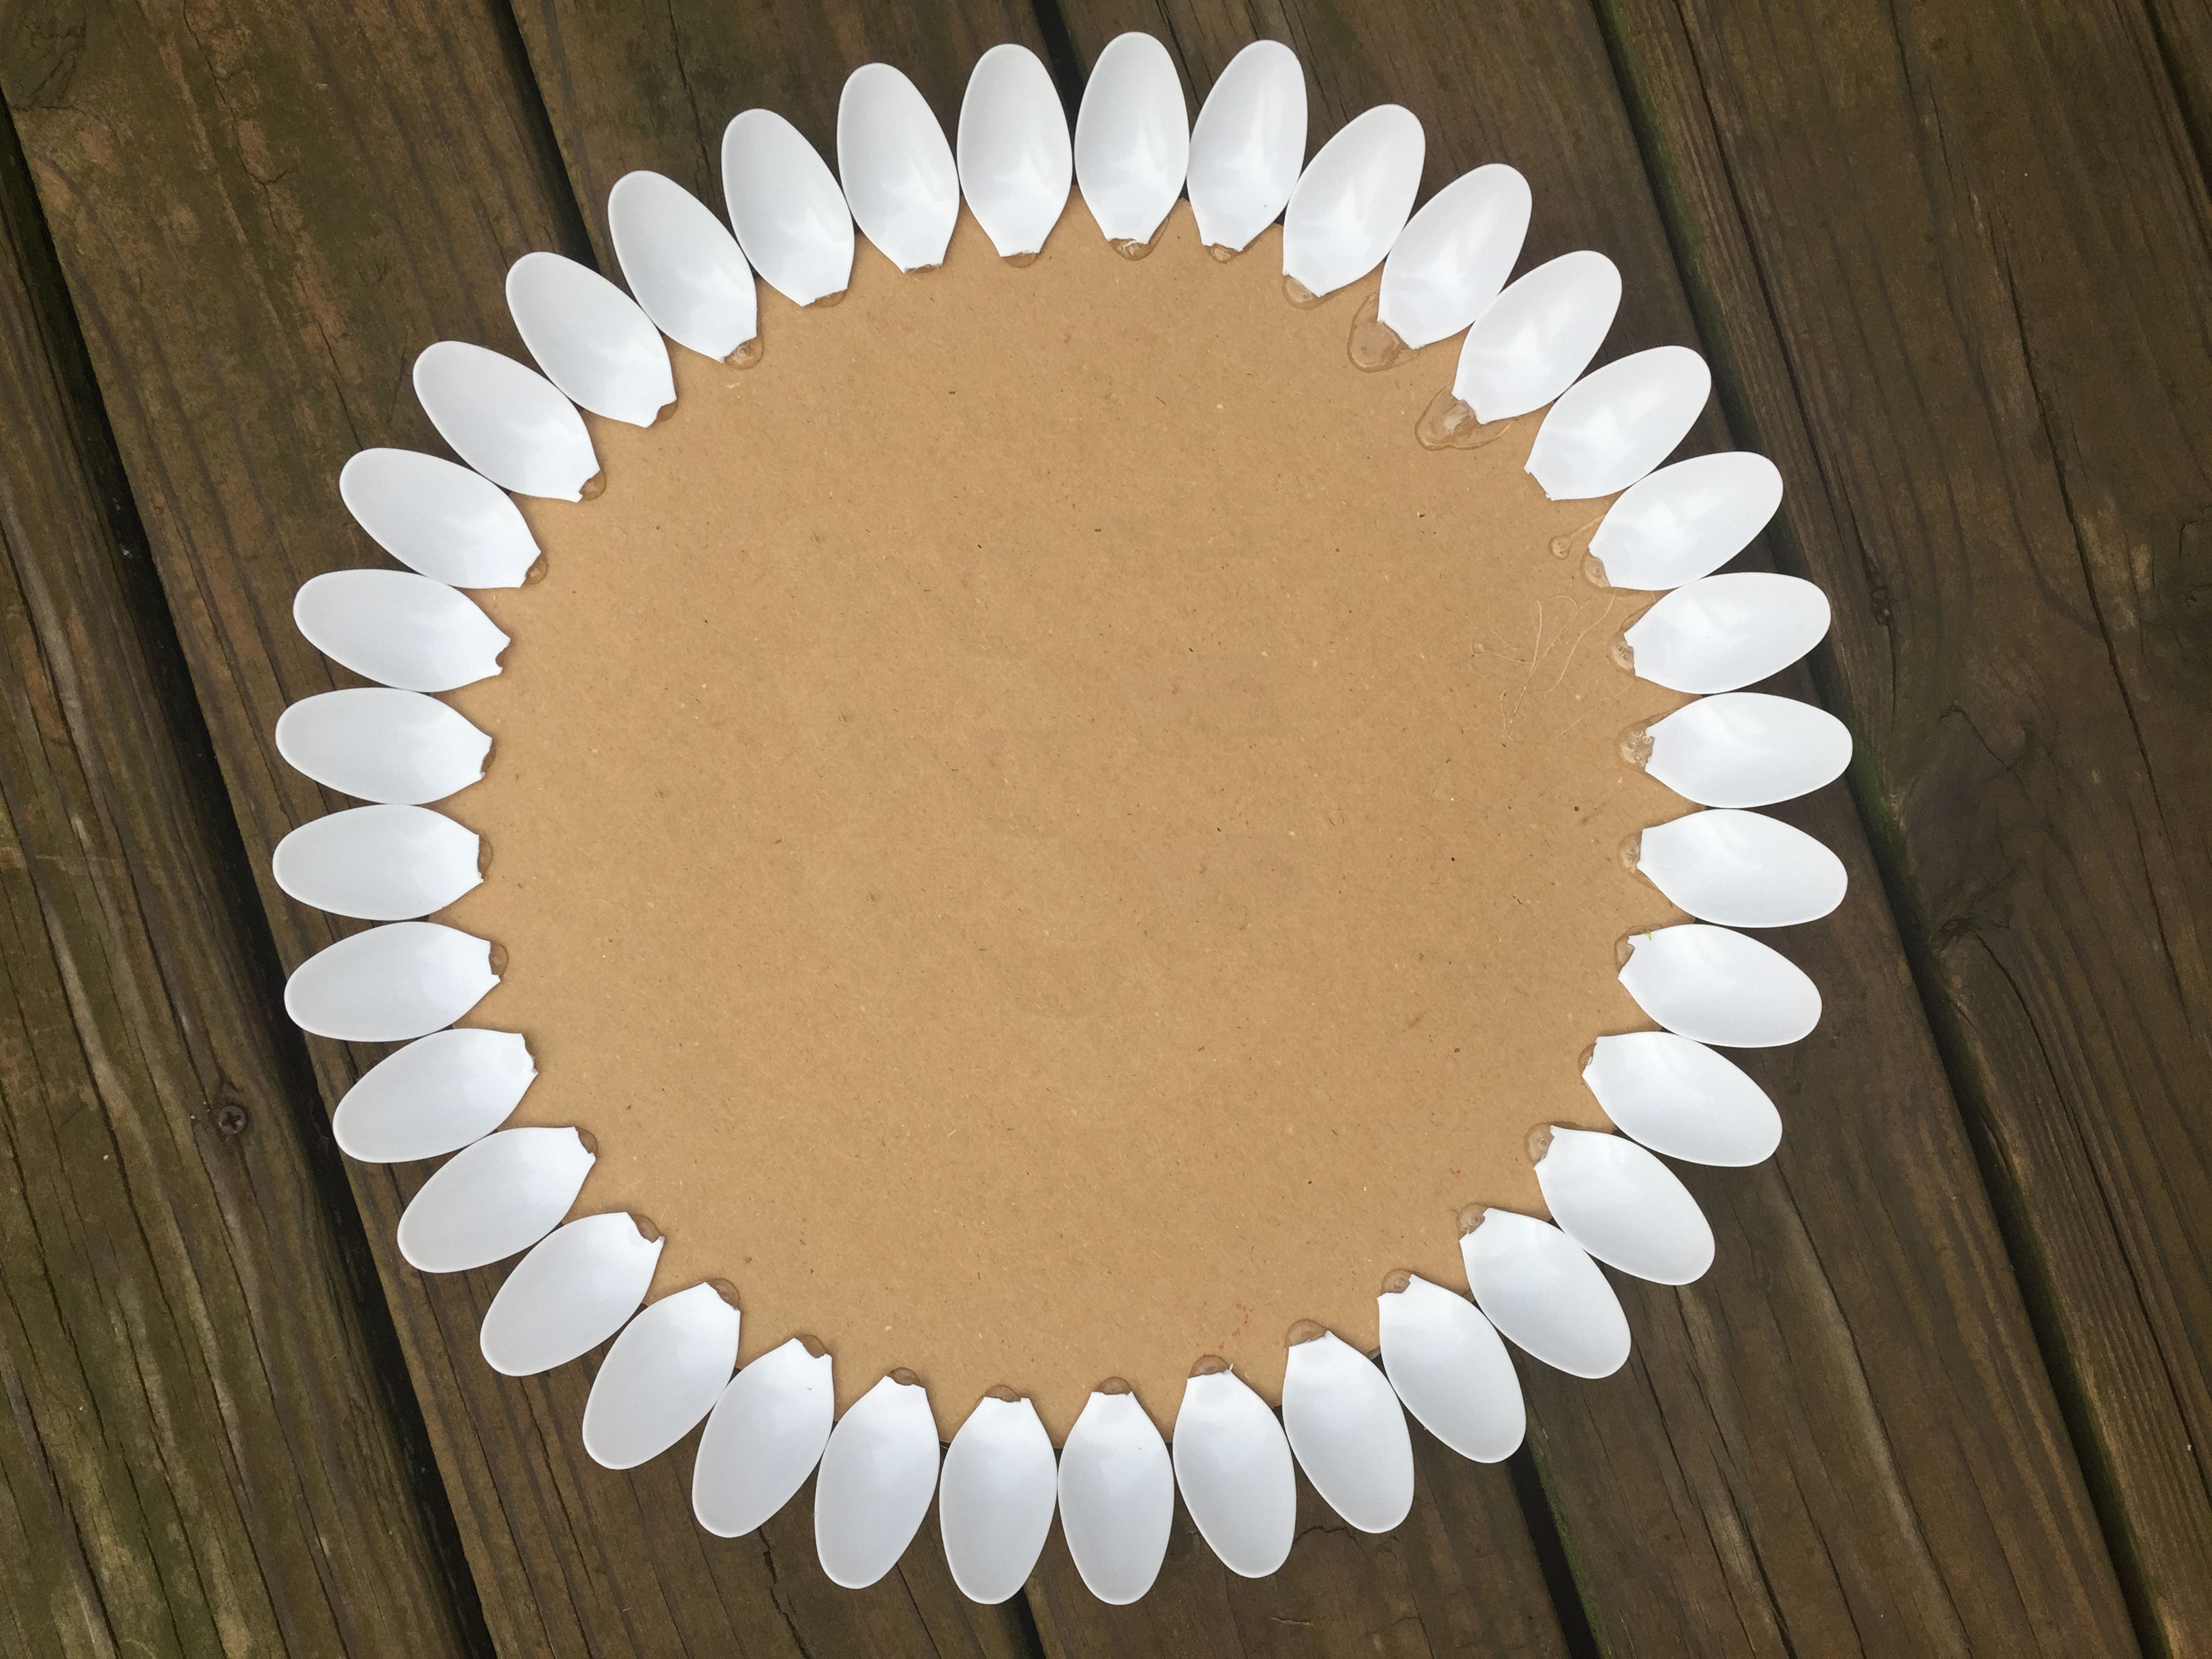
5. Keep gluing the spoon heads down until your cardboard is almost filled in. Keep placing your mirror down to see how many spoons you need to use. You don't want the entire cardboard covered, or your mirror won't sit correctly.
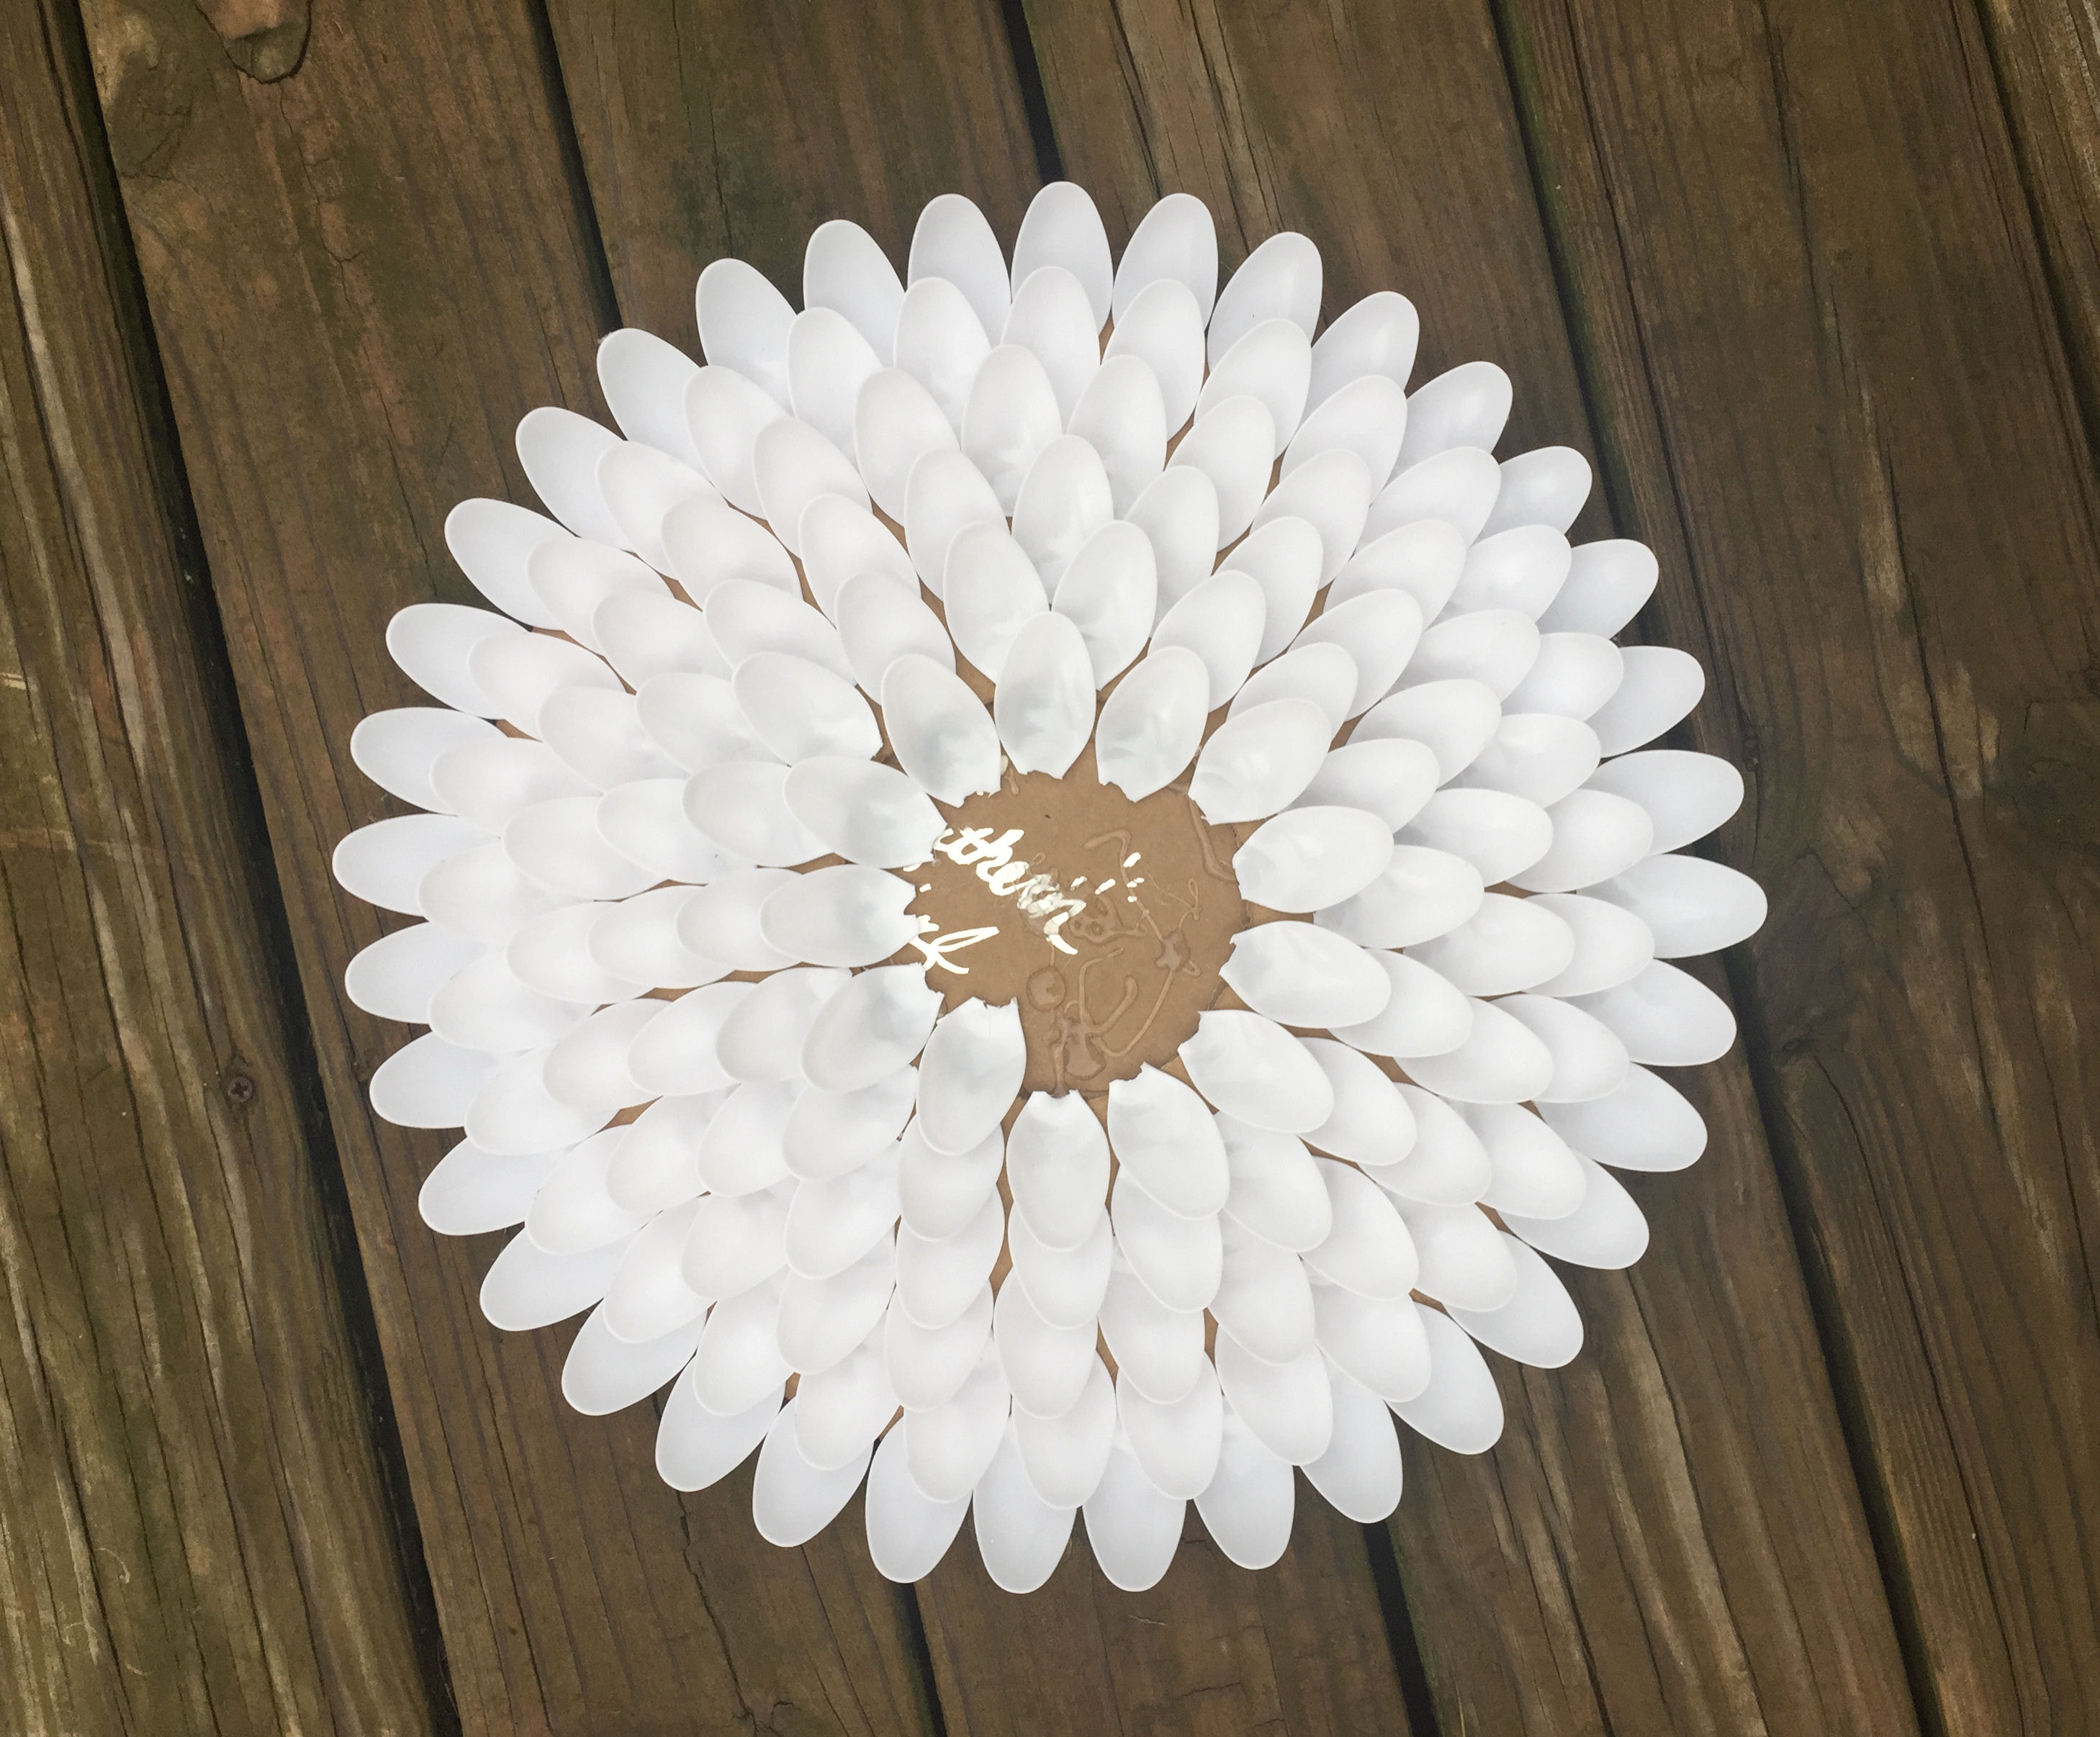
6. Glue your mirror down in the center. Make sure you have enough glue around the edges to securely hold it in place.
To hang it, glue a loop of rope or yarn to the back. There you go! An expensive-looking new piece of home decor for just a few dollars! The photo below was my inspiration. Sorry, but this girl isn't going to pay that much for a mirror when I can make one in the exact colors I want. 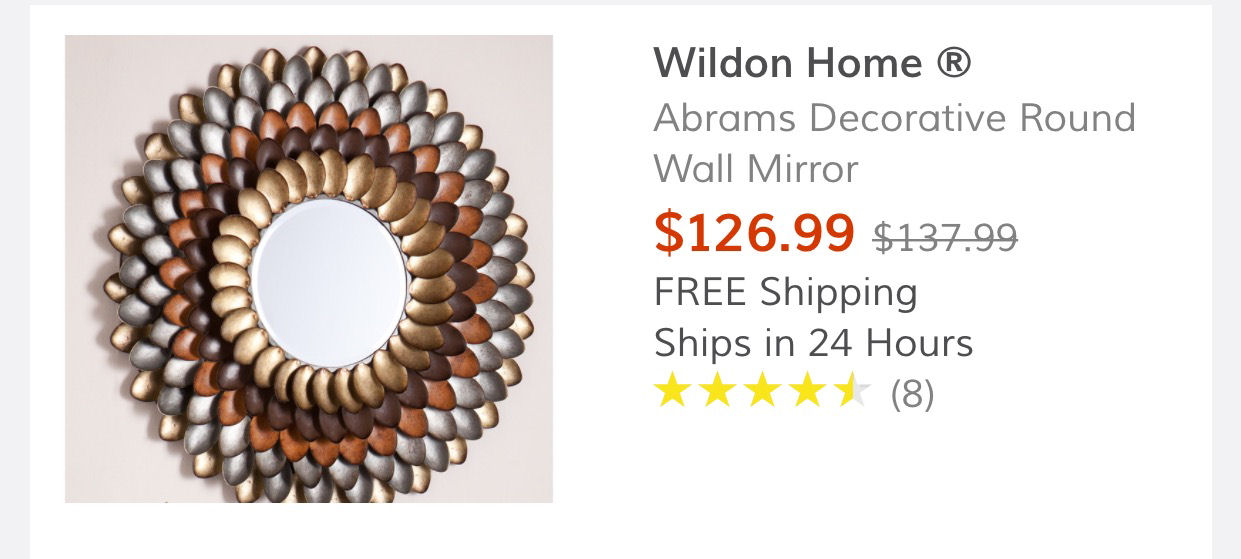
Thank y'all so much for visiting my site and taking the time to read my tutorial. If you make one of these, I would love to see photos of your creations. See y'all later!
|
 RSS Feed