
The most popular trending crafts right now are floating teacups. By using a little glue and a lot of patience, you can create this conversation-inducing craft in just a few hours.
I love coffee and used that as my theme, but you can try using a floral-printed teacup and saucer set and decorate it with artificial flowers. The next time I visit a thrift store, I'll try to find one and post an updated photo. What you need: a teacup and saucer set E6000 glue hot glue gun fork a handful of pebbles tealight coffee beans pliers How to make it: 1. Using the pliers, bend the tines and the end of the fork. 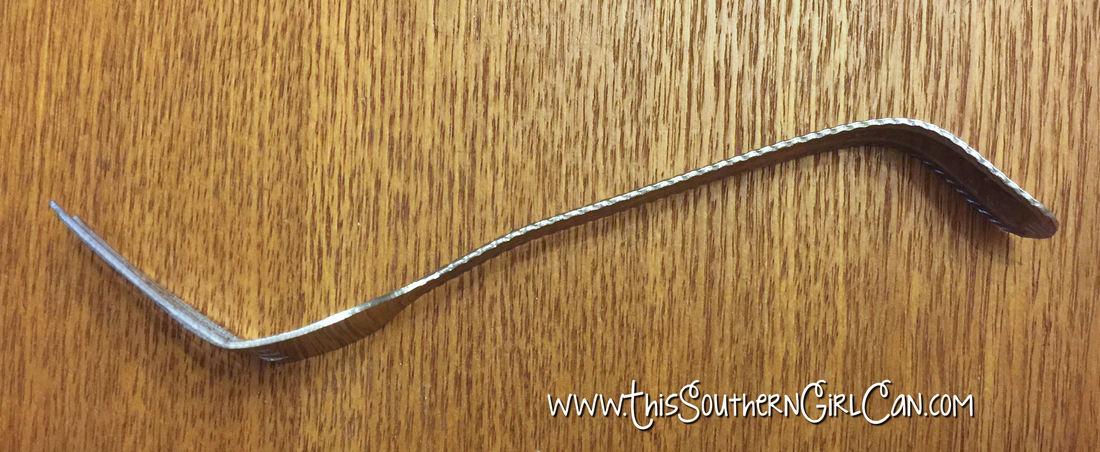
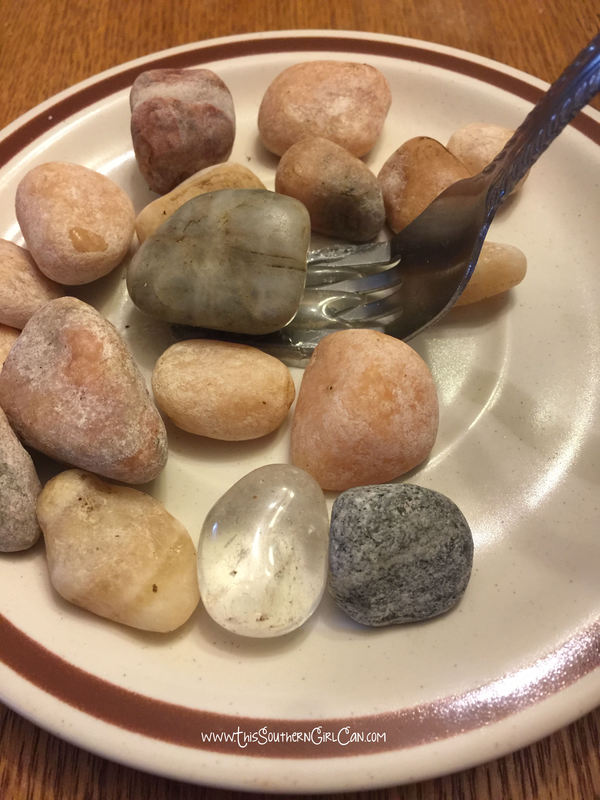
2. If your saucer is very shiny, you may want to use a bit of sandpaper to rough up the surface so the glue with adhere. Put a big glob of hot glue onto the plate, and place the tines of the fork in it. Once the glue has cooled, run a line of E6000 around all of the edges for extra support. Let dry. If you want a little extra weight so your finished product won't tip over, hot glue a handful of pebbles onto the plate as well.
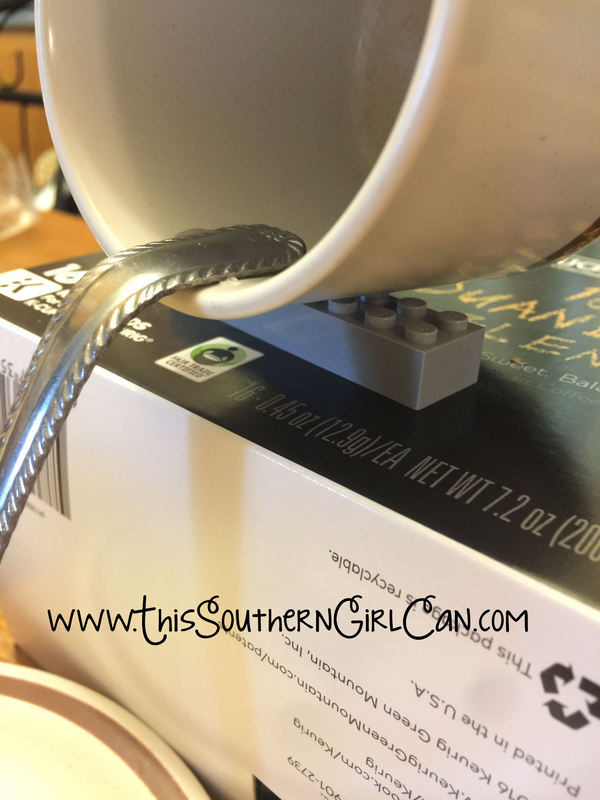
3. Hot glue the end of the fork into your teacup, and then reinforce with E6000 once it has cooled. You're going to need to support your teacup while the glue sits up. I piled a few Legos on top of a box.
4. Now comes the boring part.... gluing on all of those coffee beans! I used my hot glue gun and made a base of beans, then placed my tealight on top. I then kept gluing beans around it until it created a type of 'holder'. The tealight itself is not glued down, so I can switch it out once it is used up.
There you go! Like I said, I'll make one with artificial flowers and a more delicate cup/saucer combo in the near future. Of course you can't use a tealight with artificial flowers near, but it would still make a pretty centerpiece for a tea party.
4 Comments
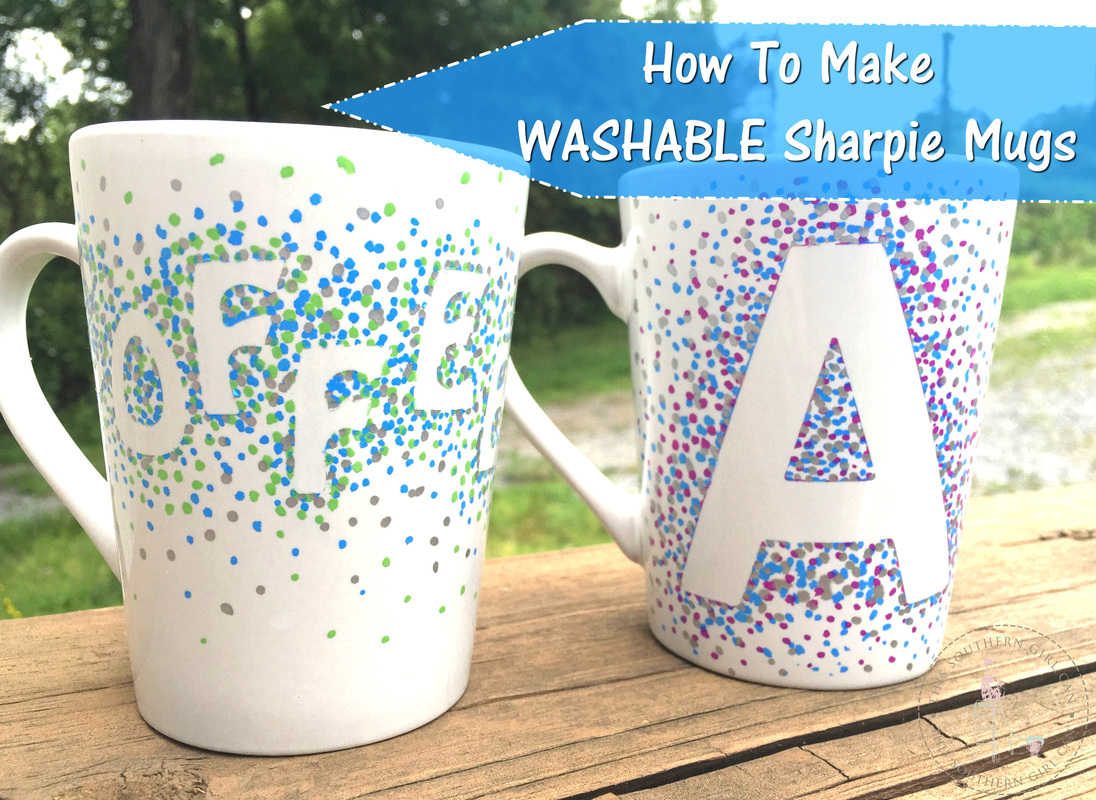
By now I'm sure you've seen hundreds of posts on Facebook and Pinterest showing you how to use Sharpie markers to make colorful, personalized coffee mugs. The only problem with 99% of those tutorials are, they use the wrong type of markers. Even though Sharpies are considered 'permanent', they will indeed wash off of your mugs, no matter how long you cure them.
I'm going to show you how to make these mugs still using markers, but instead of smudging, they will be washable. The secret to this is using the correct TYPE of marker: oil-based paint markers to be exact. 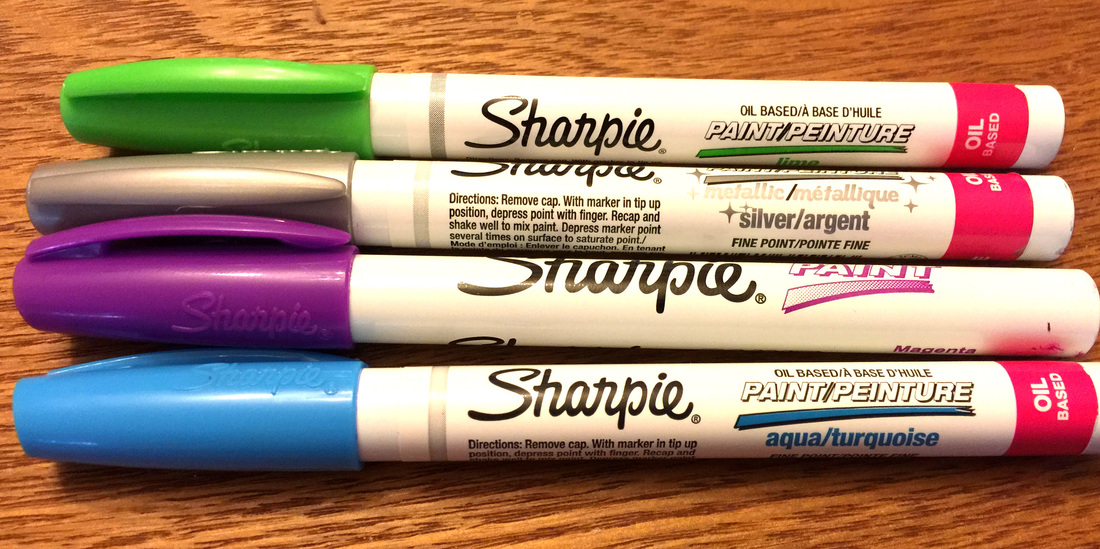
Sharpie is best known for their huge selection of permanent markers, but they also make markers full of oil paint. These are the kind you need for this project if you want it to last. You can find these at craft supply stores near the paints. I got these from Hobby Lobby, and they were $3.99 each. These are also fine pointed, not extra fine. Now, another tip that I can offer you is to not use an expensive mug for this. I got my mugs from the Dollar Tree. The reasoning behind this is, higher quality mugs generally have a thicker layer of glaze over them. The glaze on the inexpensive ones is a bit thinner, allowing the paint to soak in more easily. *NOTE* This is NOT a fast project to make. It will take several days to cure, so if you plan on giving this as a gift, plan to make it 4 days ahead of time. There are lots of tutorials out there, but this method provides the best and most reliable results. What you need: a mug a handful of paint markers in whatever colors you want stick-on VINYL (not paper) letters a needle, pin, or something else small to help you remove the stickers an oven (a microwave will not work) a baking sheet rubbing alcohol or nail polish remover cotton balls How to make it: 1. First, you need to prep your mug so the paint will stick. Soak a cotton ball in alcohol or polish remover, wring out the excess, and thoroughly wipe down your mug to remove dirt and oils. Let the mug dry. 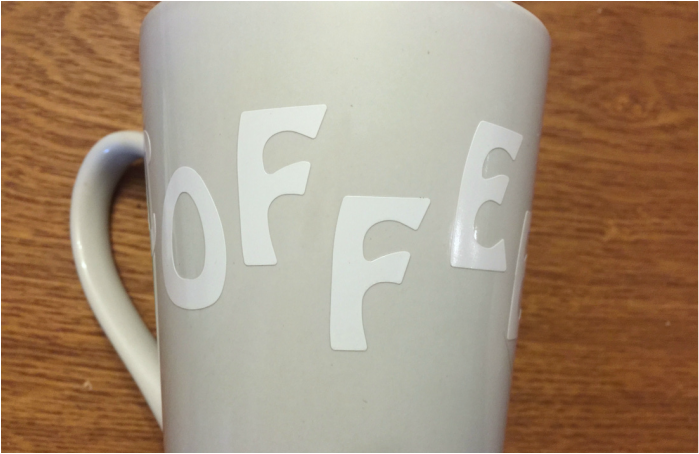
2. Place the letters you want on the mug. Make sure to apply a little extra pressure around the edges of the letters to make sure the paint doesn't ooze underneath it. Try to use your fingernail or a cotton swab to do this to avoid getting oil from your fingers on the mug.
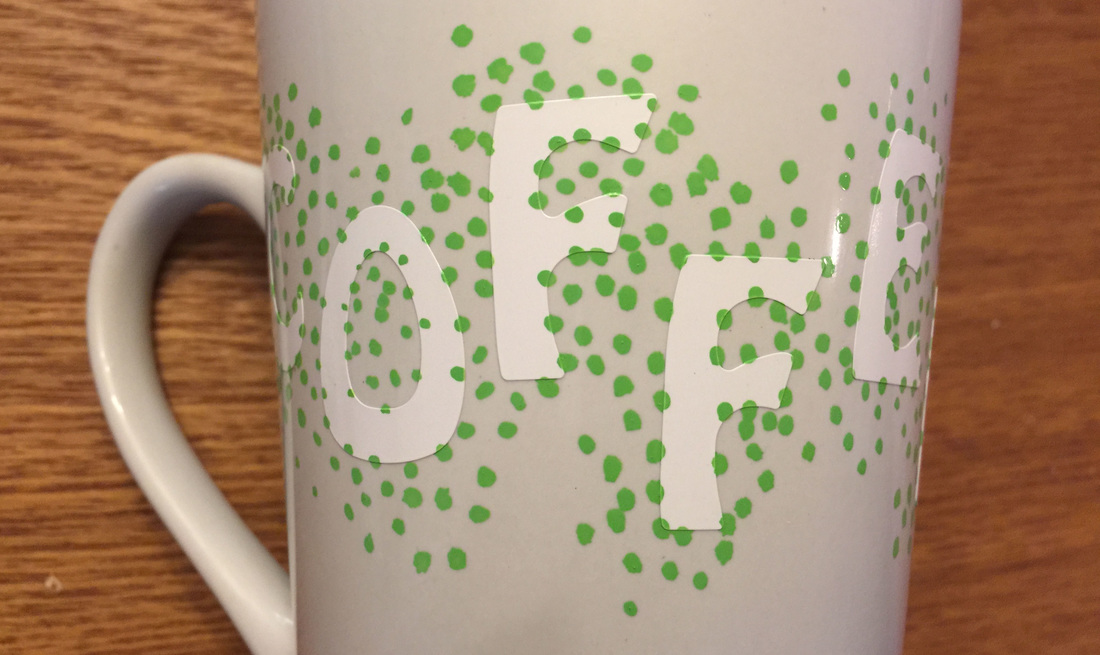
3. Prep the paint marker according to the directions on the label, and then start making dots around the letters. You want to make sure to make dots on the edge of the letters, and make them more dense there as well so when the stickers are removed, the letters will 'pop'. Keep layering colors until you have the look you want.
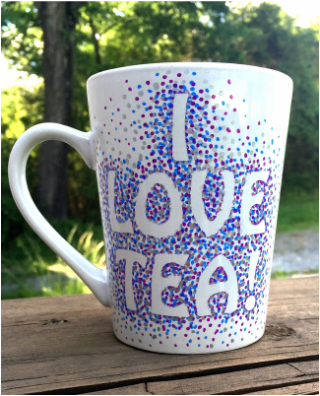
4. Let the paint dry for about 10 minutes, then carefully remove the stickers with a needle. If any paint seeped under the edge of the stickers, simply scratch it away with the needle. 5. Now, here is the hard part. You need to set your mug aside and let it cure for about 72 hours. This gives the paint a chance to penetrate the glaze a bit, and ensure it is thoroughly dry. 6. After 72 hours, place your mug (large side down so it doesn't tip over) on a baking sheet. Place the sheet with the mug on it in a COLD oven, then turn the oven to 425 degrees. 7. Bake the mug for one hour, turn the oven off, and let the mug cool completely. It is helpful if you bake the mug before bedtime, and let it sit in the oven to cool overnight. DONE! Here are a few helpful tips for this project: -This method will work on mugs, but not glasses. -Do not put these in the dishwasher. -When washing, do not use a lot of pressure. In fact, it is best if you gently use your fingers and a bit of dish soap to clean them, although gentle washing with a sponge is just fine. -You MUST let these mugs cure for 72 hours before baking them. Any less time will give you subpar results. -Paint on one side of the mug, away from where you will place your lips. Let's stay on the safe side and not get paint in our mouths. There you go! have you made any mugs in this manner? Let me know! |