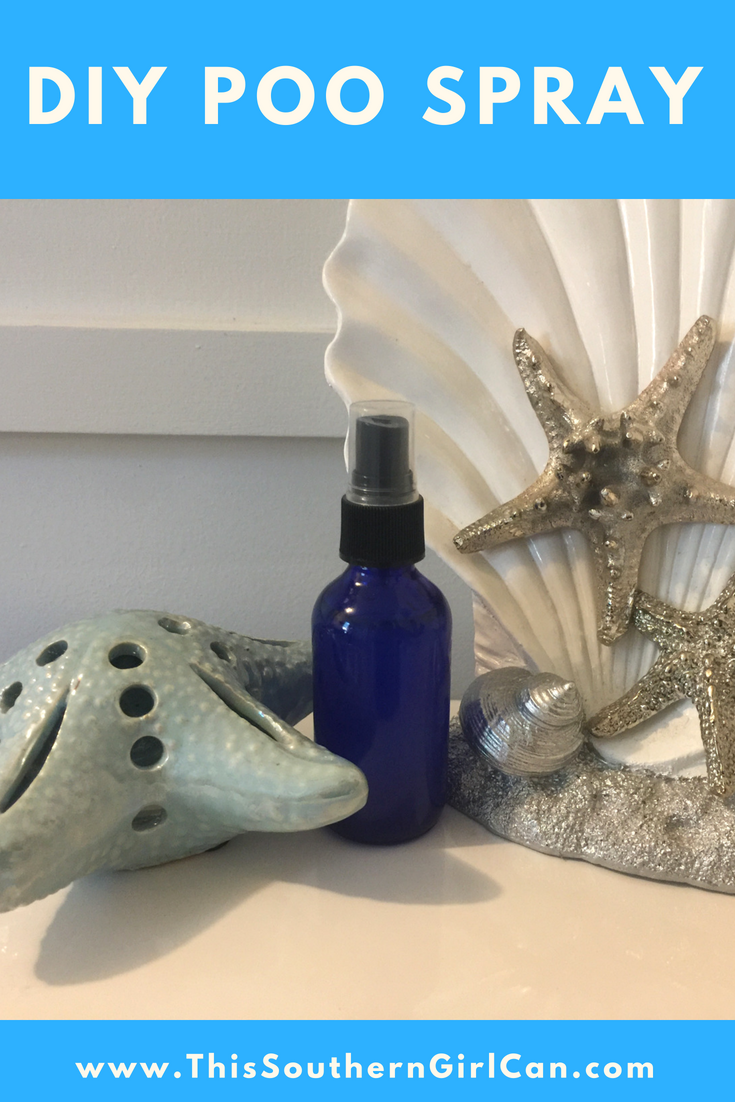
If you belong to any Dollar Tree-related groups on Facebook, then you already know that the 'hot item' for the past couple weeks is Poo Be Gone. Poo Be Gone is a spray to be used in the toilet before you go to help trap and reduce odor.
The way it works, is when you spray the product into the toilet, a barrier is created. This barrier seals away odor underneath the surface of the water, stopping it from being released in to the air. Although this type of product is trending right now, it is been around for many years. Most brands contain questionable ingredients, but by making your own poo spray, you are in complete control of what you're using. Want some free printable labels for your bottle? Click the 'download' button directly below this sentence.
What You Need:
2 ounce glass spray bottle 20-25 drops of essential oil (any scent you like) 1 tablespoon rubbing alcohol 2 ounces distilled water How To Make It: 1. Add the oils and alcohol to the spray bottle. Shake for about 30 seconds to make sure they are blended together. 2. Add the water, and shake for another 30 seconds. 3. Use 5 sprays in the toilet before you go! I have found that 5 sprays is sufficient, but you can use as many or as few as you like.
4 Comments
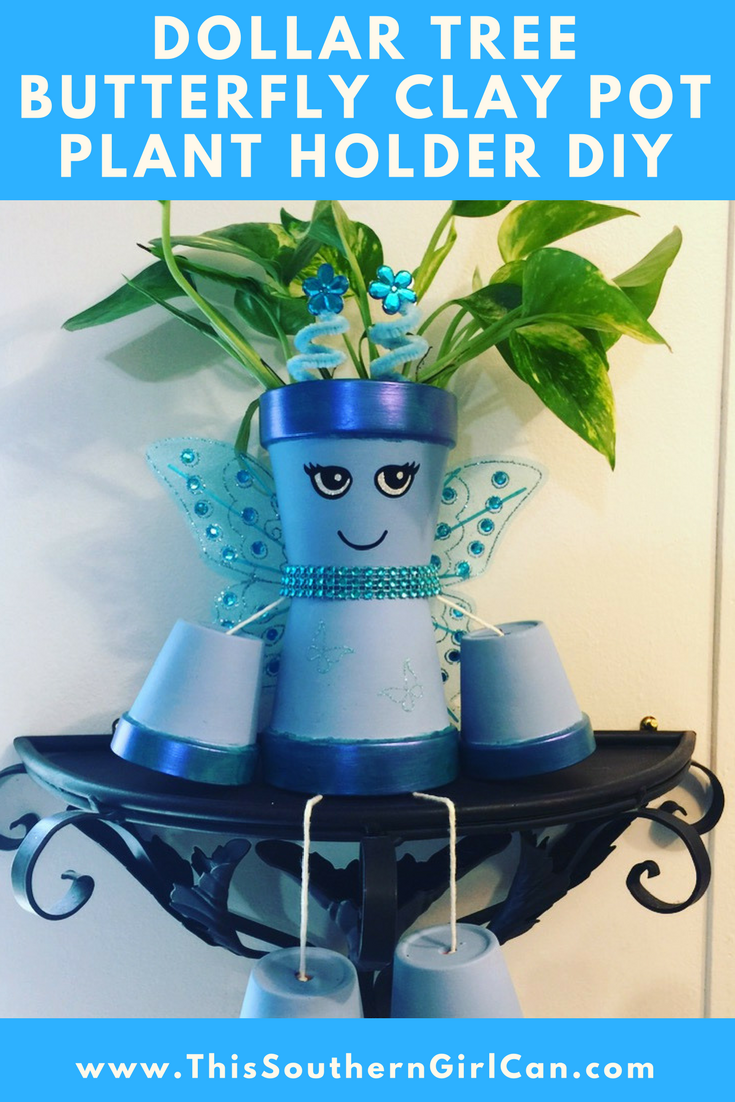
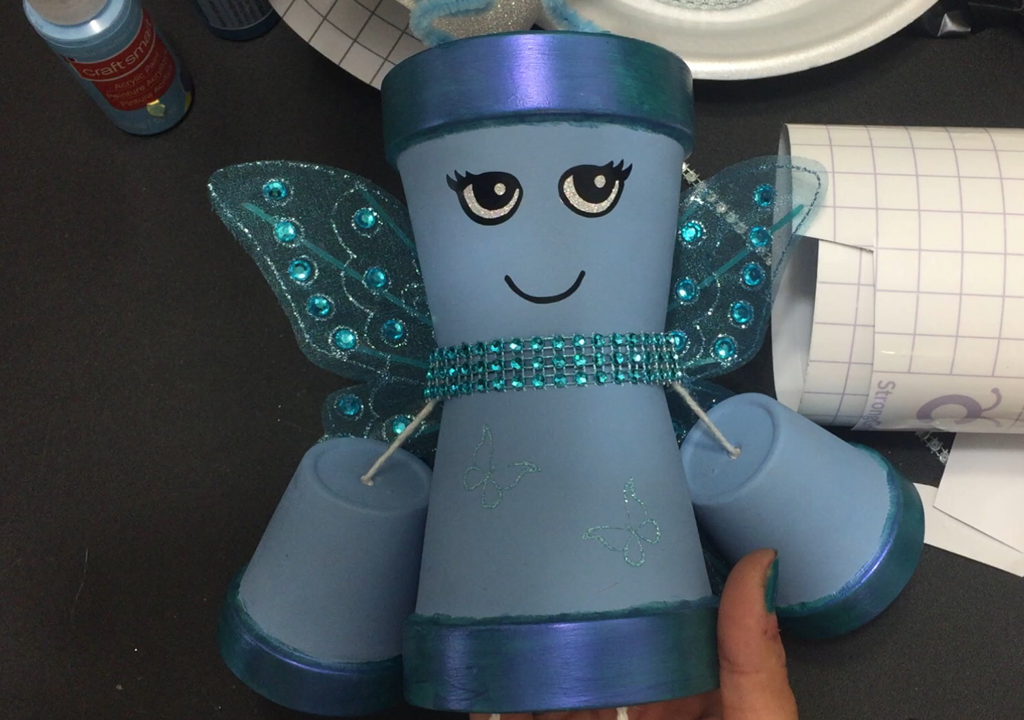
How cute is this Dollar Tree butterfly clay pot plant holder? These little clay pot people are so much fun to make, and the ways to decorate them are endless! In this tutorial, I used my Cricut Maker (which I adore) to cut out the eyes and mouth. If you don't have a Cricut, just paint the face on, or use stickers. However you want to do it is up to you.
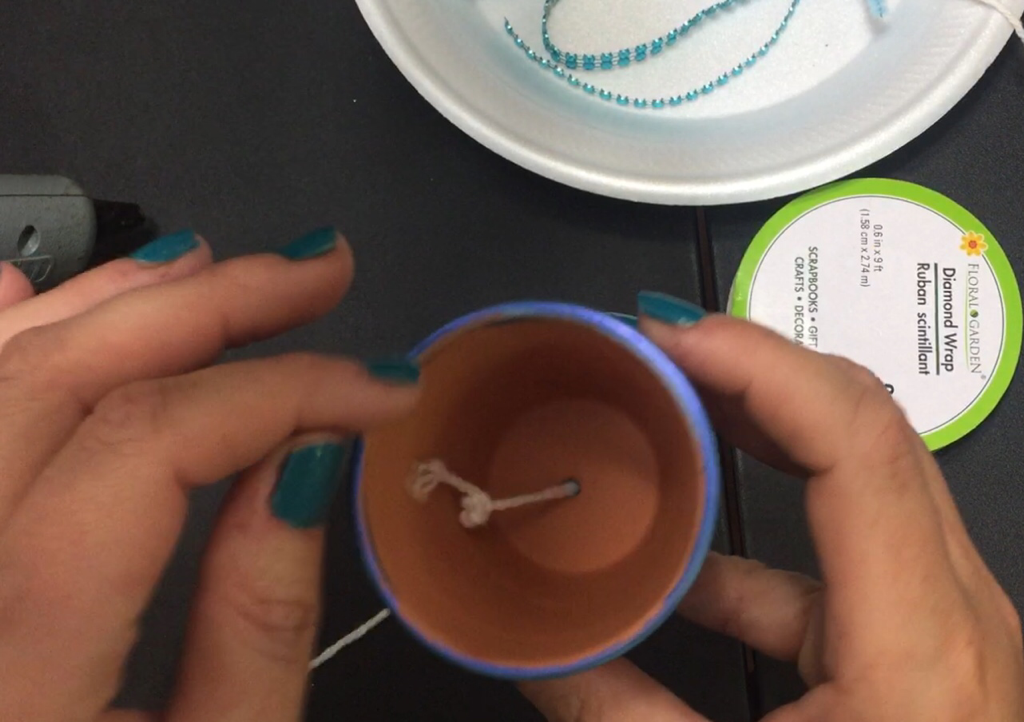
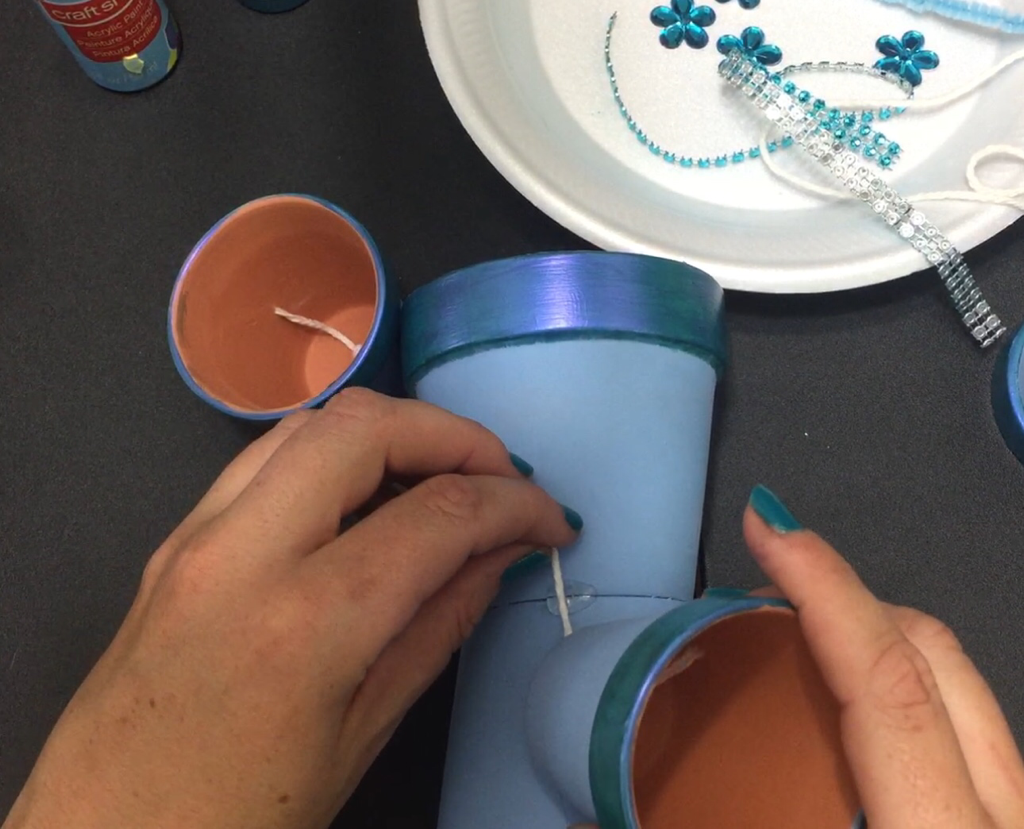
**SCROLL DOWN TO THE BOTTOM OF THE POST FOR A VIDEO TUTORIAL!** What You Need: -6 clay pots from Dollar Tree (Dollar Tree only carries 2 sizes. You need 2 of the larger ones, and 4 of the smaller ones. Or get whatever sizes you want from WalMart.) -a few feet of strong cotton yarn, twine, or rope to attach the hand and feet -acrylic paint in the colors of your choice -a clip-on butterfly from Dollar Tree -a pipe cleaner, cut in half -4 flower rhinestones from Dollar Tree -a bit of Diamond wrap from Dollar Tree -hot glue sticks & glue gun (I only use Gorilla brand)
How To Make It:
Step 1: Paint your clay pots any color you like. For this one, I chose 2 shades of blue acrylic paint. Using hot glue, glue the two larger pots together. 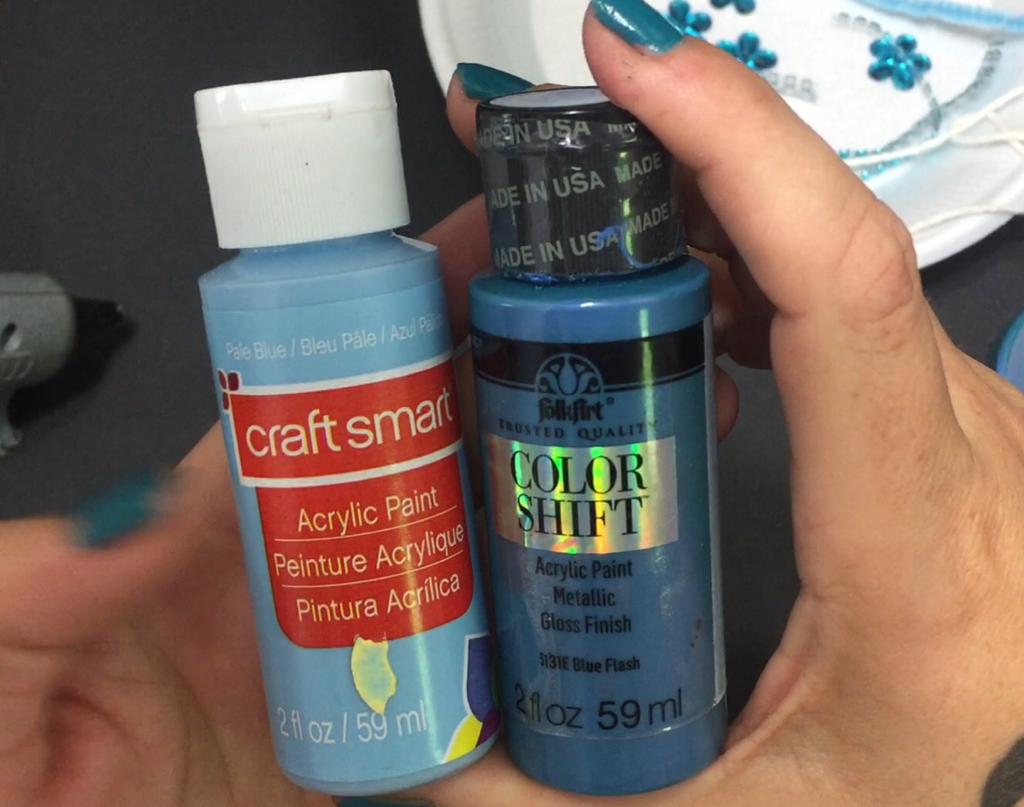
Step 2: Cut a length of cotton yarn for the arms and legs (as long or as short as you want). Thread the yarn through the holes in the bottom of the small pots, and tie a knot to keep it from slipping back through. I tied a knot 3 times to make sure it was large enough to stay in place.
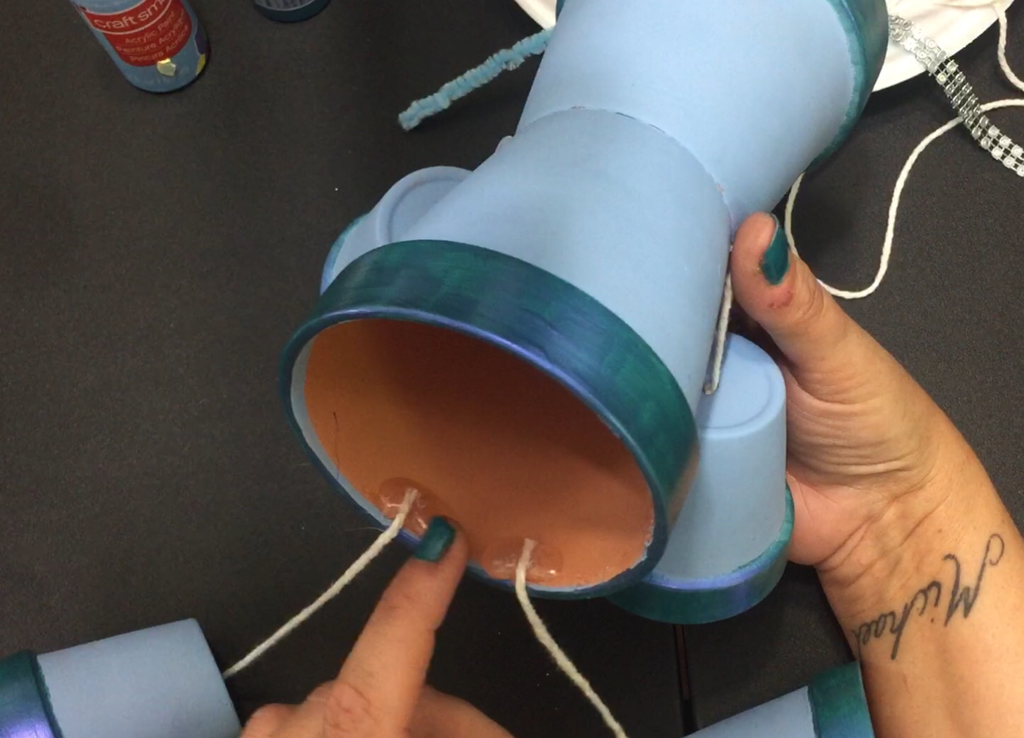
Step 3: Using hot glue, attach the arms to the larger pots where they attach.
Step 4: Using hot glue, attach the legs to the inside of the bottom pot.
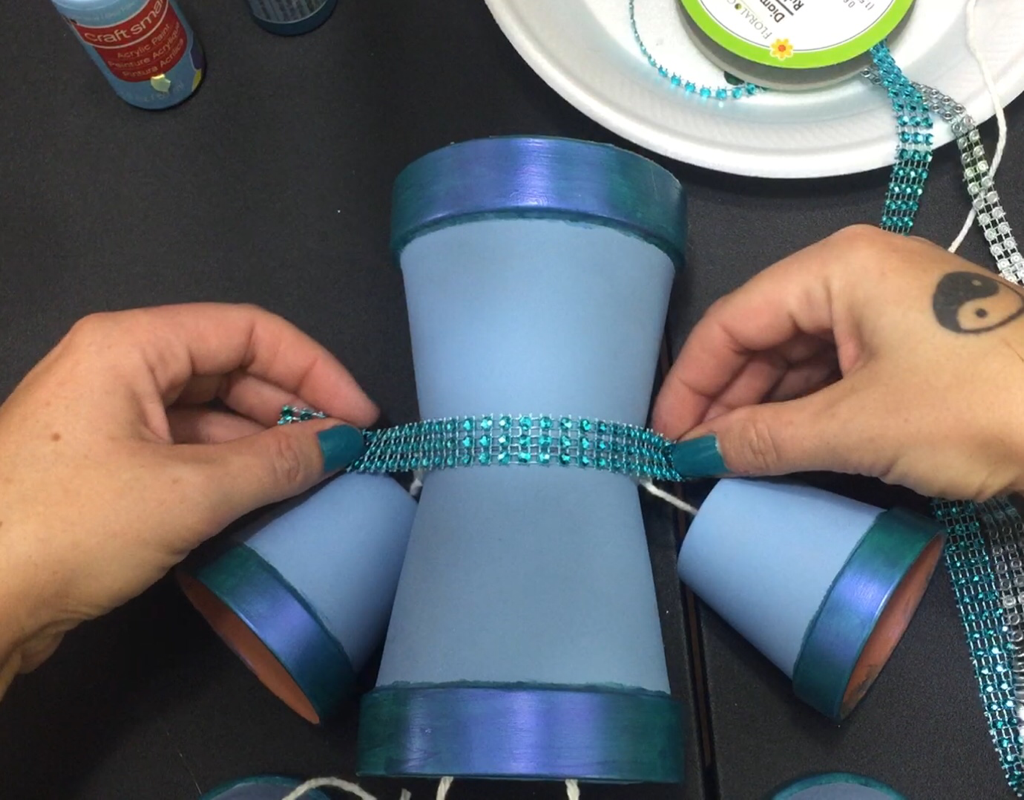
Step 5: Glue a bit of Diamond wrap around the larger pots to hide the tops of the arms.
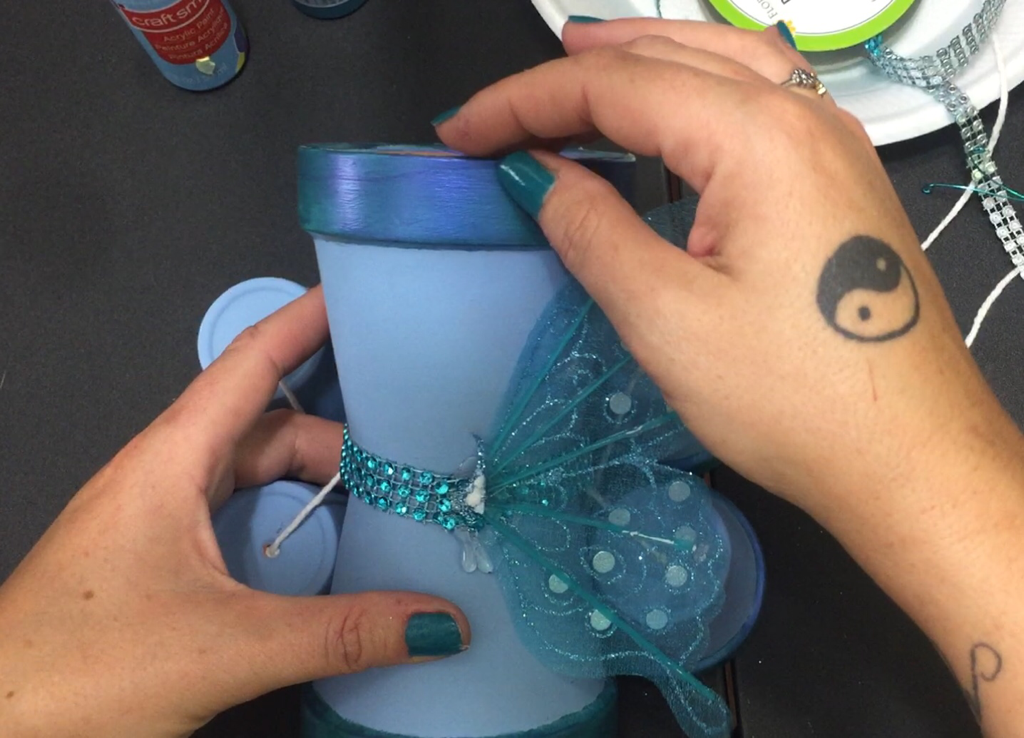
Step 6: Remove the wings from the butterfly, and glue them to the back of the pots.
Step 7: Put a bit of hot glue on the back of one of the flower rhinestones, place half of a pipe cleaner on the glue, and then place another rhinestone on top of that. You are basically sandwiching the pipe cleaner between the rhinestones.
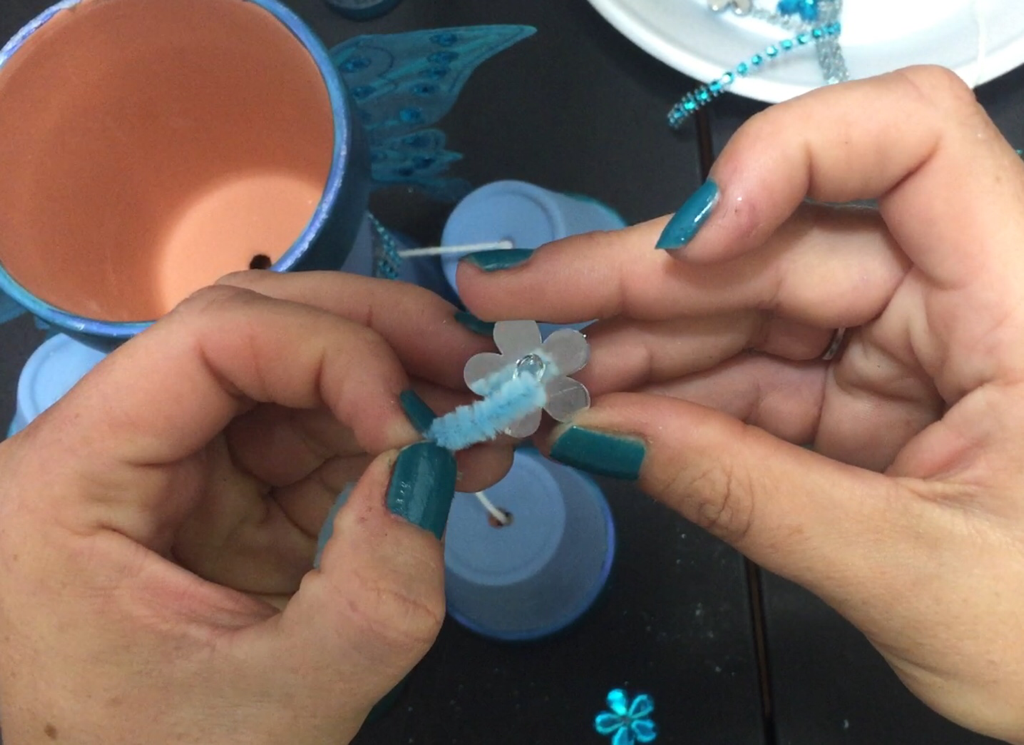
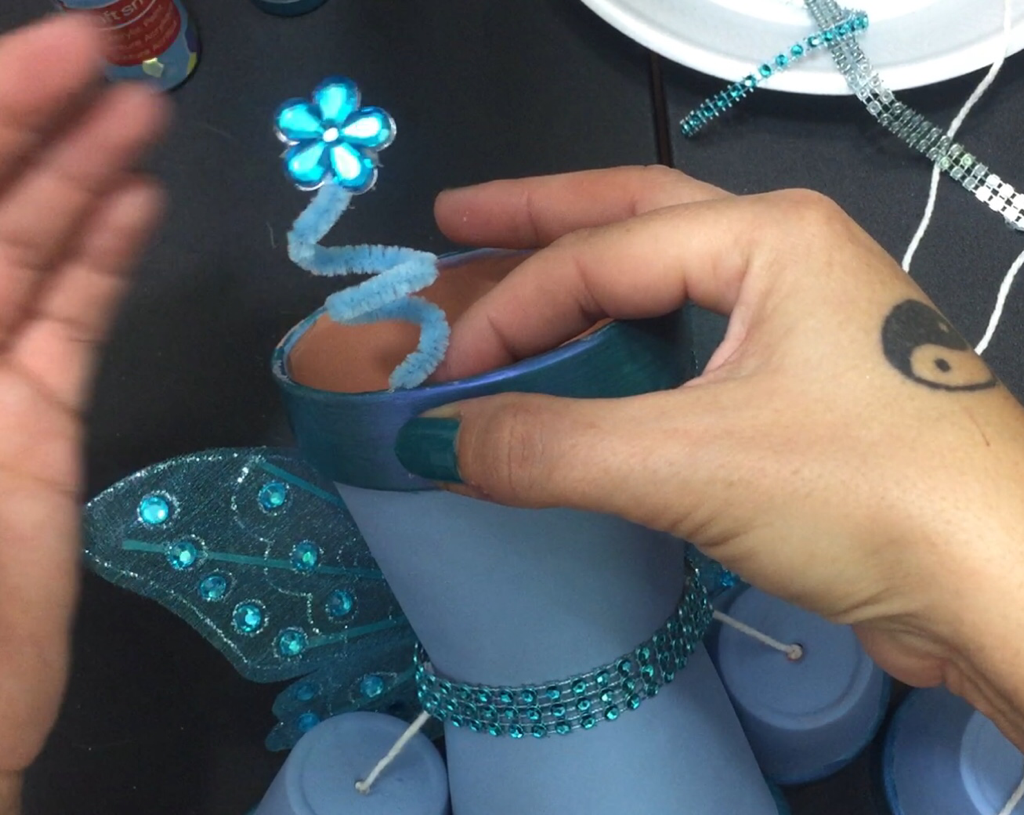
Step 8: Wrap the pipe cleaner around your finger to create a spiral, and then glue it to the inside rim of the upper large pot.
Step 9: Attach/paint on the face, and there you go!
|
|||
 RSS Feed