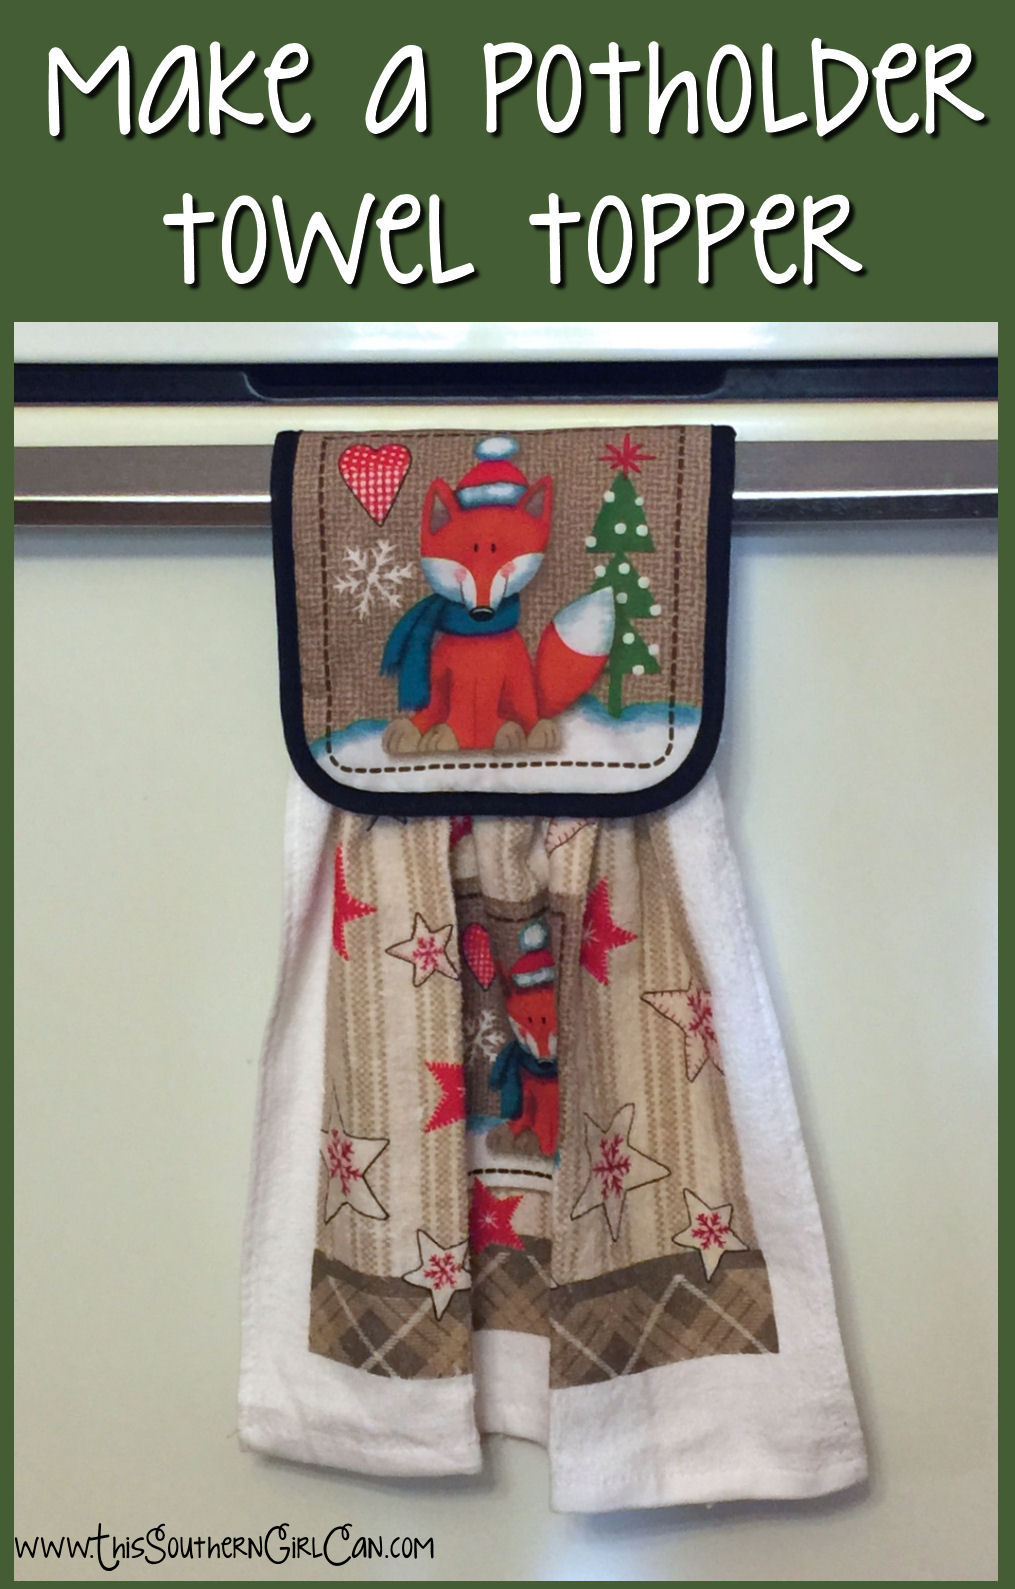
This is one of my favorite crafts to make, because not only is it inexpensive, it is also used on a daily basis. These also make great craft show/fair items.
What you need: a dishtowel a potholder thread sewing needle button straight pins scissors How to make it: 1. Cut the towel in half. Thread your needle, and make a fairly loose running stitch from one edge of the towel to the other. 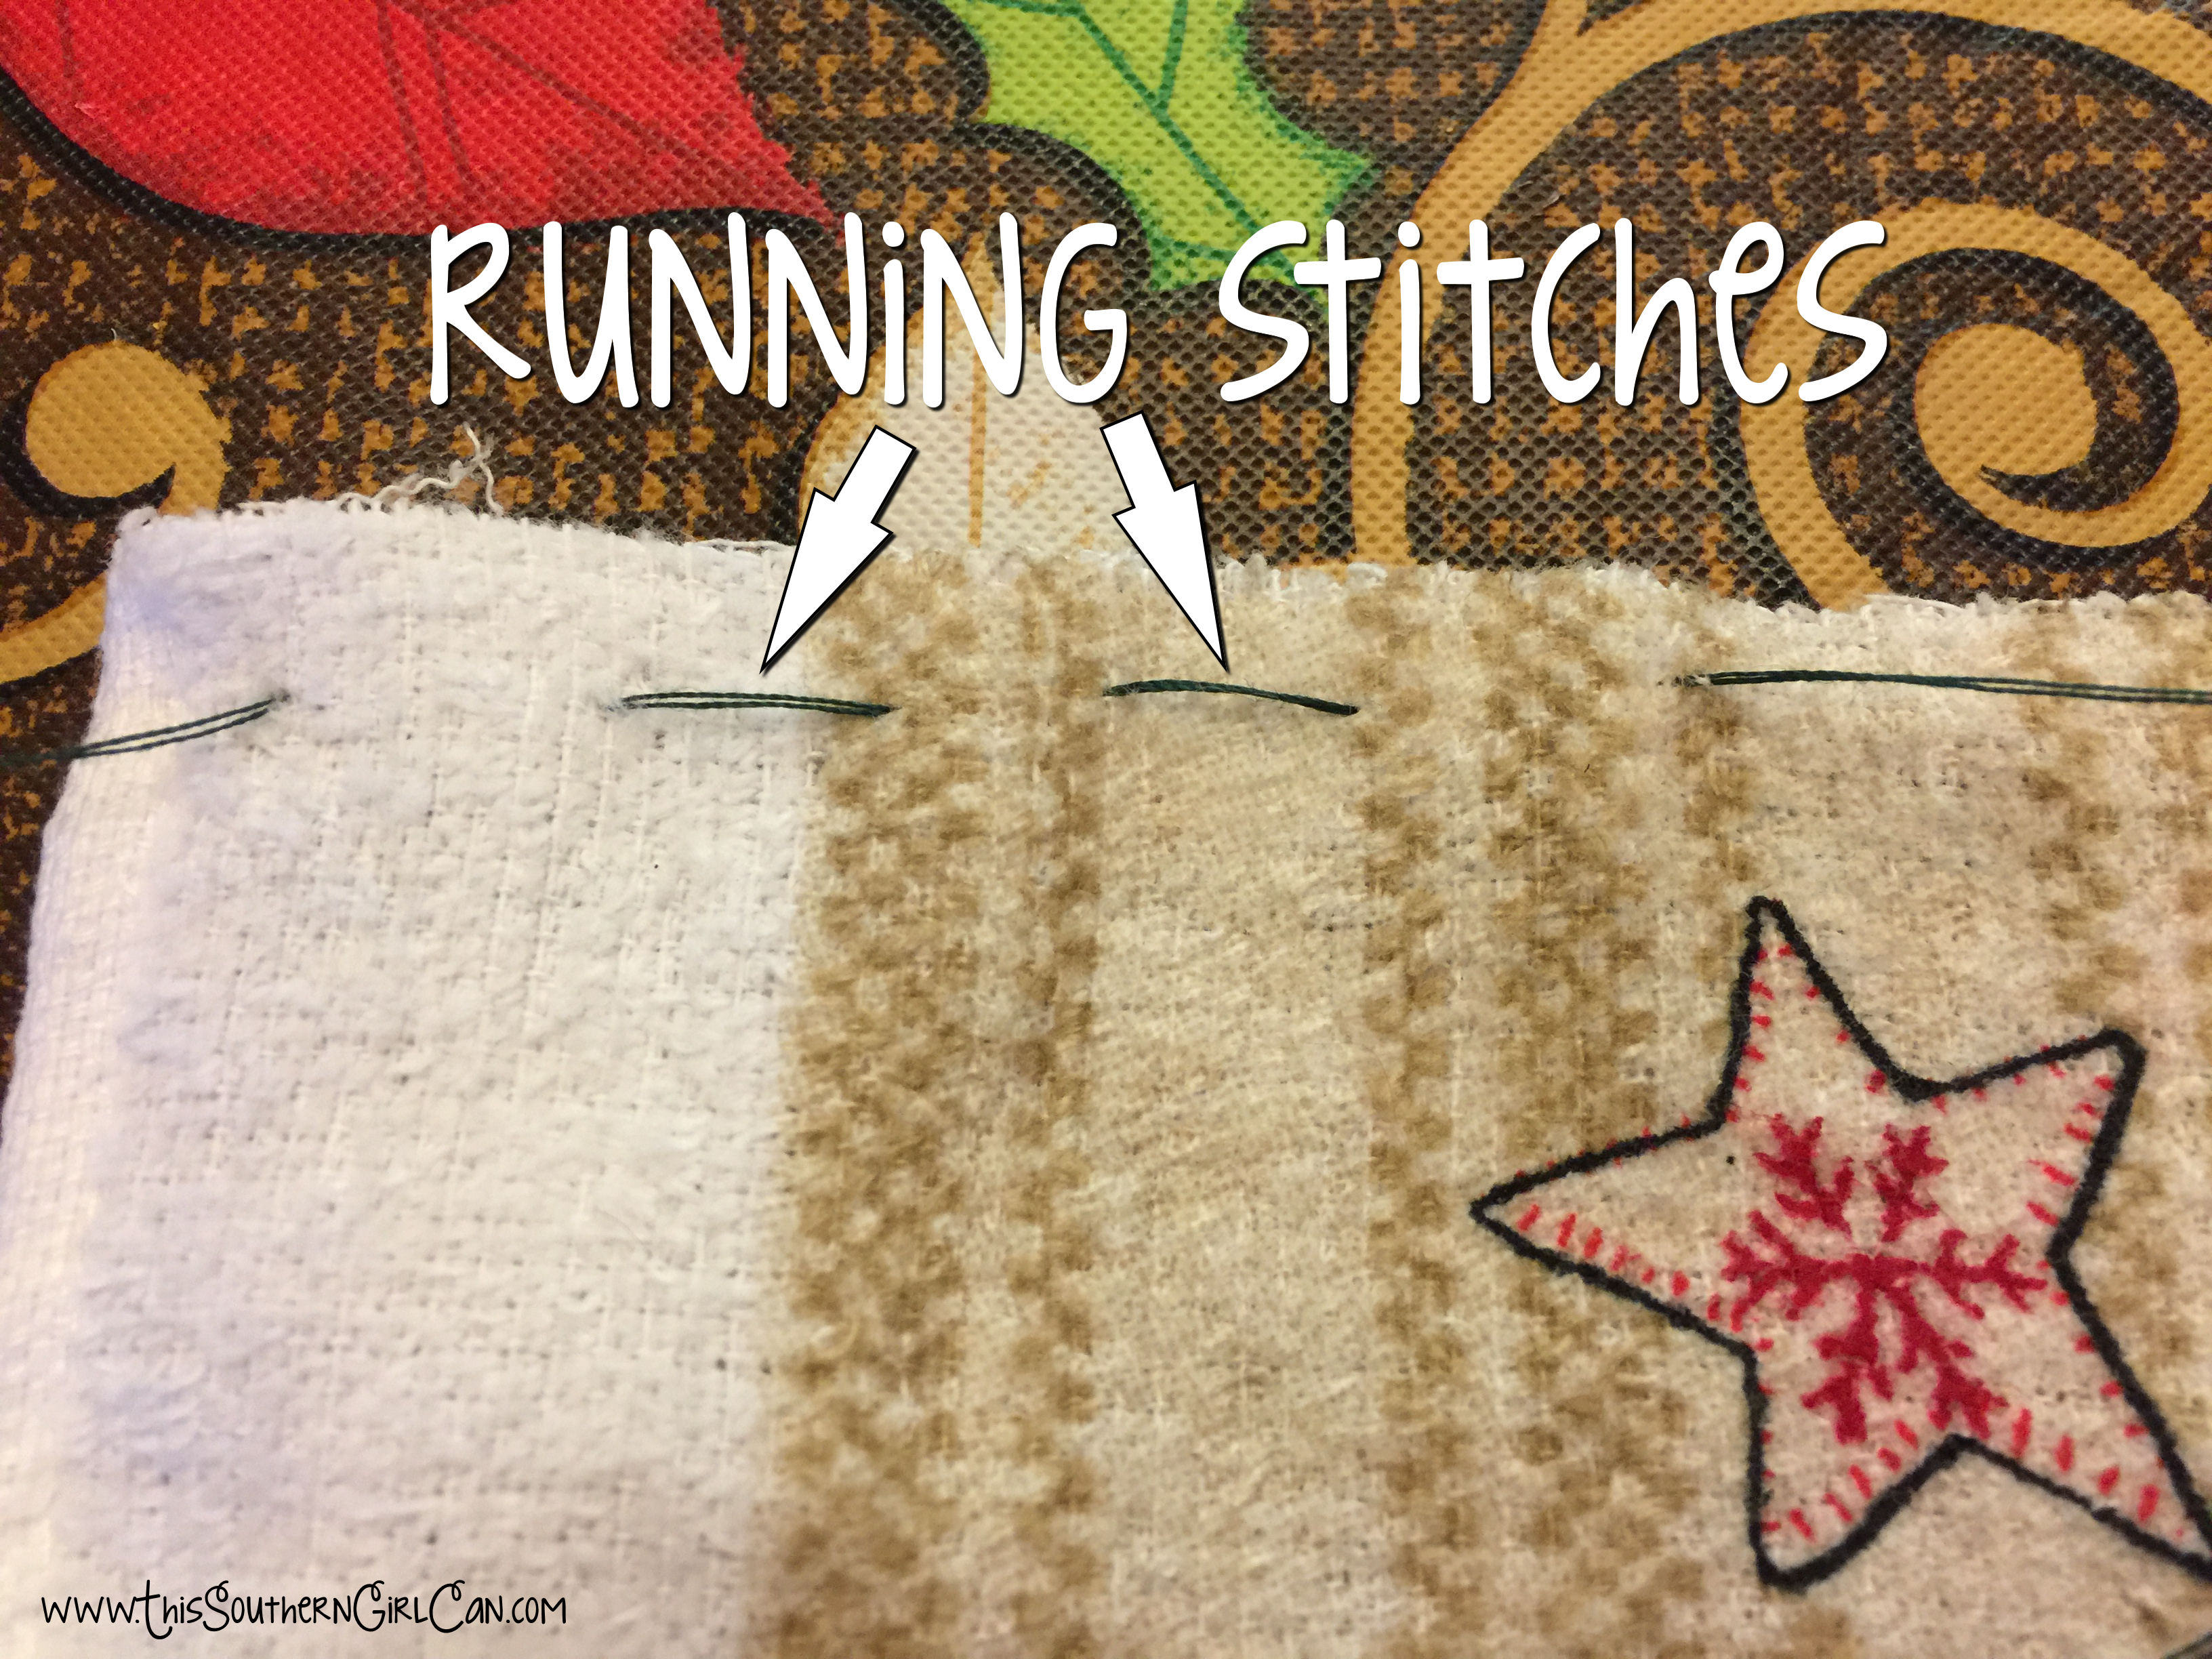
2. Once you have your running stitches in place, slowly gather the top of the towel until it is the width of your potholder. Pin it in place to the back of the potholder using the straight pins.
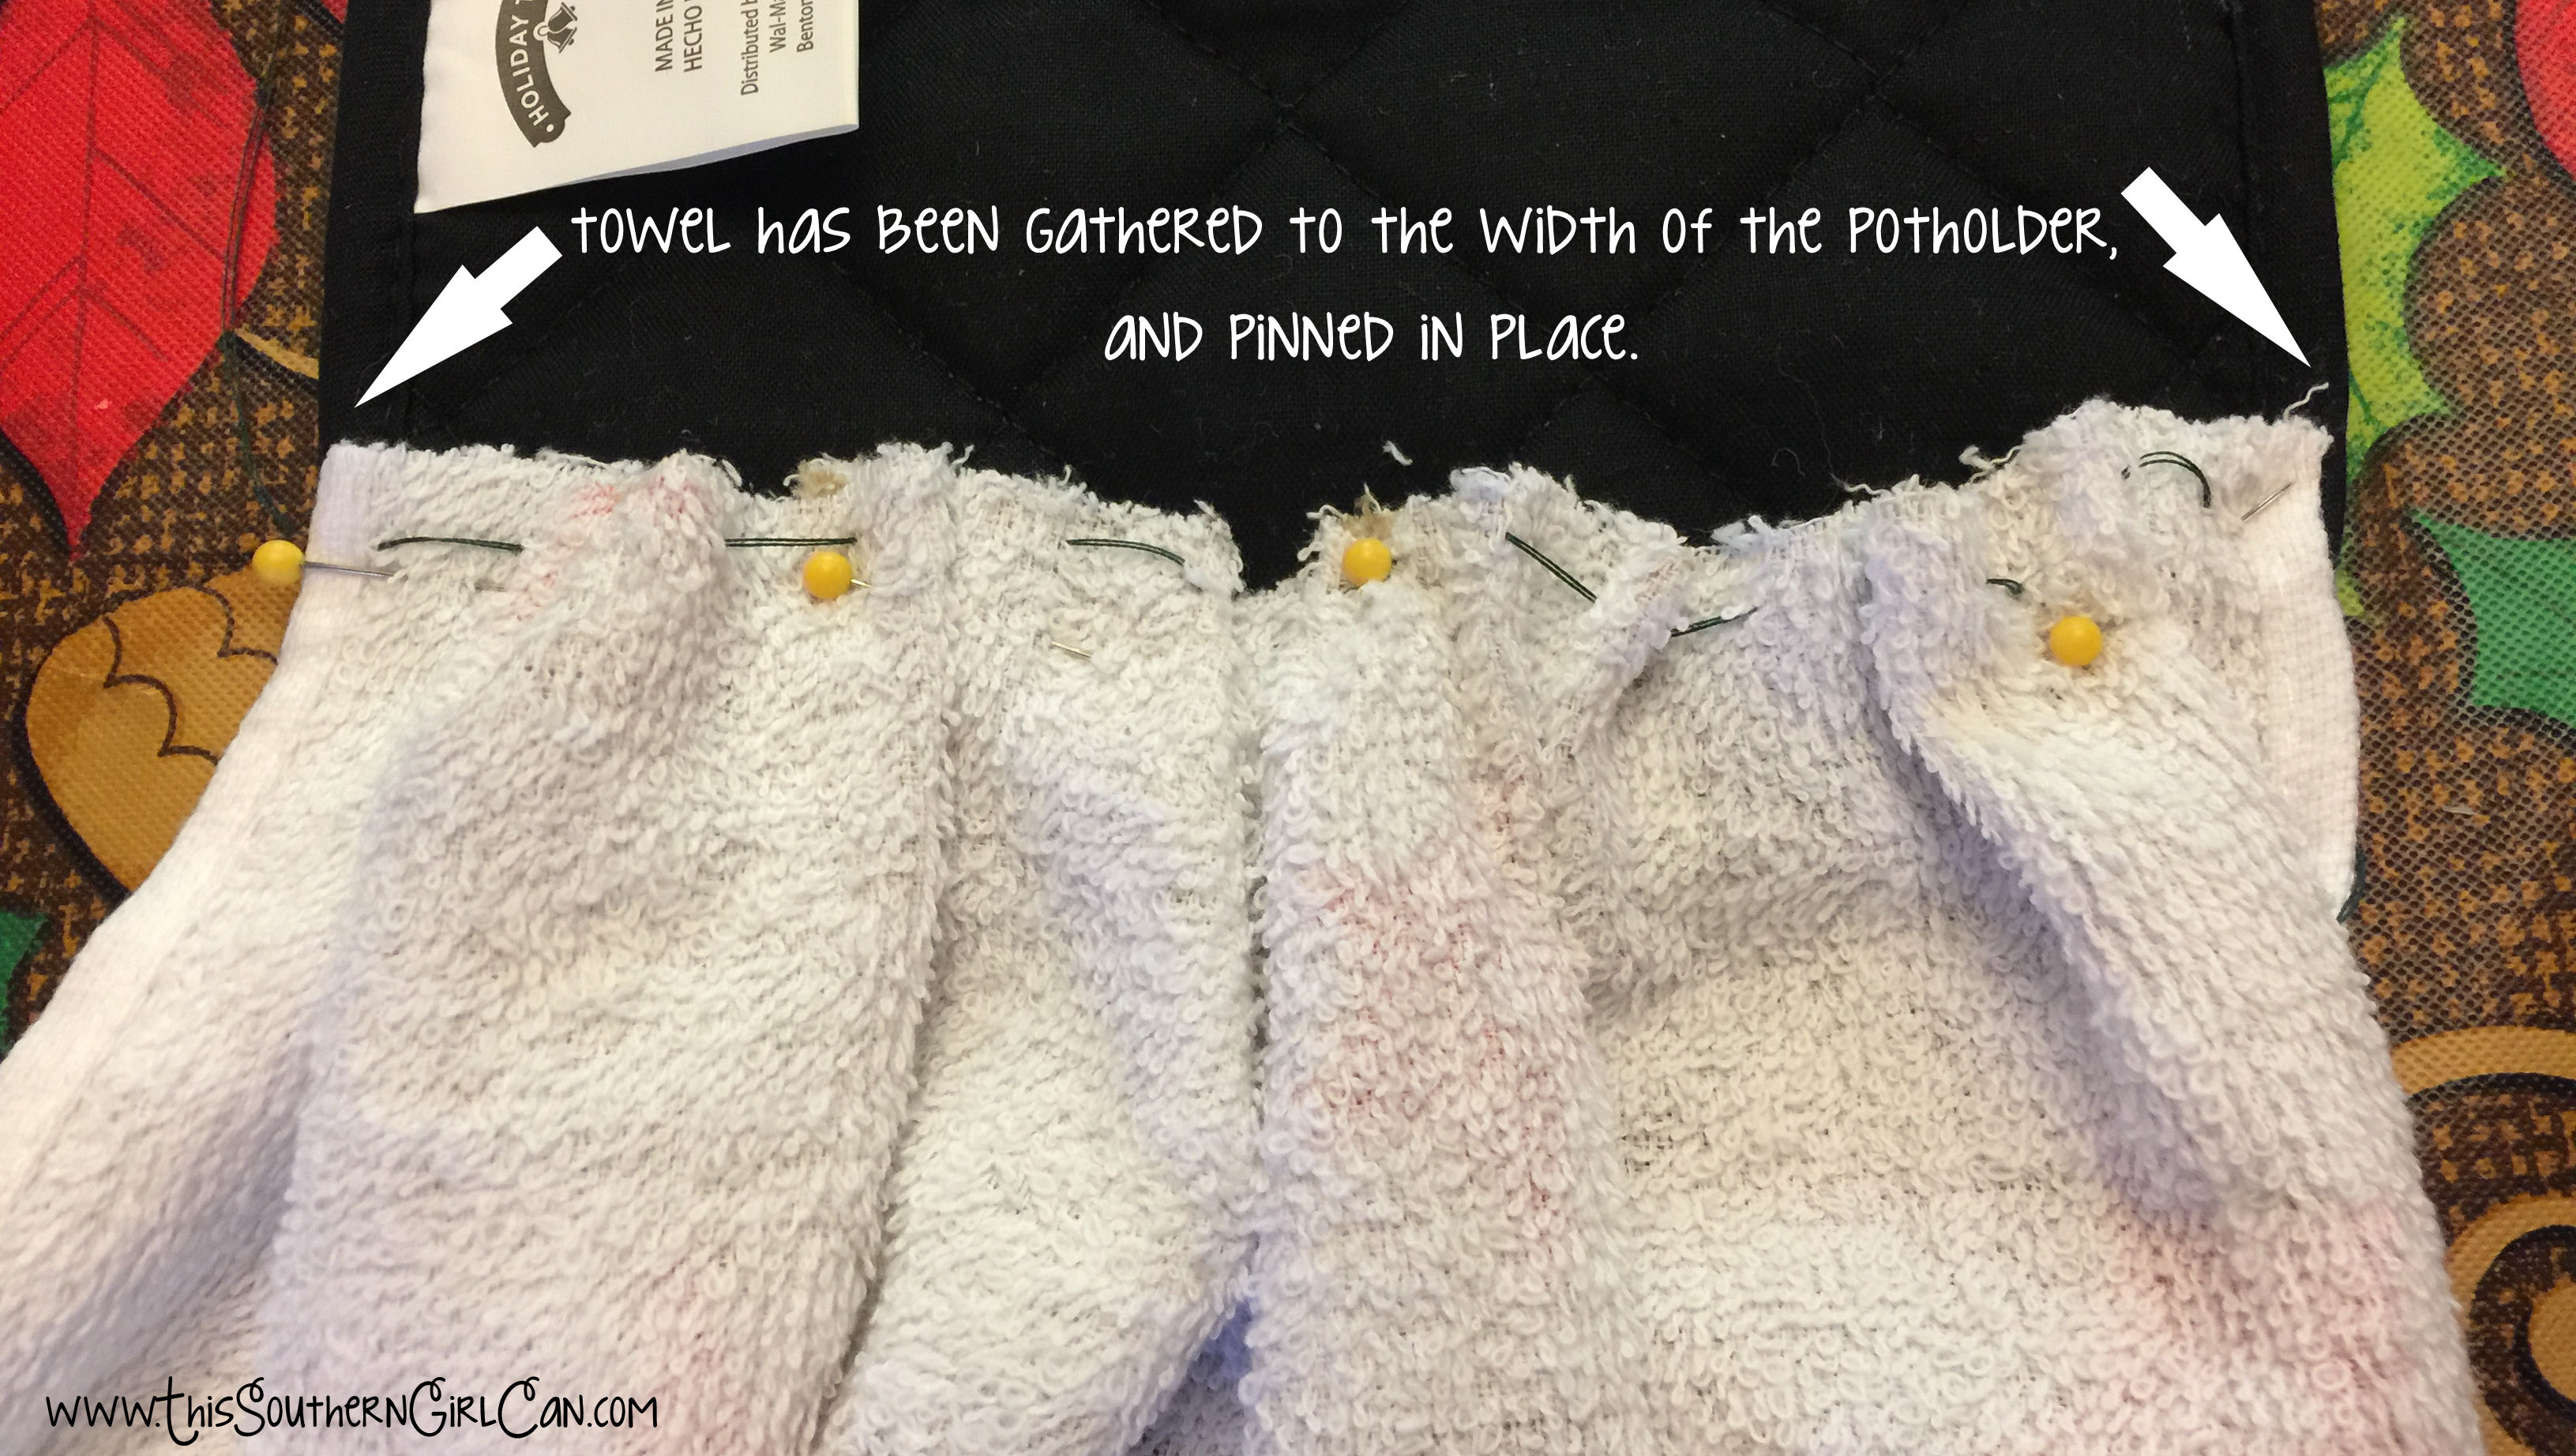
3. Stitch the towel to the potholder, making sure to not stitch all the way through to the front. I used a simple back stitch, only stitching through the back layer of the potholder.
4. Now you want to fold the top of the potholder towards the back to make a flap wide enough to fit around the handle of your oven door. Take note of your design on the front as well. You don't want to fold it over so much you ruin the design on the front of the potholder.
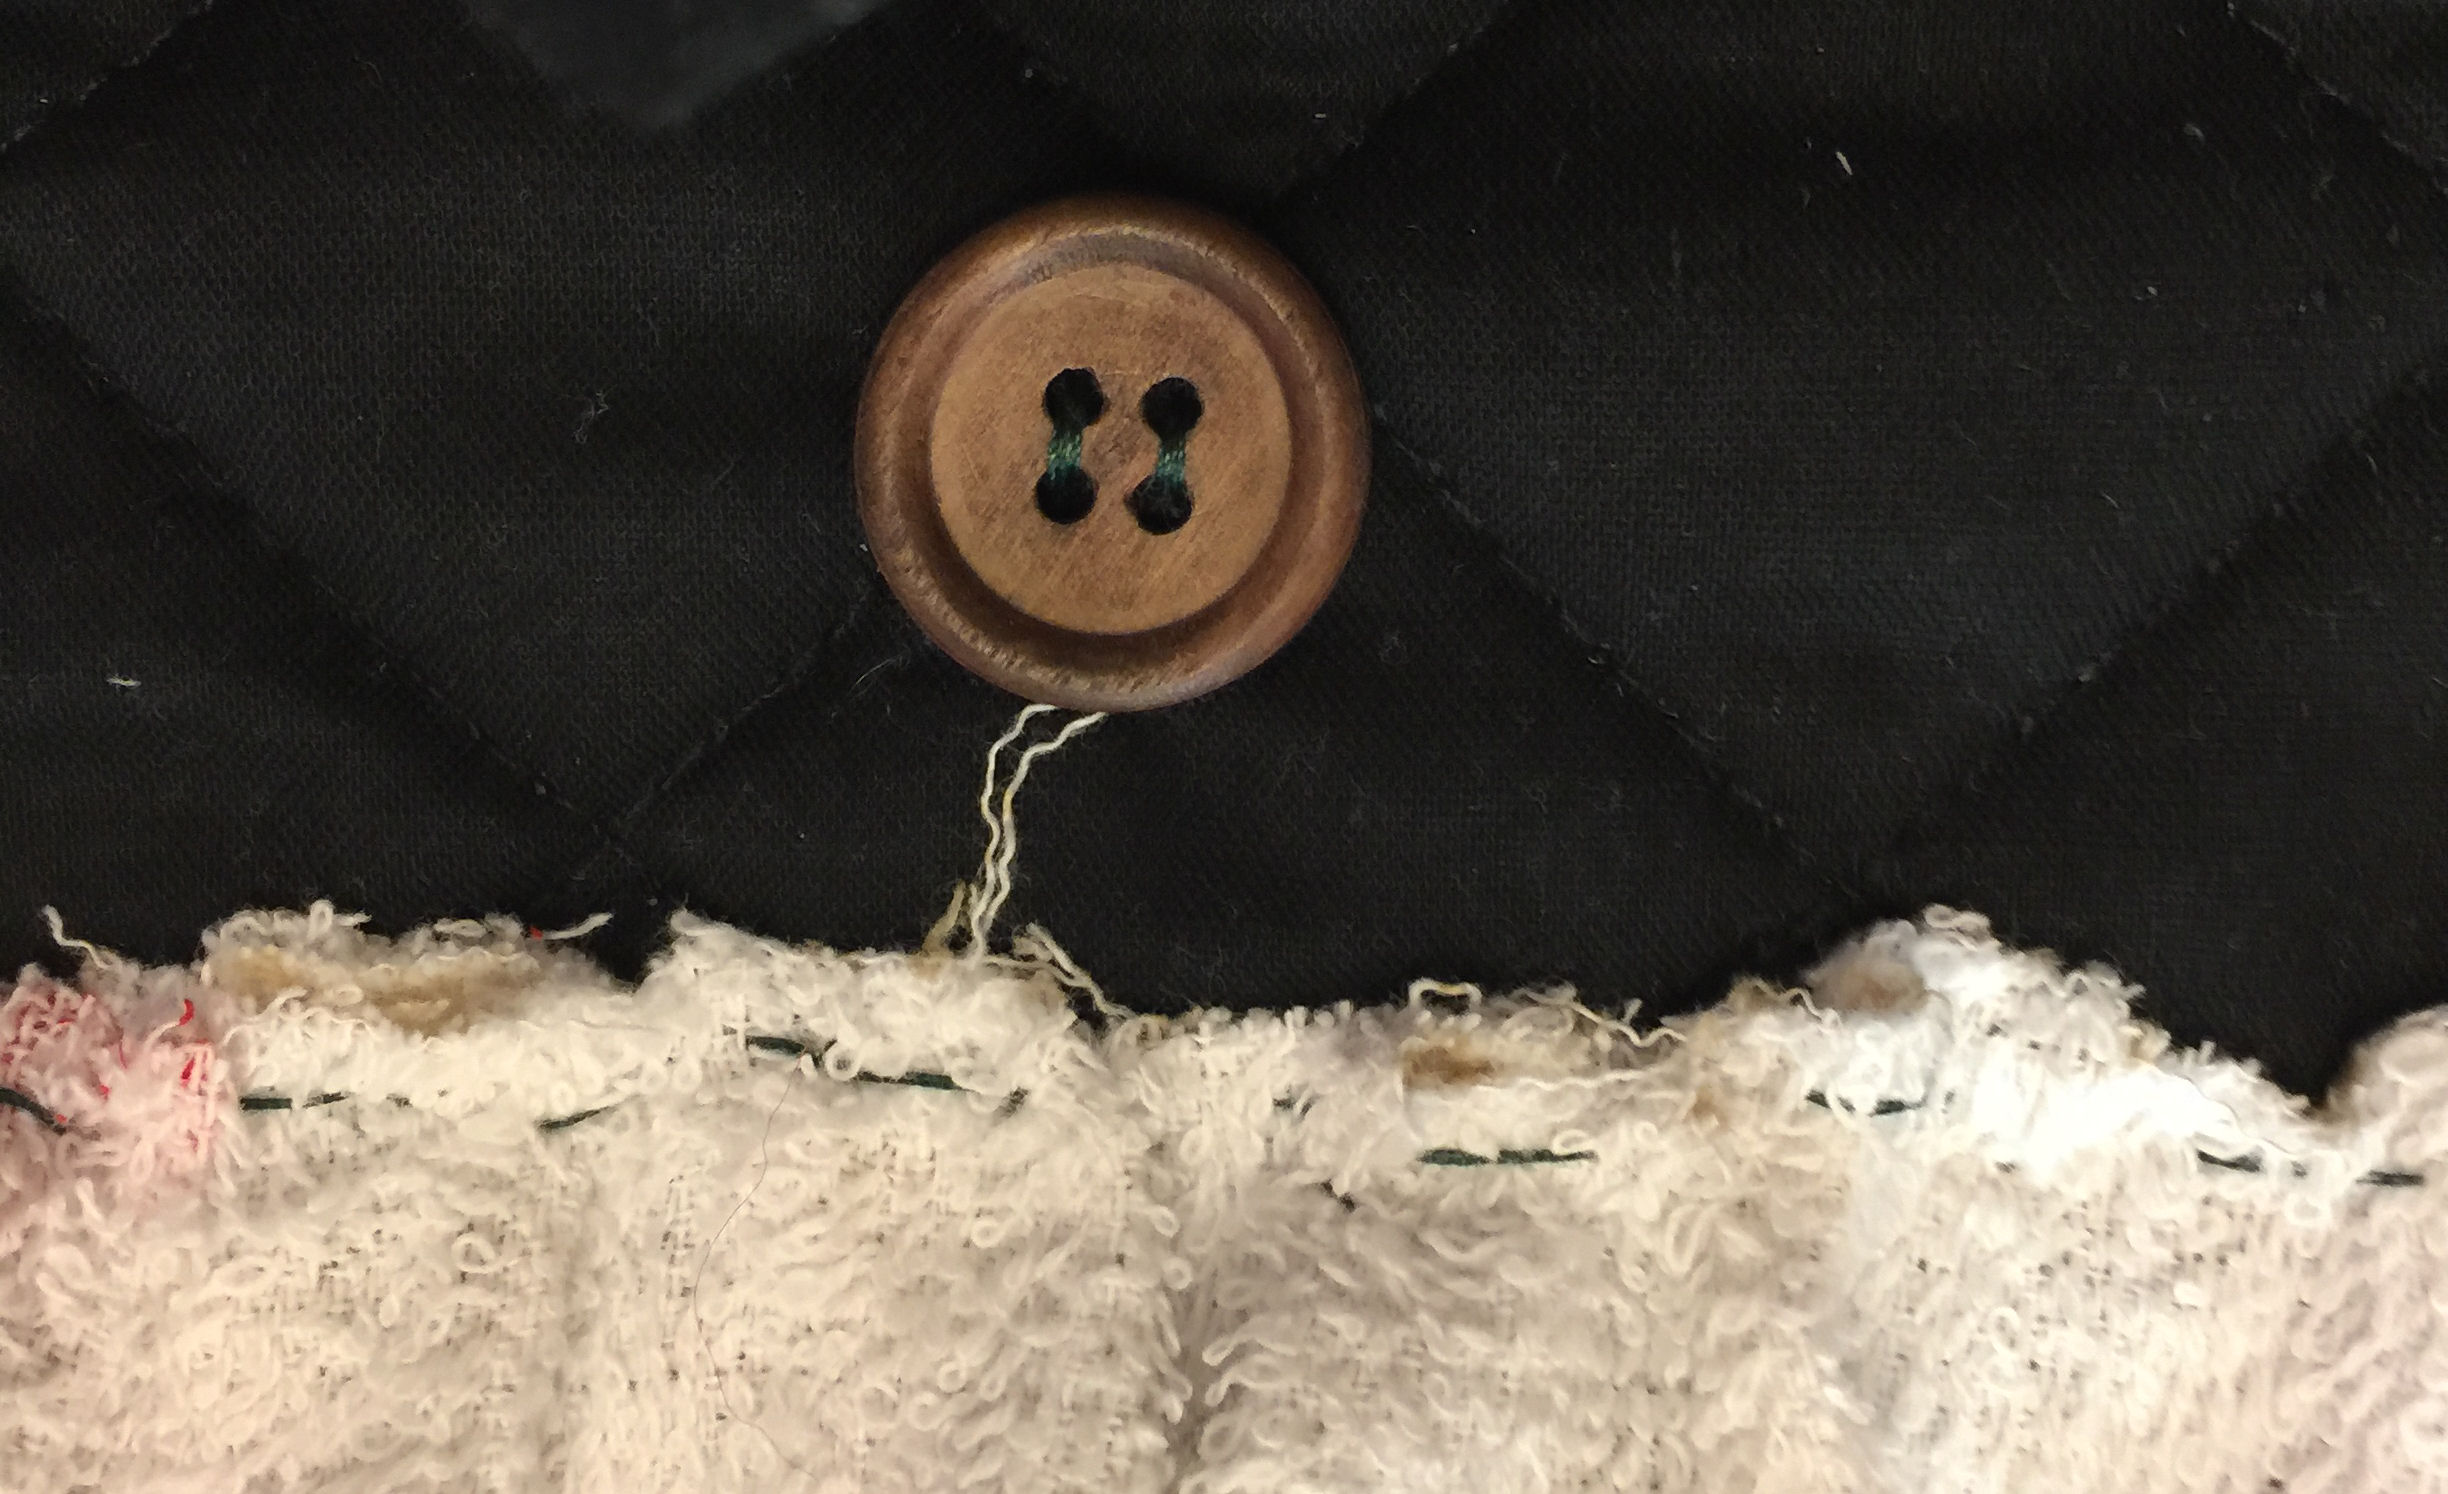
Sew a button onto your potholder so the hanging loop can fasten to it. Make sure to not sew through the front of the potholder. You will have to angle your need quite a bit to stitch only on the back layer. That's it! Now hang your new creation on your oven door! **Note: I recommend hand washing these, and laying them flat to dry.**
0 Comments
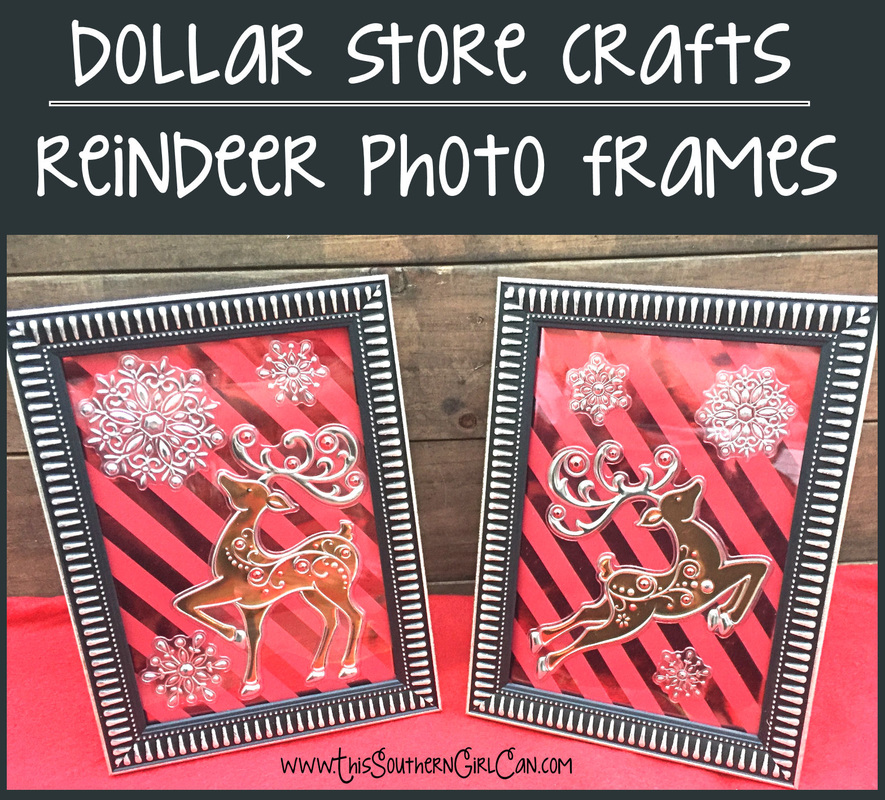
I absolutely LOVE the dollar store. By 'dollar store', I mean any store where all items cost only $1. My local dollar store happens to be called Dollar Tree, and I shop there on a regular basis. I know that times can be hard, and a lot of people out there may not have a lot of money to spend on decorating for the holidays. By spending just a little time in a dollar store and using a lot of imagination, you can create tons of beautiful decorations out of inexpensive items.
Now, let's get started. What you need: a roll of wrapping paper to use as the background a sheet of reindeer window clings 2 frames scissors a pen How to make it: 1. Get out all of your supplies. 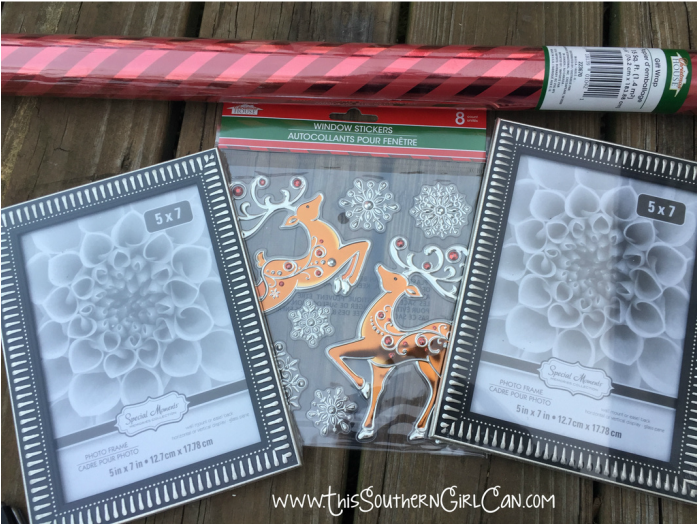
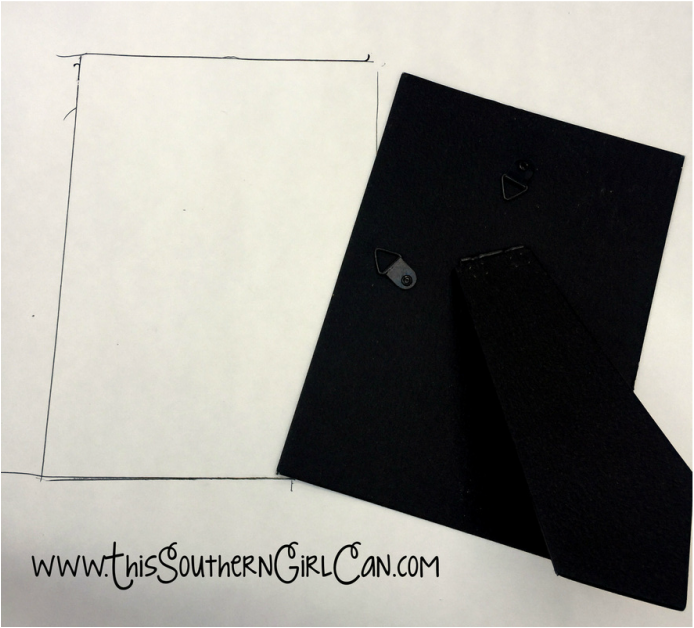
2. Take the back off of the frame, and remove the glass. Lay the back on the wrapping paper, and trace around it to get the proper size for your background.
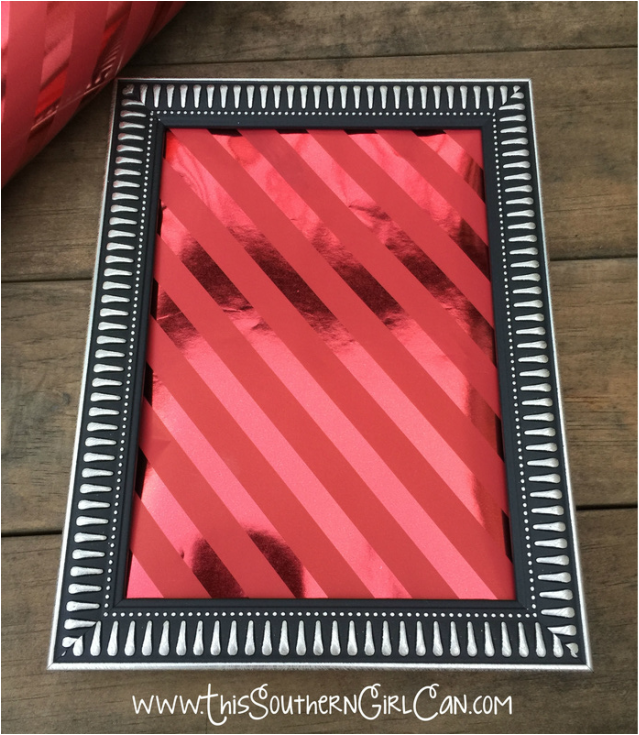
3. Cut out the wrapping paper, and put it into the frame, then replace the back. Do not put the glass in at this time. We are doing it this way so you can see exactly where your window clings need to be placed so they aren't covered by the edges of the frame once it is assembled.
4. Place your window clings onto the wrapping paper in a design you like. Once they are in place, remove the back and wrapping paper. Insert the glass, then wrapping paper, and then replace the back.
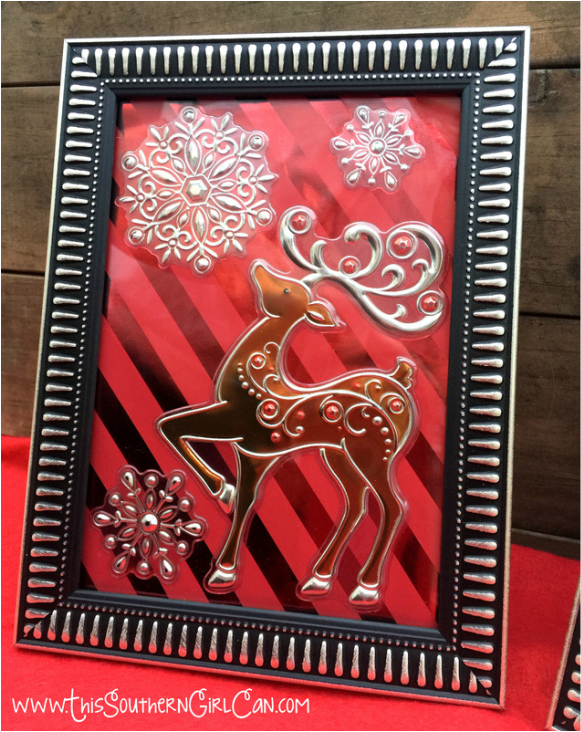
Pretty, right?! I love making things like this. It is a great way to decorate your home and not spend a lot of money. This is just one of many beautiful things you can make from inexpensive items so you don't go broke trying to look festive.
Thank you so much for stopping by and taking a look at my tutorial. See y'all later! |