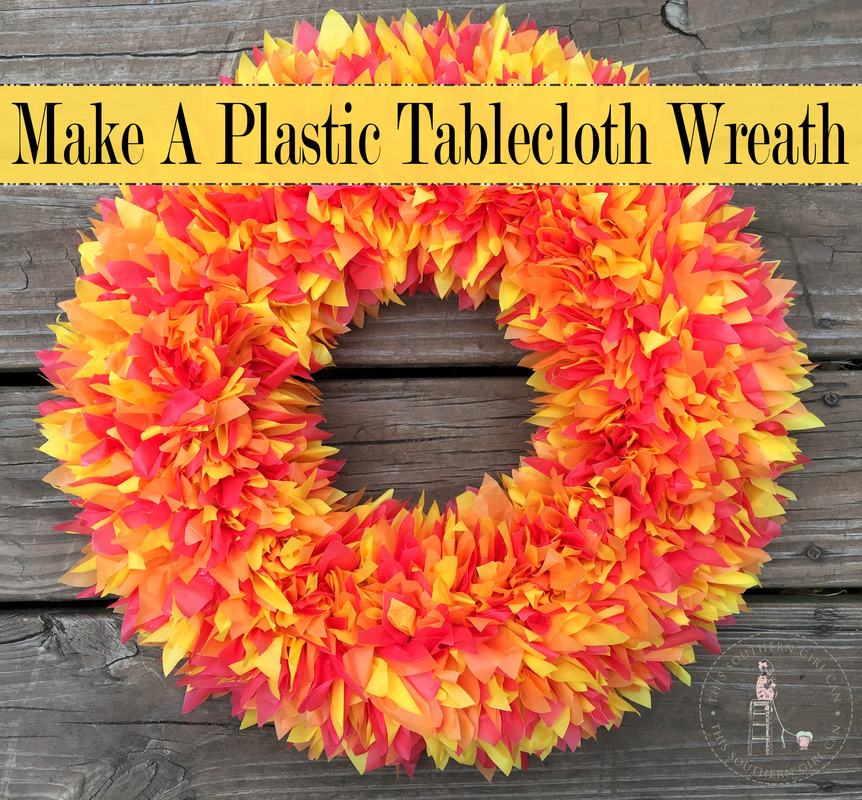
 I absolutely love making something beautiful out of something mundane, and this wreath is my latest creation made from simple items you may never have though to use as a home decoration: plastic tablecloths! Plastic tablecloths are easy to find, inexpensive, and come in a wide variety of colors so you can make wreaths for any season, to represent your love for your favorite sports team, or even a baby shower. I buy my tablecloths from The Dollar Tree and WalMart. They are $1.00 or less. I also get my wire wreath frame from The Dollar Tree for $1.00 (WalMart has them for around $3), making this a very cost-efficient way to decorate. Let's get started!  What you'll need: Plastic tablecloths in the colors you like (I use 3 colors, and roughly 6 tablecloths per wreath, so get 2 tablecloths in each color) A wire frame wreath form Scissors 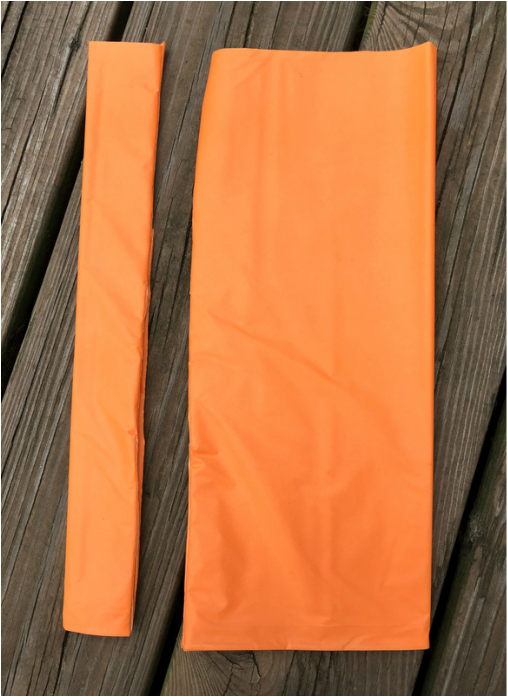 How to make it: 1. First, lay out your tablecloth straight out of the package like shown in the photo above. Cut a strip off of the tablecloth, measuring roughly 1.5 inches wide. 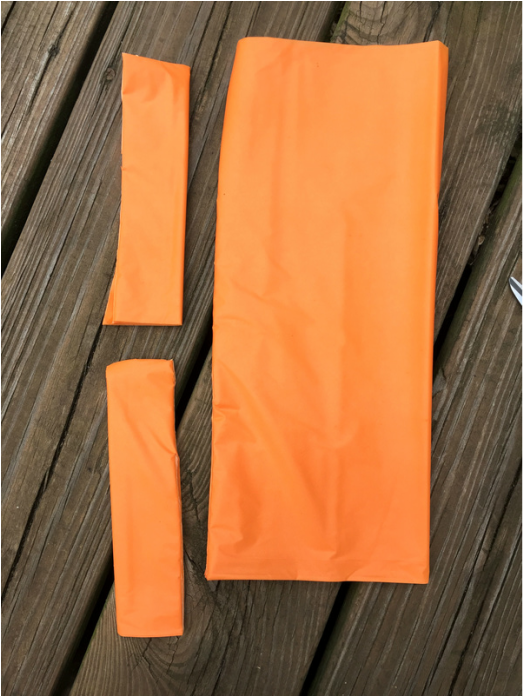 2. Cut the strip in half. 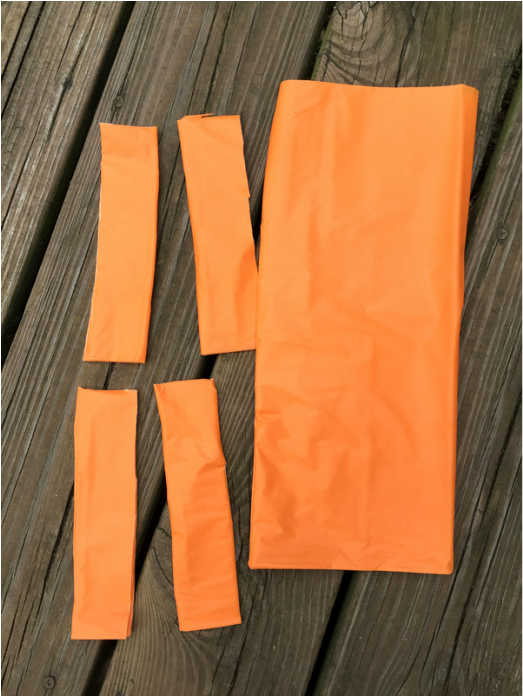 3. The strips that you have cut may be folded on one side. This is where the tablecloth was folded to fit into the package. Open up each strip until all layers are flat and you can see the folded seam that runs down the middle. Cut each strip in half again on this seam. 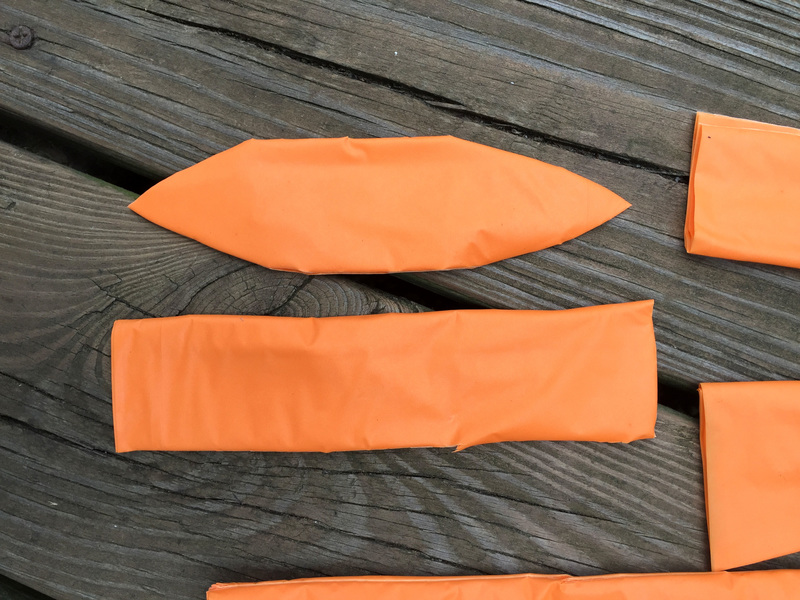 4. Now we need to cut the strips into petal shapes. Just trim a bit off of each side of the ends of the strips so they have a point. This doesn't have to be perfect at all. 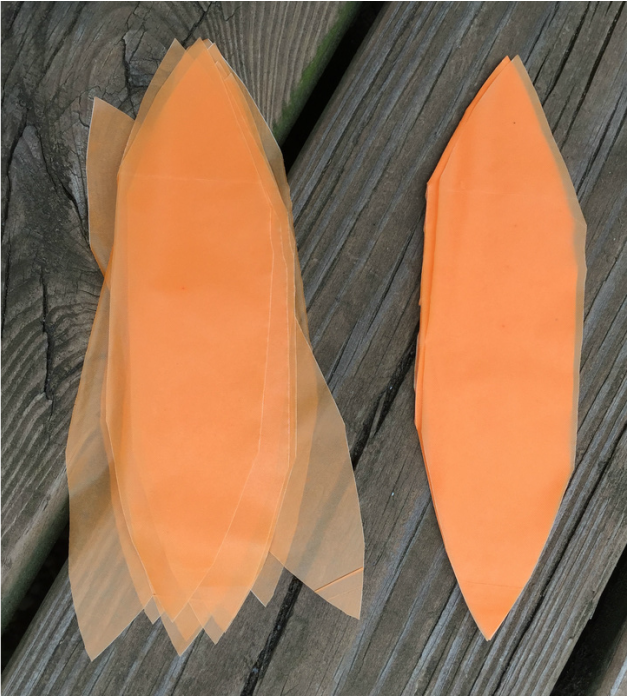 5. Separate all of the layers of the petals. They will be pretty thin, but will look brighter once you start making the wreath and everything gets squished together. Repeat all of the steps for each color of tablecloth you are using. 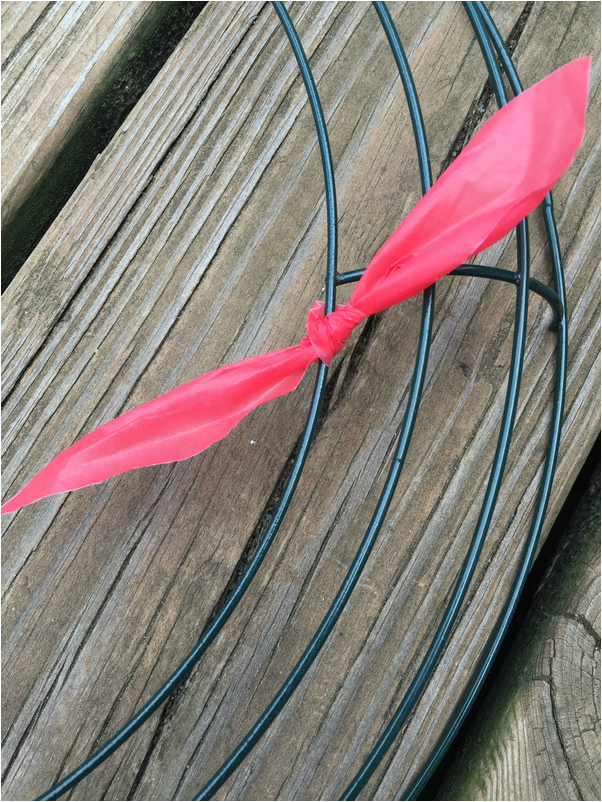 6. Now comes the fun part: actually making the wreath. Take a petal and gently tie it onto the wreath frame, starting on one of the sections in the center of the wreath.  7. Because the petals are thin, you need to use two of each color before moving on to the next. For example, tie on 2 red petals, then 2 orange, then 2 yellow. I know things are looking a little funky right now, but the more petals you tie on, the better it will look. 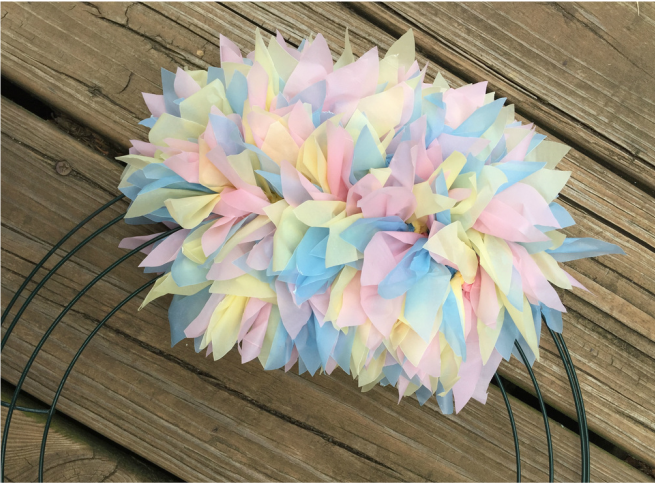 8. As you tie on more petals, slide them tightly together so they are dense and fluffy. Here is a photo of another wreath I'm in the process of making with baby shower colors in blue, pink and yellow. Continue tying on your petals until all of the wire is covered. Don't worry if it looks a little rough. We'll fluff it out and make it pretty in just a second.  9. When you have as many petals tied on as you want, flip the wreath over. Use your fingers to gently push any straggling petals from the back of the wreath through to the front. The back should look like the photo above. 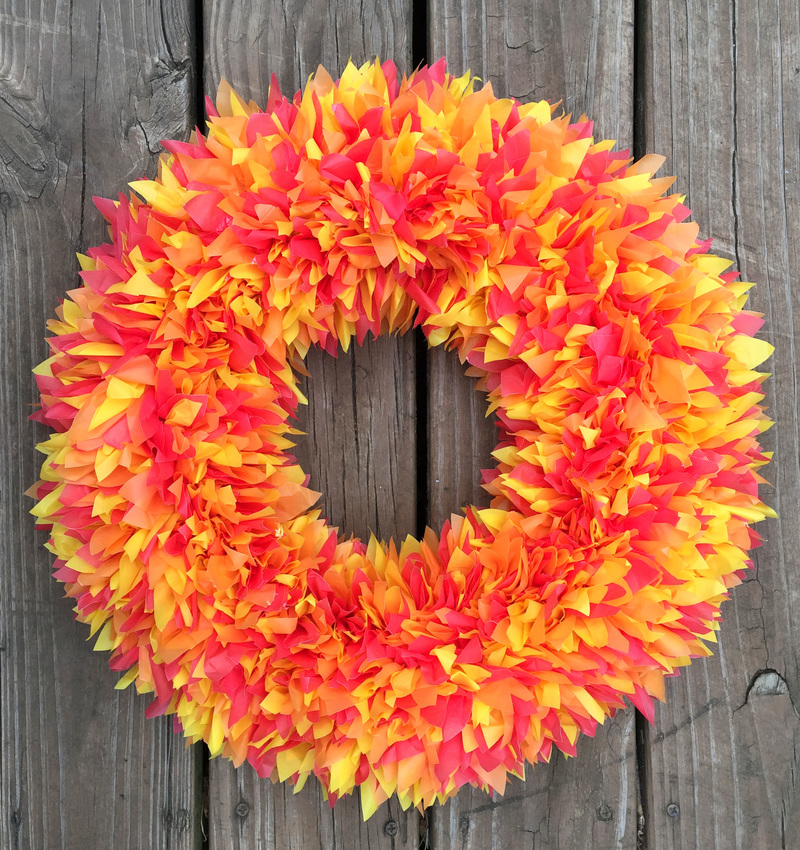 10. Fluff out all of the petals on the front on the wreath, and you're done! Tie a piece of wire or string to the wreath frame so you can hang it up.
If you happen to make a wreath like this, I would love to see it!
104 Comments
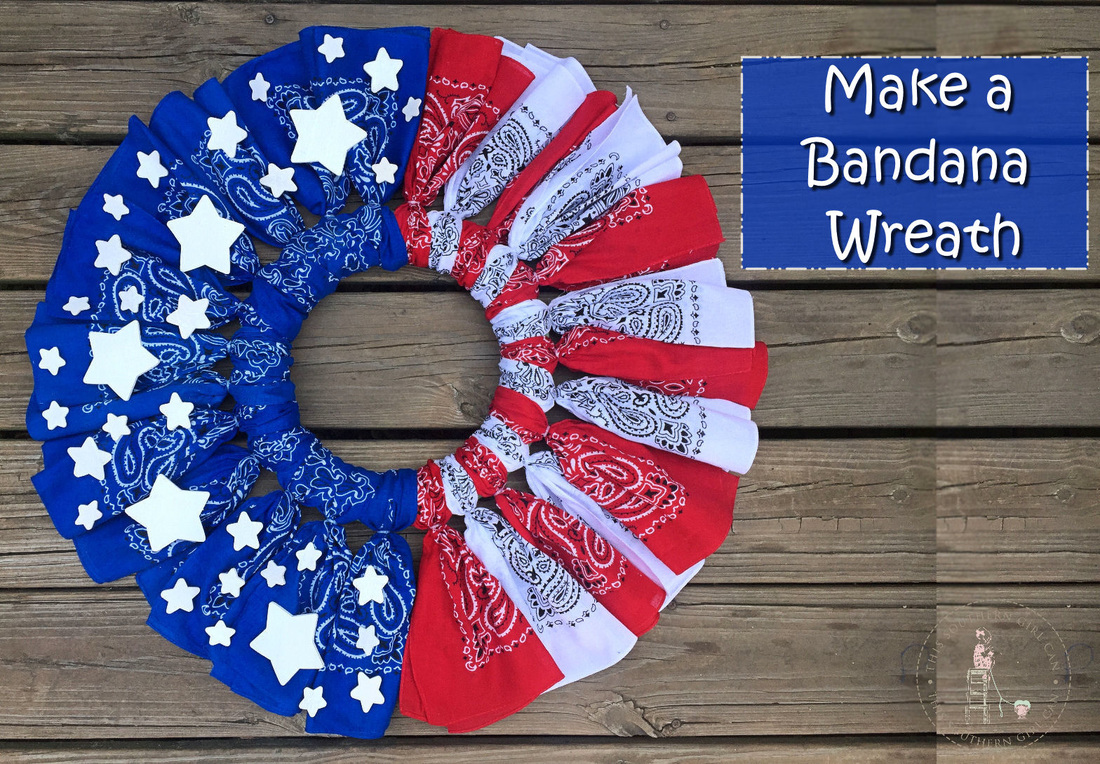 This may just be one of my most popular crafts to date: the American flag bandana wreath. This does take a little bit of time to make, but it is so worth it in the end. Now, I know many of you are probably wondering how the bandanas stay upright without flopping over. Don't worry, because I'll show you how to make them stand upright. 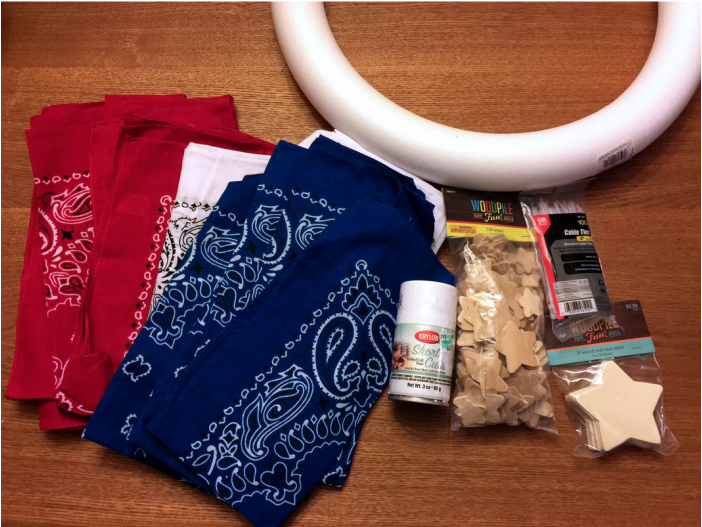 What you need: a couple packages of various-sized wooden stars (you can find these at any craft store) a small can of white spray paint a bag of small zip ties a 12-inch wreath form 4 red bandanas 3 white bandanas 6 blue bandanas Mod Podge (about 1/2 cup) medium-sized bowl hot water (same amount as Mod Podge) spray bottle paint brush or sponge brush scissors iron hot glue gun or any other type of glue you have 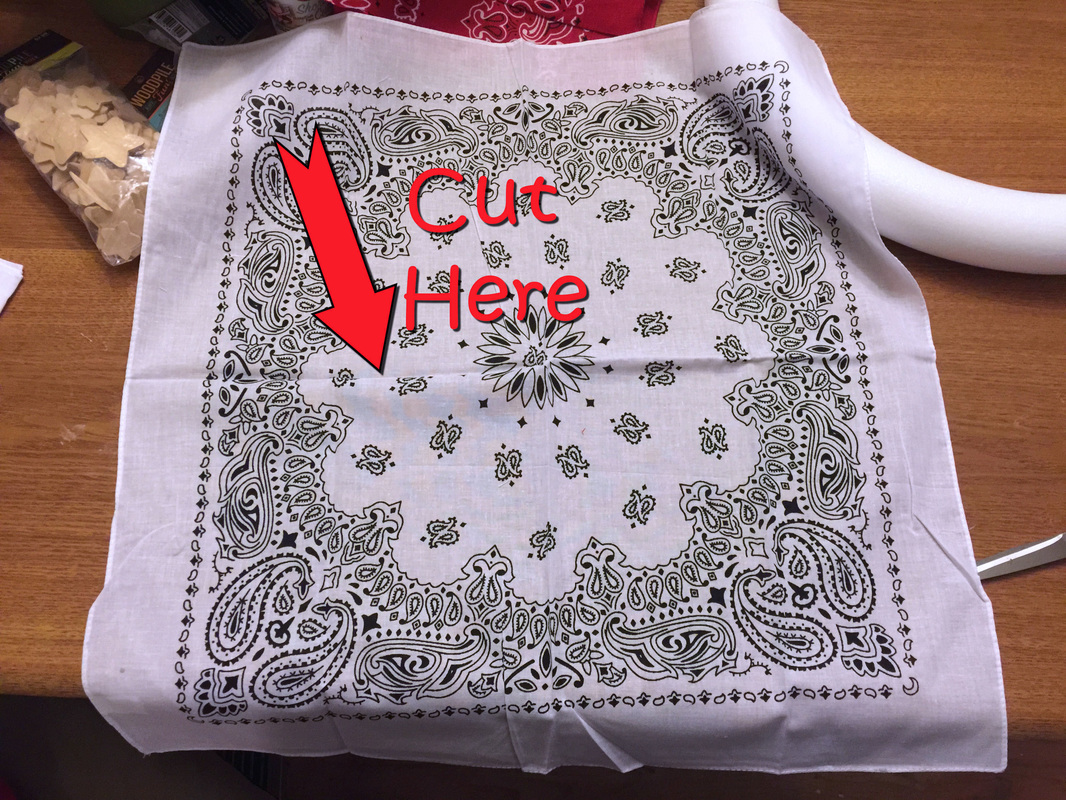 How to make it: 1. First, we are going to cut the bandanas in half. It is easier to do this before you iron them, as the fold line will act as a guide to help you cut down the middle. Cut all of the bandanas in half like this. 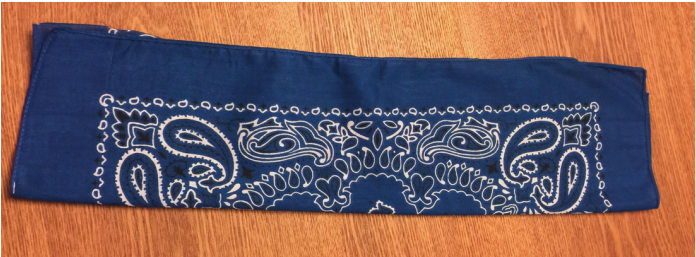 2. Iron the bandana pieces so they are nice and smooth. Then, fold each piece in half length-wise. 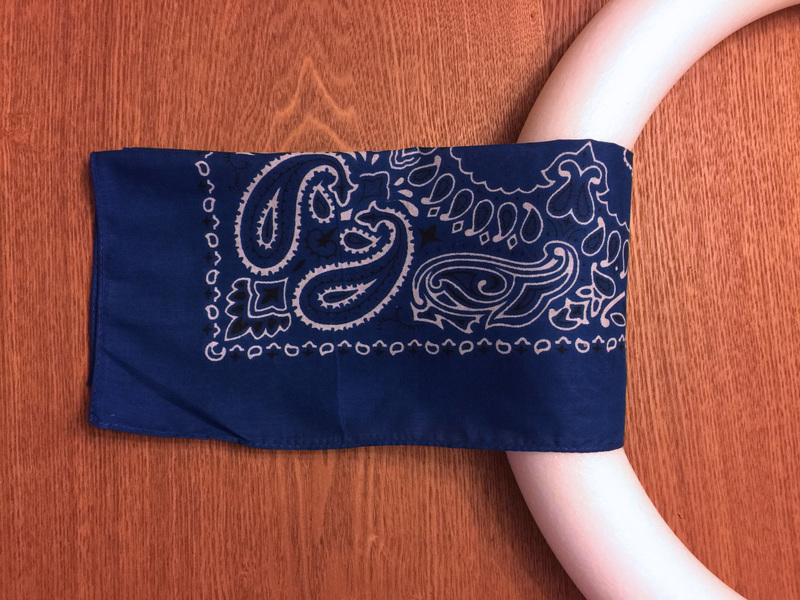 3. Next, thread a bandana through the wreath form, so the form is in the center of the bandana, and the ends are even. 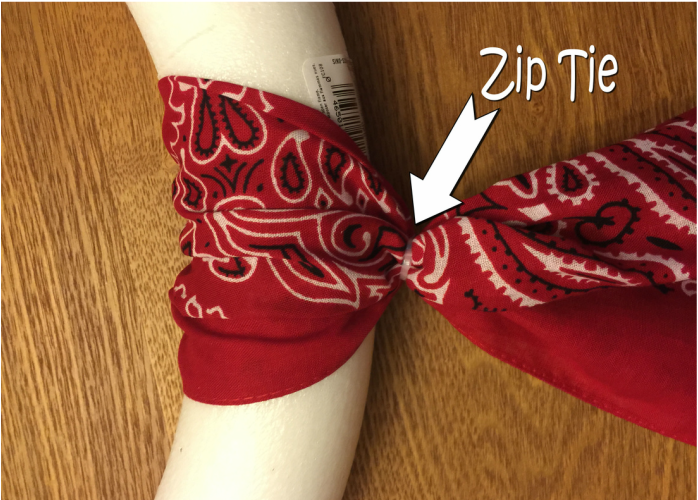 4. Using a zip tie, secure the bandana to the wreath form. Trim off any excess plastic, making sure to keep all of your zip ties facing the same way. The little nub of plastic that holds the zip tie closed should be on the back of your wreath.  5. Keep repeating this, alternating a red bandana with a white one, until all of them have been used. Then attach all of the blue ones. 6. Now, we need to paint the stars. Lay a handful of stars out onto some newspaper and paint them with the white paint. It is best to do this outside so you're not sucking down fumes. This paint will dry quickly. Give your stars 2 coats of paints, as they will absorb most of the first one. 7. While the stars are drying, mix 1/2 cup of Mod Podge and 1/2 cup of hot water in a bowl. We are going to use this to make the bandanas stiff so they don't flop over when you hang the wreath. 8. You can either use a brush or a spray bottle to apply the Mod Podge mixture. I used a spray bottle. 9. Lay your wreath face down, so the backside is facing up. Spray it all over with the Mod Podge mix, and let it dry. Pick the wreath up and see if the bandanas are stiff enough to stand up on their own. If not, lay it back down and give it another coat. Don't worry, the Mod Podge will be clear when it dries, so a few coats won't discolor your wreath. 10. Once the wreath is stiff, glue the stars to the blue section in any design you like. 11. Glue or tie a piece of wire, string, yarn or ribbon to the wreath and hang it up! 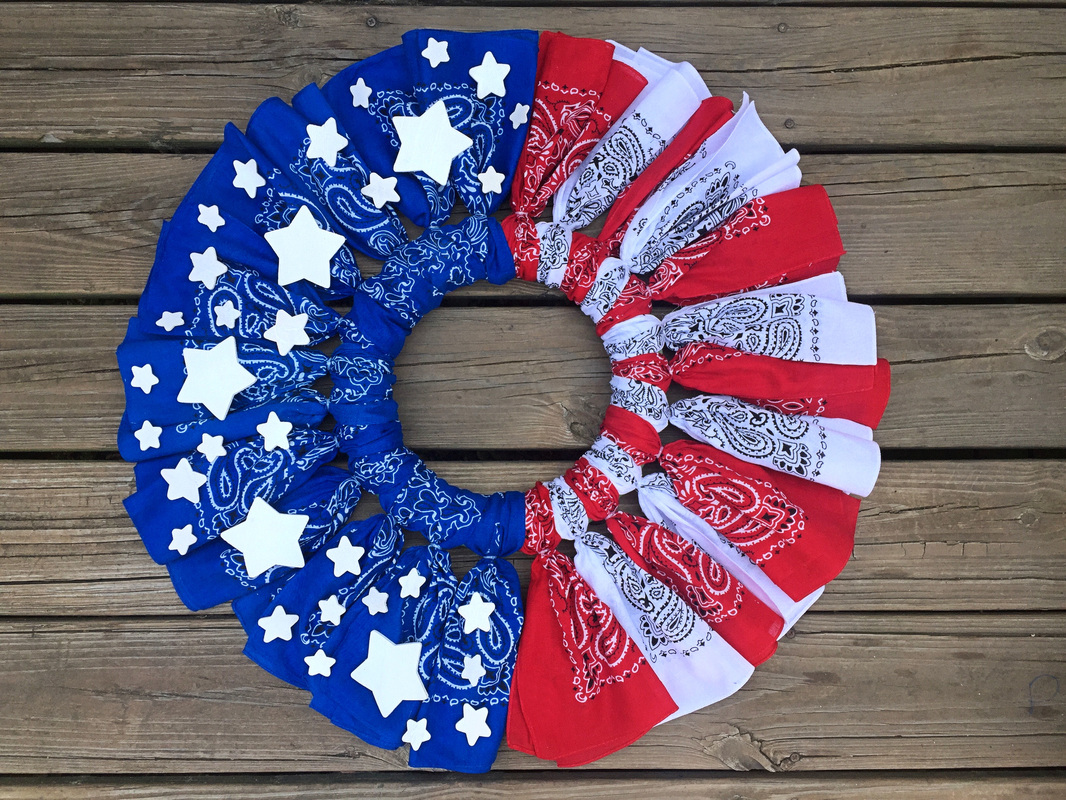  This is such a sweet and simple way to show a teacher just how much they are appreciated. It takes no more than 5 minutes to put together, and is so cost efficient you can make one for all of your child's teachers. I bought everything for this gift from my local Dollar Tree, which is a huge money saver if you want to give out a handful of these. Simply stuff an oven mitt with a bagged muffin, brownie or cookie mix, add in a spoon or spatula, tie it up with a ribbon and attach a gift tag. I wanted to make this project so fast and easy for you, I even took the time to make a few gift tags in various colors and offer them to my readers as a free download! Just click the link below and print them out onto card stock!
|
|||