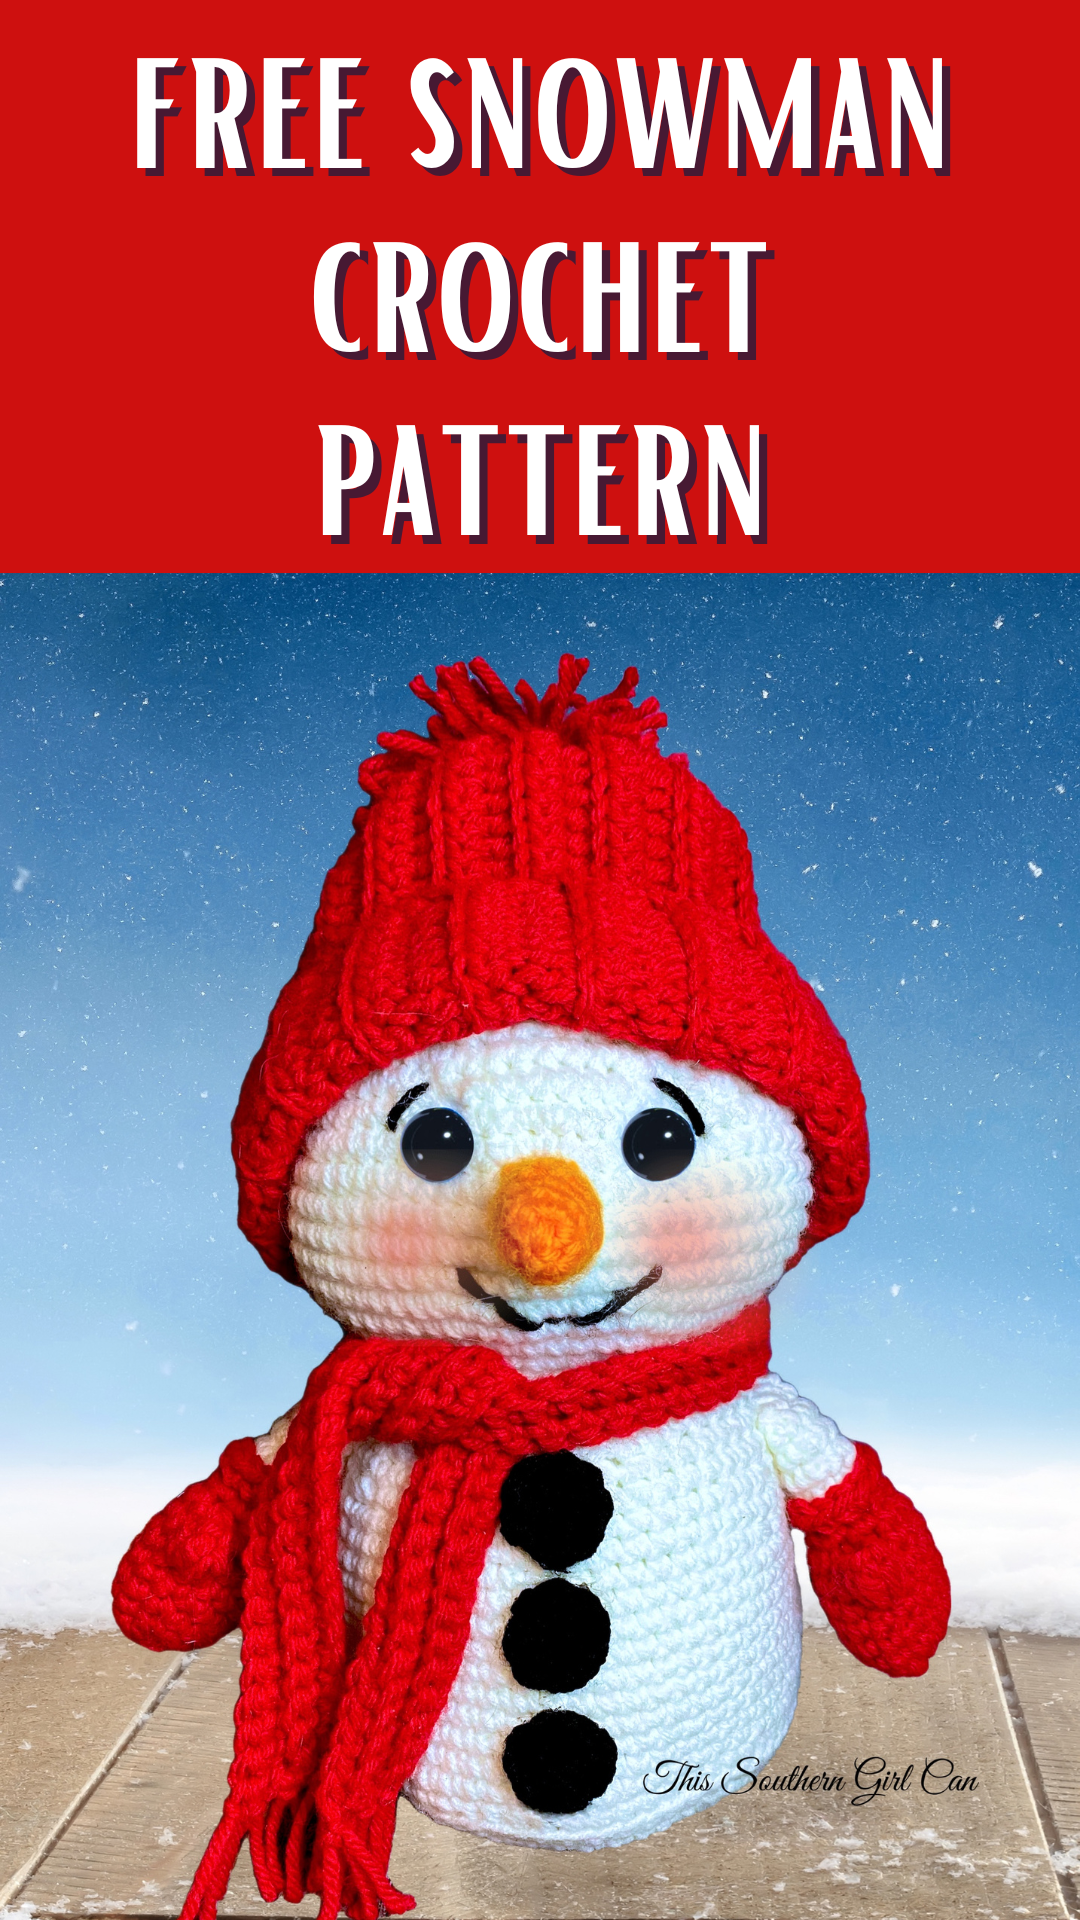
 Do you love decorating with snowmen for Christmas? I don't have a lot of them in my Christmas decor, but there are a few scattered here and there. I myself like more of a rustic-themed Christmas, but I do know there are tons of you who have lots of snowmen incorporated into your Christmas themes, so I thought I would create a fun free snowman crochet pattern designed to sit on a table, or any other flat surface, I chose to make my snowman's hat and accessories red, but use any color that would fit in with your Christmas decor. If you appreciate my free crochet patterns, please consider showing your support! CLICK HERE TO VISIT MY YOUTUBE CHANNEL. PLEASE SUBSCRIBE! Keep scrolling to make your own snowman using my free crochet pattern, or CLICK HERE TO PURCHASE AN AD-FREE PRINTABLE PATTERN. Supplies Needed: -4.5mm crochet hook -Yarn needle -Scissors -Red Heart Super Saver yarn in the colors white, black, orange, and red - polyester fiberfill stuffing -12mm black safety eyes, or whatever size and color you prefer -blush for the cheeks -cardboard -small bag of river rocks (can be found at craft stores) Abbreviations Used (American Terms): Sc= single crochet Ch= chain SlSt= slip stitch Dec: decrease Hdc= half double crochet MC= magic circle BLO= back loop only Inc= increase Pc= popcorn (make 5 hdcs in the same stitch. Remove hook, and place it in the 1st hdc. Grab the open loop where you removed your hook, and pull through.) Notes Measures 11” tall I always prefer to start projects worked in the round with a magic circle. If you do not prefer this method, simply chain 2, and start working in the 2nd chain from the hook. All photos and text are copyright Amber Dawn Riley, 2022. All rights reserved. Do not distribute this pattern in part or in whole without my explicit written consent. (You cannot make a video tutorial) Yes, you may sell anything you make using this pattern, as long as it is not commercially produced. You may not rewrite this pattern and claim it as your own. Worked in the round. Do not join at the end of each round. Body White 1: 6sc in a MC (6) 2: inc in each stitch around (12) 3: sc, inc. Repeat around (18) 4: scx2, inc. Repeat around. (24) 5: scx3, inc. Repeat around. (30) 6: scx4, inc. Repeat around (36) 7: scx5, inc. Repeat around. (42) 8: scx6, inc. Repeat around. (48) 9: scx7, inc. Repeat around. (54) 10: scx8, inc. Repeat around (60) Trace the piece you just made onto cardboard, and cut it out. Set this to the side. 11: BLO sc around (60) 12-20: sc around (60) 21: scx8, dec. Repeat around (54) 22: sc around (54) 23: scx7, dec. Repeat around. (48) 24: sc around (48) 25: scx6, dec. Repeat around (42) 26: sc around (42) 27: scx5, dec. Repeat around (36) Place the piece of cardboard in the bottom of the body. 28: scx4, dec. Repeat around (30) 29: scx3, dec. Repeat around (24) Place a handful of river rocks in the bottom of the body, and start stuffing firmly as we continue with the rest of the snowman. 30: Inc in each stitch around. (48) 31: scx5, inc. Repeat around (56) 32: scx6, inc. Repeat around (64) 33: scx7, inc. Repeat around (72) 34-39: sc around (72) Insert safety eyes between rows 37&38, with 7 stitches between. 40: scx7, dec. Repeat around (64) 41: scx6, dec. Repeat around (56) 42: scx5, dec. Repeat around (48) 43: scx4, dec. Repeat around (40) 44: scx3, dec. Repeat around (32) 45: scx2, dec. Repeat around (24) 46: sc, dec. Repeat around (16) 47: dec around (8) 48: dec around (4) Finish off, leaving a long tail for sewing. Use a yarn needle to close up the top. Arms Red 1: 6sc in a MC (6) 2: inc in each stitch around (12) 3: scx3, inc. Repeat around. (15) 4-6: sc around (15) 7: pc using hdc. Scx14. (15) 8: Dec, scx3. Repeat around (12) 9: Scx2, dec. Repeat around. (9) Start stuffing the mitten, and continue stuffing the arm as you go. White 10: BLO scx9. (9) 11-14: sc around (9) 15: Finish off, leaving a long tail for sewing Holding the arm with the mitten end facing you, join red yarn with a slst to any of the front loops from row 10. Ch1, and sc into the same stitch. Inc in the next stitch. Sc, inc around. (13)Finish off. Scarf Red Ch82 1: sc in 2nd ch from the hook, and across. (80) 2-4: ch1 and turn. BLO sc across. (80) Finish off. Cut short pieces of yarn, and tie across the short ends of the scarf to resemble fringe. Hat Red Ch30 1: starting in the 2nd ch from the hook, hdc across. (28) 2-37: ch1 and turn. BLO hdc in each stitch across. (28) Joining: Ch1 and turn. Holding both short edges of your work together, slip stitch all the way across, making sure to work through both layers. This will create a tube. Finish off, leaving a long tail for sewing. Using a yarn needle, weave your yarn in and out of the stitches all the way around the end of the tube, and pull tight. Fasten off. Flip your work right side out, and turn up the edge to resemble a brim on a hat. Optional: Sew a pompom to the top. Nose Orange 1: 3sc in a MC (3) 2: inc in each stitch around (6) 3: scx6 (6) 4: sc, inc. Repeat around (9) 5-7: scx9 (9) Finish off, leaving a long tail for sewing. Buttons Make 3 Black 1: 8hdc in a MC. (8) Finish off Assembly
Stitch the nose to the face. Using black yarn, stitch on a mouth and eyebrows. Sew on the arms between rows 25 and 26. Sew the buttons to the front of the body. Tie scarf around the neck. Add blush to cheeks. Enjoy!
1 Comment
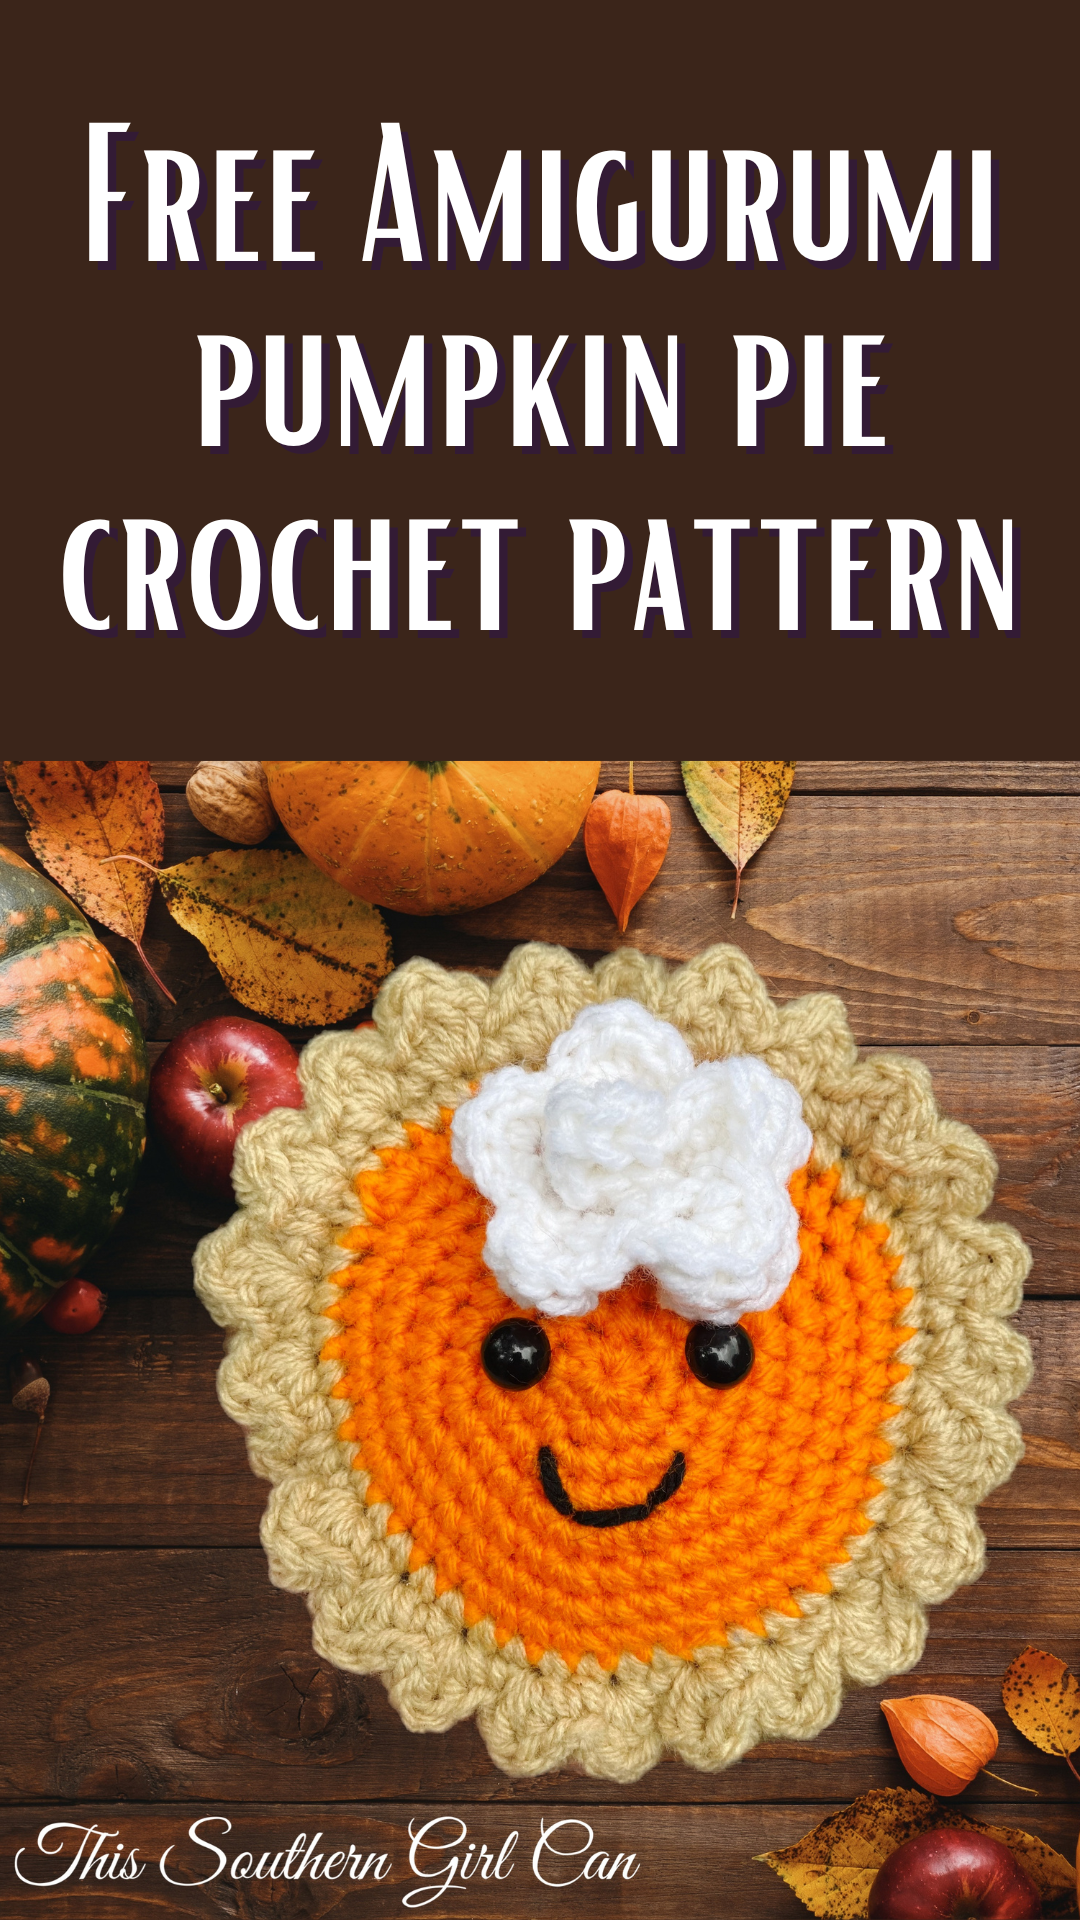 Even though it's still August, I can't help but think about all of the delicious pumpkin-flavored Fall goodies that are right around the corner: lattes, muffins, cookies, and pie! My little boy loves pumpkin pie, so he was pretty disappointed when he heard me say I was making a pumpkin pie, only for it to be crocheted. Don't worry. I'm making him a pie tomorrow. This adorable little crocheted pumpkin pie measures roughly 5" across, making it the perfect size to display on a Fall-themed tiered tray! For the yarn, I used Red Heart Supersaver, but any brand of worsted weight yarn will be fine. IF YOU LIKE MY FREE PATTERNS, PLEASE CLICK HERE TO SHOW YOUR SUPPORT BY SUBSCRIBING TO MY YOUTUBE CHANNEL! Supplies: -4.5mm crochet hook -Worsted weight yarn (I used Red Heart Supersaver in the colors buff, pumpkin, white, and black. -scissors -yarn needle -polyester fiberfill for stuffing -a scrap of cardboard -12mm safety eyes Pie Bottom Buff 1: 6sc in MC. (6) 2: inc around. (12) 3: sc, inc. Repeat around. (18) 4: scx2, inc. Repeat around. (24) 5: scx3, inc. Repeat around. (30) 6: scx4, inc. Repeat around. (36) 7: scx5, inc. Repeat around. (42) 8: scx6, inc. Repeat around. (48) Trace this piece onto a piece of sturdy cardboard. Put the cardboard aside for now. 9: BLO sc around. (48) 10-12: sc around. (48) Finish off. Filling: Pumpkin 1: 6sc in MC. (6) 2: inc around. (12) 3: sc, inc. Repeat around. (18) 4: scx2, inc. Repeat around. (24) 5: scx3, inc. Repeat around. (30) 6: scx4, inc. Repeat around. (36) 7: scx5, inc. Repeat around. (42) 8: scx6, inc. Repeat around. (48) Attach safety eyes, and stitch a mouth onto the filling. We are now going to be working through the stitches of the filling, and the stitches of the brown bottom to attach them. Buff 9: Join both pieces with a single crochet through both the orange piece, and the brown piece. Single crochet in each stitch halfway around the piece. Insert the cardboard piece, and press it flat into the bottom. Begin stuffing, and continue working single crochets around, stuffing as you go. Join with a slst to the first sc. 10: Slst into the next stitch, and ch1. (Sc, Hdc, dc, hdc, sc into the same stitch. Sc into the next stitch.) repeat around. Slst to the first stitch, and finish off. Whipped Cream White Ch19 1: sc in 2nd ch from hook, and across. Ch1 and turn. (18) 1: Sc, hdc, dc, hdc, sc all in the same stitch. Slst in the next stitch. (Sc, hdc, dc, hdc, sc in the next stitch. Slst in the next stitch) Repeat to the end of the row, and finish off, leaving a long tail for sewing. Curl the piece into a spiral, resembling whipped cream, and stitch to the pie. Enjoy! 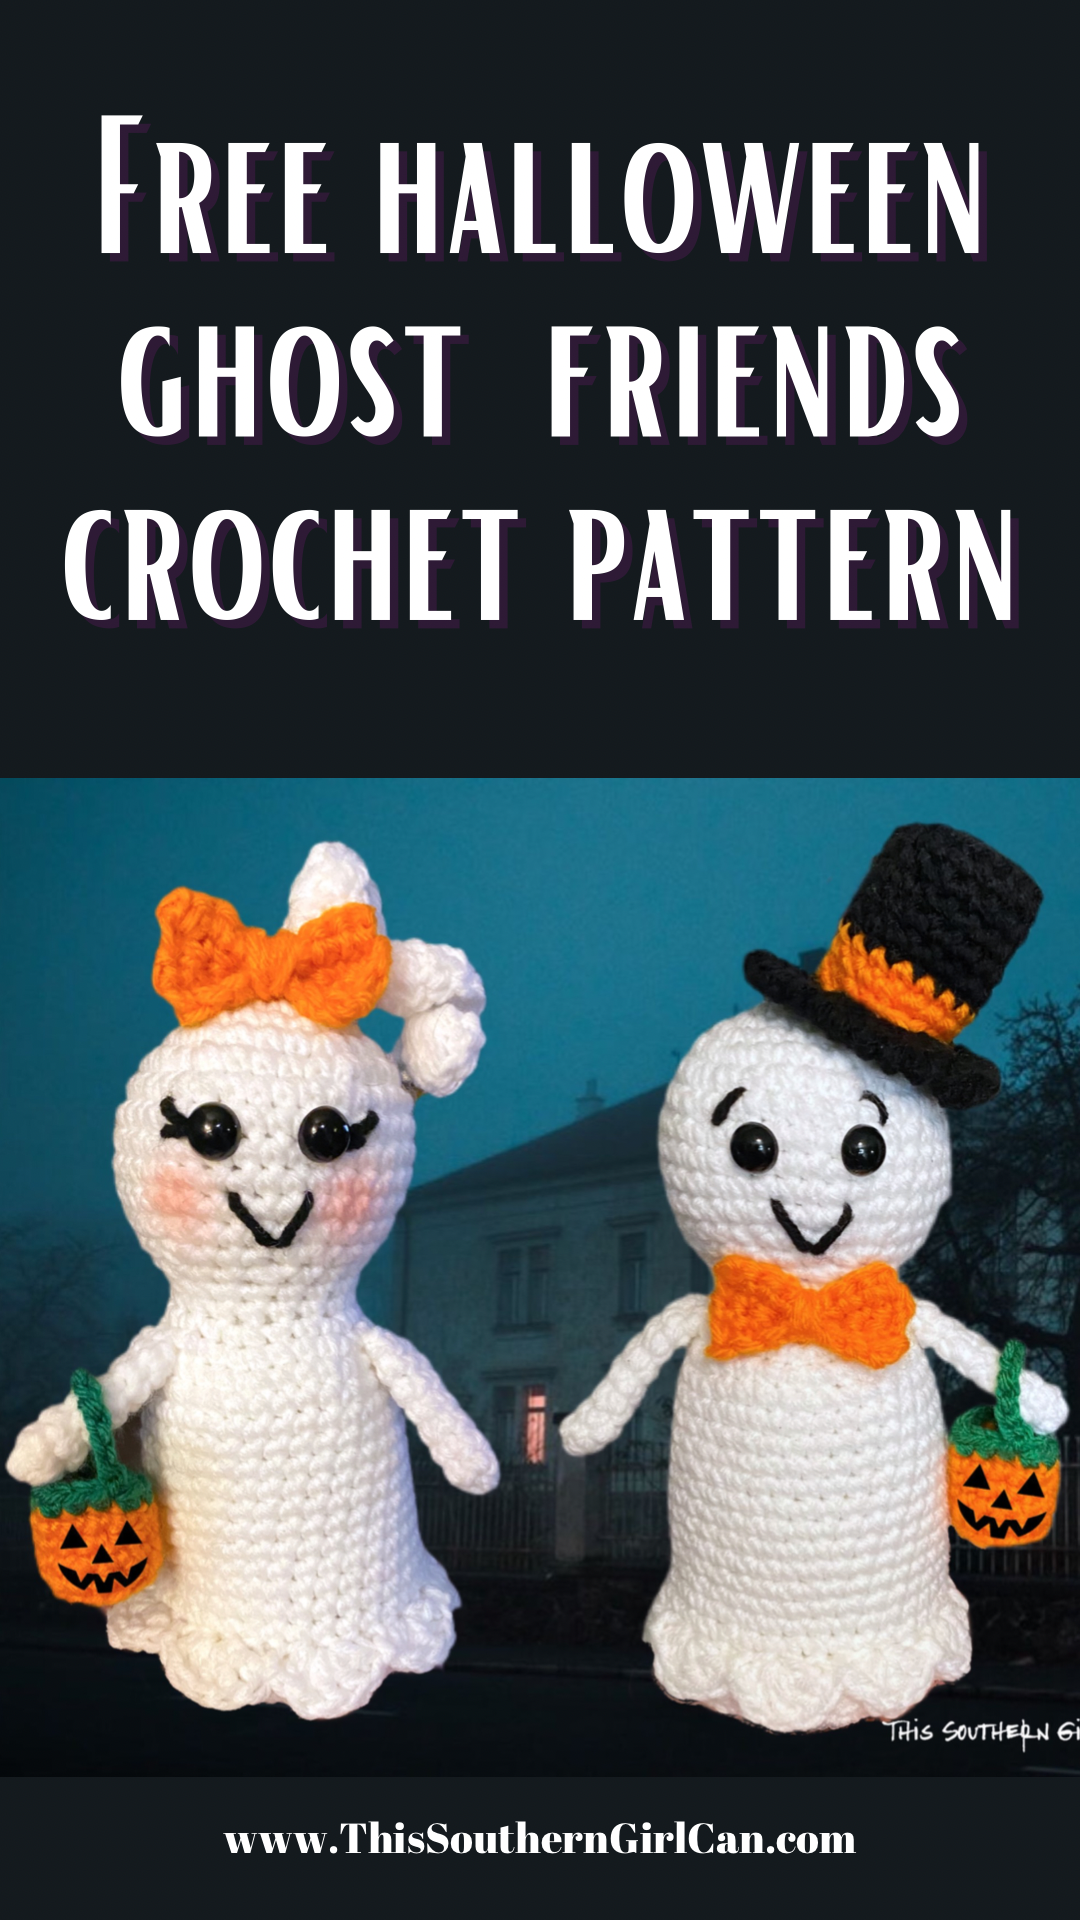 I live for Halloween, so I thoroughly enjoyed creating this adorable free ghost crochet pattern for my followers. I remember watching Casper the Friendly Ghost cartoons when I was small, and thought I would make a set of friendly ghosts that can be given to children as a toy, or set on a table for a cute Halloween decoration. If these are going to be used as toys, I wouldn't worry too much about putting cardboard in the bottom. I only used that as a way to make sure they could stand up on a flat surface. CLICK HERE TO PLEASE SUBSCRIBE TO MY YOUTUBE CHANNEL FOR HUNDREDS OF CRAFTING VIDEOS! CLICK HERE TO PURCHASE A PRINTABLE, AD-FREE PDF OF THIS PATTERN IN MY RAVELRY SHOP! I used Red Heart Supersaver yarn for my crochet ghosts, but any sturdy, worsted weight yarn should do. Please do not redistribute this pattern in any form, or rewrite it and claim it as your own. You may sell items you make from this pattern, as long as it is not on a commercially produced basis. Supplies Used 4.5mm hook Red heart Supersaver yarn in white, black, green, and orange 12mm safety eyes polyester fiberfill cardboard yarn needle scissors Terminology Used (US Terms) MC= magic circle Sc= single crochet Ch= chain Slst= slip stitch BLO= back loop only Inc= increase Dec= decrease Measures 8.5" tall Body White Round 1: scx6 in a MC (6) Round 2: inc around (12) Round 3: sc, inc. repeat around (18) Round 4: scx2, inc. repeat around (24) Round 5: scx3, inc. repeat around (30) Round 6: scx4, inc. repeat around (36) Rounds 7-11: sc around (36) Round 12: scx4, dec. Repeat around (30) Round 13: scx3, dec. Repeat around (24) Round 14: scx2, dec. Repeat around (18) Rounds 15&16: sc around (18) Insert safety eyes between rows 8&9, with 4 stitches in between. Begin stuffing the head. Continue stuffing the body as we go. Round 17: scx2, inc. Repeat around (24) Round 18: scx3, inc. repeat around (30) Round 19: scx4, inc. repeat around (36) Rounds 20-32: sc around (36) Round 33: BLO sc around (36) Round 34: sc around (36) Finish off. Ruffle White Join yarn with a slst in any front loop stitch from round 33. Ch3, dcx4 in the same stitch. (Skip a stitch, slst in the next stitch. Skip a stitch, dcx5 in the next stitch.) Repeat around. Slst into the next stitch, skip a stitch, slst into the next stitch, and finish off. Ghost bottom Round 1: scx6 in a MC (6) Round 2: inc around (12) Round 3: sc, inc. repeat around (18) Round 4: scx2, inc. repeat around (24) Round 5: scx3, inc. repeat around (30) Round 6: scx4, inc. repeat around (36) Finish off, leaving a long tail for sewing. Trace the round piece you just made onto a piece of cardboard, and cut it out slightly smaller than the crocheted piece. With a yarn needle, sew the bottom onto the ghost. When you are halfway around, put in the piece of cardboard and finish stitching. Arms White Make 2 Do not stuff Round 1: scx6 in a MC (6) Rounds 2-8: sc around (6) Finish off, leaving a long tail for sewing. Sew arms to body Ponytail White Ch12 Dc in 3rd ch from hook. Dcx2 in the same stitch. Dcx3 in each stitch across. Finish off, leaving a long tail for sewing. Sew to the top of the head. Bow Orange Row 1: Ch8. Sc in 2nd Ch from hook and across Rows 2-4: Ch1 and turn. Sc across. Finish off. Cut a piece of yarn, and wrap it around the center of the rectangle you made to form a bow shape. Sew the bow to the ghost. Trick or Treat Bucket Orange Round 1: scx6 in a MC (6) Round 2: inc around (12) Round 3: BLO sc around (12) Rounds 4-6: sc around (12) Green Round 7: sc around Ch12, join with a slst to the opposite side of the bucket. Finish off. Hat Black Round 1: scx6 in a MC (6) Round 2: inc around (12) Round 3: sc, inc. repeat around (18) Trace this piece onto cardboard and cut it out. Set this aside to be used later. Round 4: BLO sc around (18) Rounds 5-8: sc around (18) Orange Rounds 9&10: sc around (18) Finish off, leaving a long tail for sewing Place the round piece of cardboard into the hat, and press into the top. Stuff the hat. Hat brim Black Round 1: scx6 in a MC (6) Round 2: inc around (12) Round 3: sc, inc. repeat around (18) Round 4: scx2, inc. repeat around (24) Round 5: scx3, inc. repeat around (30) (Optional) crab stitch around Finish off Stitch the top of the hat to the brim. Stitch the hat to the head. Using black yarn, stitch on eyebrows, eyelashes, and smiles. You may also use a little bit of blush on the cheeks if you like. Optional: Cut out a jack-o’-lantern face from black felt, and attach to the bucket. You can also use a black marker to draw the face on, or cut one out from vinyl, using a vinyl-cutting machine. |


