This Southern Girl Can
|
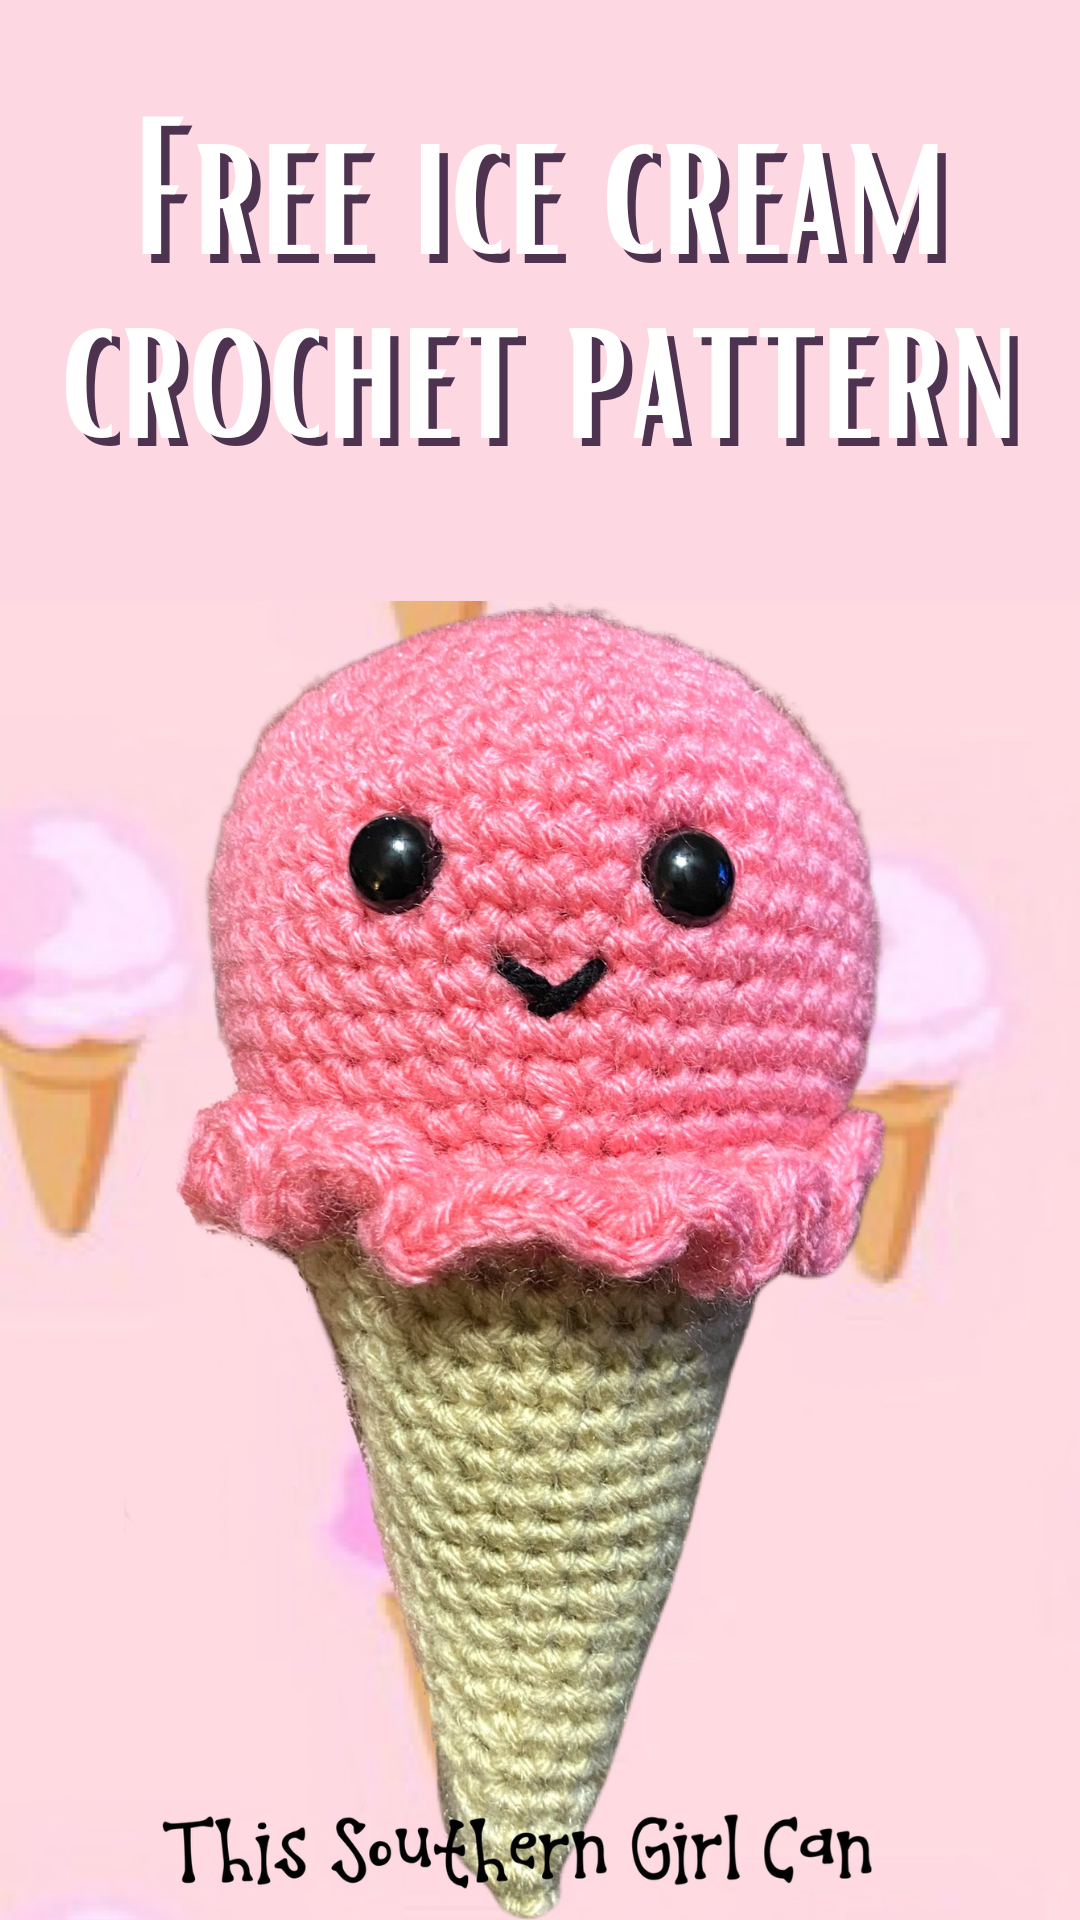
With temperatures rising to almost 100 degrees in my state, all I can think about is ice cream! I wanted to crochet something summer related this week, and what could be more fun than a crocheted version of a delicious ice cream cone? This cute ice cream crochet pattern can be made in any color you like, with or without eyes and a smile. I chose to use solid black safety eyes, but you can use any color you like. Keep scrolling for the pattern. CLICK HERE TO CHECK OUT MY CROCHET TUTORIALS ON YOUTUBE. CLICK HERE TO PURCHASE MY STORYBOOK/CROCHET PATTERN BOOK. Free Ice Cream Crochet Pattern Insert safety eyes between rows 11 and 12, with six stitches in between. Round 1: 6sc in a MC. (6) Round 2: incx6 (12) Round 3: sc, inc. Repeat around. (18) Round 4: scx2, inc. Repeat around. (24) Round 5: scx3, inc. Repeat around. (30) Round 6: scx4, inc. Repeat around. (36) Round 7: scx5, inc. Repeat around. (42) Round 8: scx6, inc. Repeat around. (48) Rounds 9-15: sc around. (48) Round 16: scx6, dec. Repeat around. (42) Round 17: scx5, dec. Repeat around. (36) Round 18: scx4, dec. Repeat around. (30) Round 19: FLO hdcx4 into the first stitch. hdcx3 into the next stitch. Repeat around, placing 4 hdc into the next stitch, 3 hdc into the next, and so on. This round will ripple quite a bit. That is the look we are going for. Round 20: BLO scx30. (30) Change color to tan/beige. Rounds 21-23: sc around. (30) Round 24: scx8, dec. Repeat around (27) Round 25: sc around. (27) Begin stuffing the ice cream, and continue stuffing as you go. Round 26: scx7, dec. Repeat around (24) Round 27: sc around. (24) Round 28: scx6, dec. Repeat around. (21) Round 29: sc around (21) Round 30: scx5, dec. Repeat around. (18) Round 31: sc around (18) Round 32: scx4, dec. Repeat around. (15) Round 33: sc around (15) Round 34: scx3, dec. Repeat around (12) Round 35: sc around (12) Round 36: scx2, dec. Repeat around (9) Round 37: sc around (9) Round 38: sc, dec. Repeat around (6) Round 39: sc around (6) Finish off, leaving a long thread for sewing. Sew the end of the ice cream cone shut. With a small amount of black yarn, stitch on a smile. Enjoy!
1 Comment
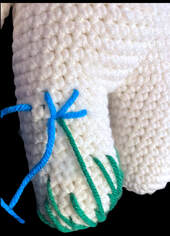
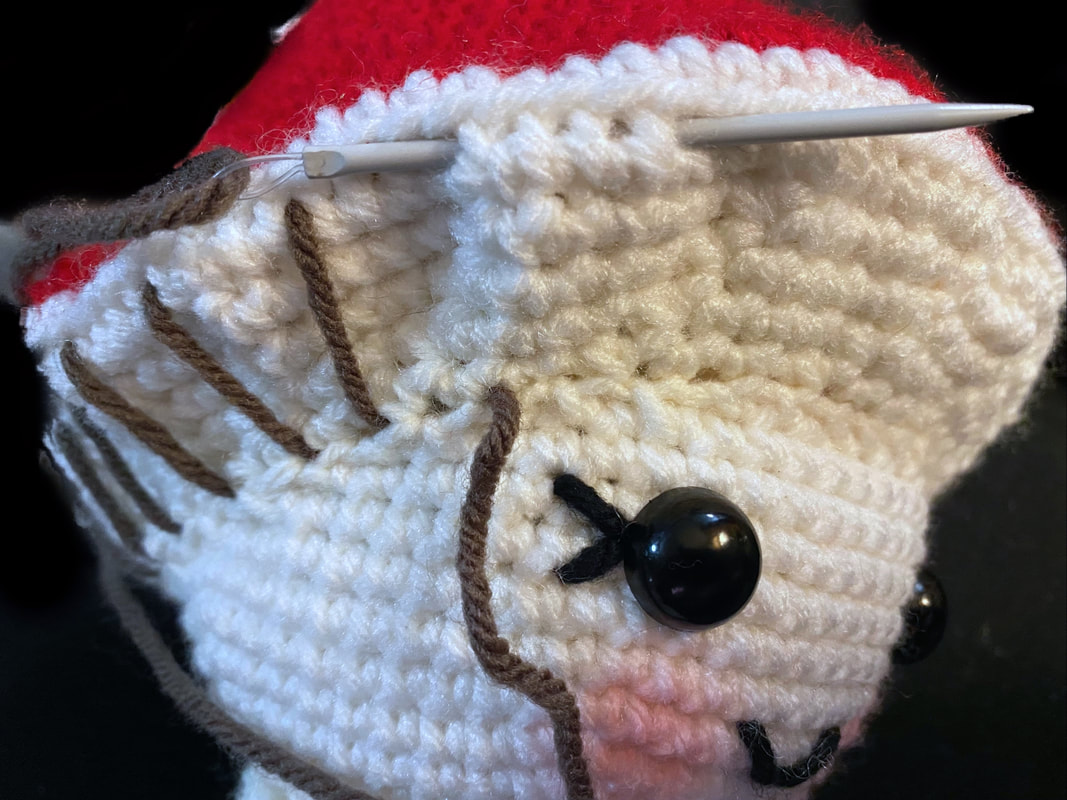
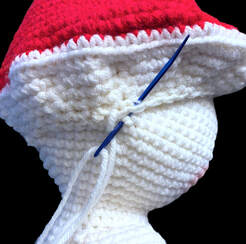
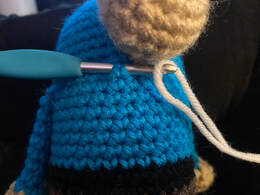
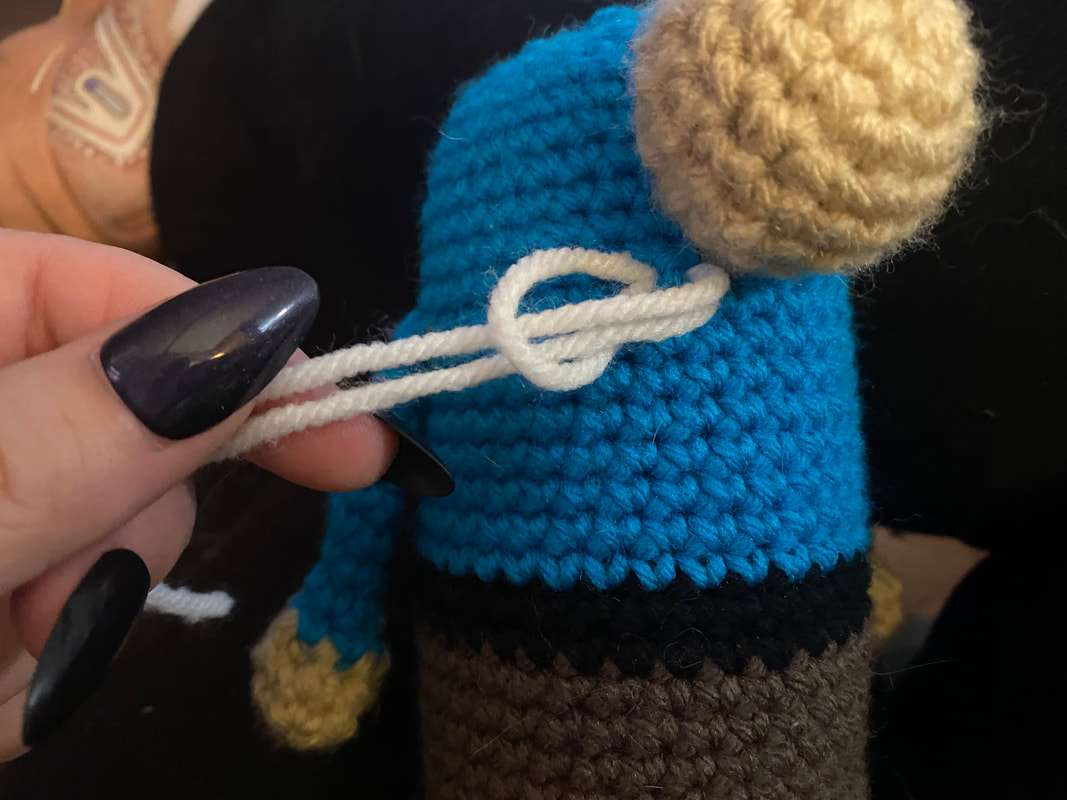
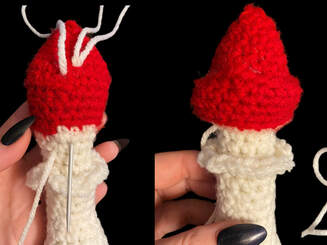
Mushrooms and woodland themed decorations are all the rage right now! Now, you can make your own adorable woodland friend with my free mushroom doll crochet pattern. This mushroom doll measures 15" tall. I spruced mine up a little bit with some embroidery on the legs, but it's totally up to you as to whether or not you want to do that. I used all Red Heart SuperSaver yarn, but any sturdy worsted weight yarn will work just fine. Before you get started, please check me out on YouTube! CLICK HERE! Supplies Needed: -4.5mm crochet hook -Yarn needle -Scissors -Red Heart Super Saver yarn in the colors red, white, black, brown, green, pink, blue, and yellow. - polyester fiberfill stuffing -16mm black safety eyes, or whatever size and color you prefer -blush for the cheeks Abbreviations Used (American Terms): Sc= single crochet Ch= chain SlSt= slip stitch Dec: decrease MC= magic circle Inc= increase (work 2 stitches into the same stitch) Notes Measures 15” tall I always prefer to start projects worked in the round with a magic circle. If you do not prefer this method, simply chain 2, and start working in the 2nd chain from the hook. All photos and text are copyright Amber Dawn Riley, 2022. All rights reserved. Do not distribute this pattern in part or in whole without my explicit written consent. Yes, you may sell anything you make using this pattern, as long as it is not commercially produced. You may not rewrite this pattern and claim it as your own. PURCHASE AN AD FREE PRINTABLE PDF OF THIS PATTERN HERE IN MY RAVELRY SHOP: CLICK HERE Worked in the round. Do not join at the end of each round. Stuff the piece firmly as you go. Legs, Body, and Head, worked as one piece Color: White Round 1: MC, ch1, scx6 (6) Round 2: Inc in each stitch around. (12) Round 3: Sc, inc. Repeat around. (18) Round 4: Scx8, inc. Repeat. (20) Rounds 5 & 6: Sc around. (20) Rounds 7 & 8: Sc around (20) Rounds 9-14: Sc around (20) Finish off. Make leg number 2, but DO NOT finish it off. Join the 2nd leg to the 1st leg with a slst. You will make the joining sl st in the stitch after the last stitch made on the 1st leg. Round 15: Scx39, inc. You have now connected the 2 legs. (41) Round 16: Inc, scx18, inc, sc, inc, scx19. (44) Rounds 17-19: Sc around. (44) Round 20: Scx11, dec, scx20, dec, scx9. (42) Rounds 21 & 22: Sc around. (42) Round 23: Scx12, dec, scx18, dec, scx8. (40) Round 24: Scx10, dec, scx18, dec, scx8. (38) Rounds 25 & 26: Sc around. (38) Round 27: Scx11, dec, scx16, dec, scx7. (36) Round 28: Sc around. (36) Round 29: Scx7, dec. Repeat around. (32) Round 30: Scx14, dec. Repeat. (30) Rounds 31 & 32: Sc around. (30) Round 33: Scx3, dec. Repeat all the way around. (24) Rounds 34-36: Sc around. (24) Round 37: Scx3, inc. Repeat around. (30) Round 38: Scx4, inc. Repeat around. (36) Round 39: Scx5, inc. Repeat around. (42) Round 40: Scx6, inc. Repeat around. (48) Round 41: Scx7, inc. Repeat around. (54) Round 42: Scx8, inc. Repeat around. (60) Rounds 43-53: Sc around. (60) Insert safety eyes between rounds 46 & 47, with roughly 8 stitches between them. Round 54: Scx8, dec. Repeat around. (54) Round 55: Scx7, dec. Repeat around. (48) Round 56: Scx6, dec. Repeat around. (42) Round 57: Scx5, dec. Repeat around. (36) Round 58: Scx4, dec. Repeat around. (30) Round 59: Scx3, dec. Repeat around. (24) Round 60: Scx2, dec. Repeat around. (18) Round 61: Sc, dec. Repeat around. (12) Round 62: Decx4. Fasten off, leaving a 12 inch tail. Using a yarn needle, weave the yarn in and out of the remaining stitches, and pull tight to close. Fasten off. Work away the end. Arms(Make 2) Color: White Round 1: MC, ch1, scx6. (6) Round 2: Inc in each stitch around. (12) Round 3: Sc, inc. Repeat around. (18) Round 4: Sc around. (18) Round 5: Sc around. (18) Round 6: Sc around. (18) Rounds7-9: Sc around. (18) Round 10: Scx7, dec. Repeat. (16) Round 11: Sc around. (16) Round 12: Scx6, dec. Repeat. (14) Round 13: Sc around. (14) Round 14: Scx5, dec. (12) Round 15: Sc around. (12) Finish off, leaving a long tail for sewing them to the body. Mushroom Cap Hat Round 1: scx6 in a MC (6) Round 2: Incx6 (12) Round 3: sc, inc. Repeat around (18) Round 4: scx2, inc. Repeat around (24) Round 5: sc around (24) Round 6: scx3, inc. Repeat around (30) Round 7: sc around (30) Round 8: scx4, inc. Repeat around (36) Round 9: sc around (36) Round 10: scx5, inc. Repeat around (42) Round 11: sc around (42) Round 12: scx6, inc. Repeat around (48) Round 13: sc around (48) Round 14: scx7, inc. Repeat around (54) Round 15: sc around (54) Round 16: scx8, inc. Repeat around (60) Round 17: sc around (60) Round 18: scx9, inc. Repeat around (66) Round 19: sc around (66) Round 20: scx10, inc. Repeat around (72) Round 21: sc around (72) Round 22: scx11, inc. Repeat around (78) Round 23: sc around (78) Round 24: scx4, inc. Repeat around. scx3 (93) Round 25: scx5, inc. Repeat around. Scx3 (108) Change to white Round 26: sc around (108) Round 28: BLO sc around (108) Round 29: scx5, dec. Repeat around. scx3 (93) Round 30: scx4, dec. Repeat around. scx3 (78) Round 31: scx3, dec. Repeat around. scx3 (63) Round 32: scx2, dec. Repeat around. Sc, dec (47) Large spot Round 1: 6sc in a Mc (6) Round 2: inc around (12) Round 3: sc, inc. repeat around (18) Finish off. Medium spot Round 1: 6sc in a Mc (6) Round 2: inc around (12) Finish off Small spot Round 1: 6sc in a Mc (6) Finish off Make as many spots as you like, and sew them onto the hat. Stuff the mushroom hat lightly, and sew onto head. Refer to photos. Neck ruffle Ch27 Row 1: dcx3 in the 3rd ch from the hook, and in every stitch across. Finish off, and leave a long tail for sewing. Your piece should look like a long curl. Holding both ends of the curl, try to straighten it as much as possible. This will cause the stitches to ruffle. Wrap the ruffle around the neck of your doll, and using a yarn needle, stitch the two ends together. Face Using black yarn, stitch on a mouth and eyelashes. Optional: Using green yarn, and the color of flowers of your choice, stitch on the flower design as shown in the photo. I began by running my yarn into the center of the bottom of the foot, come up where I wanted the top of the grass to be, then back down, and into the bottom of the foot again. Repeat for as many blades of grass as you like. The flowers are stitched on the same way, but start at the top of the blade of grass where you want the flower to be. For the yellow center, you can use yellow yarn to make a French knot. Or, tie a square knot three or four times, thread the loose ends of your yarn into your needle, and thread it directly through the center of the flower. Brown Cap Stripes With a long length of brown yarn, stitch on cap stripes. I started at the back of the hat, where it is stitched to the body. Simply run your yarn back and forth between the bottom row of the hat, and the front loop stitches. Who doesn't love gnomes? Gnomes have been growing in popularity as decor pieces over the years, and there are so many different ways to style them. I've seen bee gnomes, farmer gnomes, santa gnomes..... way too many to list. These are all cute, but I think my favorite will always be the classic gnome wearing his red hat, blue jacket, and brown pants. I've designed this gnome to be easy for little hands to grasp and play with, or just to have sitting around on a shelf. Both the gnome and mushrooms are weighted on the bottom to provide stability. This helps them to sit upright without toppling over. I used river rocks from Dollar Tree, but you can find bags of stones at any craft store. IF YOU WOULD LIKE AN AD-FREE PRINTABLE VERSION OF THIS PATTERN, PLEASE HEAD OVER TO MY RAVELRY SHOP BY CLICKING THIS LINK: https://www.ravelry.com/patterns/library/gnome-and-toadstool-set Supplies Needed: -4.5mm crochet hook -Yarn needle -Scissors -Red Heart Super Saver yarn in red, blue, brown, black, flesh tone, and white - polyester fiberfill stuffing -cardboard -river rocks or something small and heavy Abbreviations Used (American Terms): Sc= single crochet Ch= chain SlSt= slip stitch Dec: decrease MC= magic circle Inc= increase (work 2 stitches into the same stitch) Notes I always prefer to start projects worked in the round with a magic circle. If you do not prefer this method, simply chain 2, and begin working into the 2nd ch from the hook. GNOME Black Round 1: 6sc in a MC (6) Round 2: incx6 (12) Round 3: sc,inc. Repeat around. (18) Round 4: scx2, inc. Repeat around. (24) Round 5: scx3, inc. Repeat around. (30) Round 6: scx4, inc. Repeat around (36) Trace the piece you just made onto some cardboard, and cut it out. Trim the cardboard piece down so it is just slightly smaller than the crocheted piece you just made. Round 7: BLO, sc around. (36) Rounds 8&9: sc around (36) Change color to brown. Rounds 10-17: sc around (36) Change color to black. Rounds 18&19: sc around (36) Put the piece of cardboard you cut out into the bottom of the gnome, and press it flat. Change color to blue. Rounds 21-35: sc around (36) Place a handful of stones or fish gravel in the body, and start stuffing. Round 36: scx4, dec. Repeat around. (30) Round 37: scx3, dec. Repeat around (24) Round 38: scx2, dec. Repeat around. (18) Round 39: sc, dec. Repeat around (12) Round 40: decx6 (6) Finish off. Leave a long tail for sewing. Sew the top of the body closed. HAT Red Round 1: scx6 in a MC (6) Round 2: sc around (6) Round 3: sc,inc. Repeat around (9) Round 4: sc around (9) Round 5: scx2, inc. Repeat around. (12) Round 6: sc around (12) Round 7: scx3, inc. Repeat around. (15) Round 8: sc around (15) Round 9: scx4, inc. Repeat around. (18) Round 10: sc around (18) Round 11: scx5, inc. Repeat around. (21) Round 12: sc around (21) Round 13: scx6, inc. Repeat around. (24) Round 14: sc around (24) Round 15: scx7, inc. Repeat around. (27) Round 16: sc around (27) Round 17: scx8, inc. Repeat around. (30) Round 18: sc around (30) Round 19: scx9, inc, Repeat around. (33) Round 20: sc around (33) Round 21: scx10, inc. Repeat around. (36) Round 22: sc around (36) Round 23: scx11, inc. Repeat around. (39) Round 24: sc around (39) Round 25: scx12, inc. Repeat around. (42) Rounds 25-28: sc around (42) Finish off, leaving a long tail for sewing. NOSE Flesh tone Round 1: scx6 in a MC (6) Round 2: incx6 (12) Round 3: sc, inc. Repeat around. (18) Rounds 6-8: sc around (18) Round 9: sc, dec. Repeat around. (12) Round 10: decx6 (6) Finish off, leaving a long tail for sewing. Stuff the nose. ARMS Very lightly stuff the hands, but not the arms. Flesh tone Round 1: scx6 in a MC (6) Round 2: incx6 (12) Round 3: decx6 (6) Change color to blue. Rounds 4-11: sc around (6) Finish off, leaving a long tail for sewing. Assembly: Step 1: Stitch the nose to the body, starting at row 28, and working up towards the top of the piece. 2: Stitch the arms to the body, between rows 28&29. 3: Cut pieces of white yarn, roughly 5 inches long. Fold in half, put your hook into a stitch close to the nose, grab the folded edge of the yarn, pull it through the stitch, and pull the ends of the yarn through the loop. (Refer to photos.) Use as many strands of yarn as you like to fill out the beard. You may leave the yarn as is, or separate the strands, and comb them to make them appear fuller. 4: Stitch the hat to the gnome. Toadstool Red Round 1: 6sc in a MC (6) Round 2: sc, inc. Repeat around. (9) Round 3: scx2, inc. Repeat around. (12) Round 4: scx3, inc. Repeat around. (15) Round 5: scx4, inc. Repeat around. (18) Round 6: scx5, inc. Repeat around. (21) Round 7: scx6, inc. Repeat around. (24) Round 8: BLO scx2, dec. Repeat around. (18) Rounds 9-11: sc around (18) Change color to white. Round 12: BLO scx2, dec. Repeat around. Scx2 (14) Begin stuffing the mushroom cap. Round 13: scx2, dec. Repeat around. Scx2. (11) Rounds 14-16: sc around (11) Round 17: BLO sc around (11) Rounds 18-22: sc around (11) Round 23: scx2, inc. Repeat around. Scx2 (14) Round 24: sc around (14) 25: sc, inc. Repeat around. (21) 26: sc around (21) Finish off. Stuff mushroom. Stalk ruffle Hold the mushroom so the cap is facing you. Join white with a slip stitch in one of the front loops from round 14. Round 1: ch1. 3 sc in each stitch around. Finish off. Mushroom base Round 1: 6sc in a MC. (6) Round 2: inc around (12) Round 3: sc, incx3, Sc, incx3, sc, incx3 (21) Finish off, leaving a long tail for sewing. Cut out a piece of cardboard slightly smaller than the mushroom base. Place a few river stones (you can get these in bags at the dollar tree) and the stalk of the mushroom. Using a yarn needle, begin to sew the base of the mushroom on to the bottom of the stalks. Slip in the piece of cardboard, and finish stitching on the base. Now we are going to shape the top of the mushroom. Using a long length of white yarn and a yarn needle, insert the needle two rows below where the red cap ends. Bring the needle up to a row above the BLO row on the cap, Skip a stitch, then bring the needle back down. Pull your yarn slightly tight, to give shape to the mushroom. Tie a knot. Work your way around the cap of the mushroom in this fashion to add spots, and give the mushroom shape. Do not finish off. (Refer to photos) Red Hold the mushroom so the cap is facing you. Join red with a slip stitch in one of the front loops from round 8. Ch 1. Rounds 1-4: sc around (24) Finish off. Using white yarn and yarn needle, continue stitching spots onto the remainder of the cap of the mushroom. Finish off. Notes: To make a taller or shorter mushroom, make more or fewer rows for the stalk (rows 18-22 in the written pattern) Enjoy! All photos and text are copyright Amber Dawn Riley, 2022. All rights reserved. Yes, you may sell anything you make using this pattern, as long as it is not commercially produced. You may not rewrite the pattern and claim it as your own. |
|
Home
About Contact |
This Southern Girl Can is a participant in the Amazon Services LLC Associates Program, an affiliate advertising program designed to provide a means for sites to earn advertising fees by advertising and linking to Amazon.com.
|
